Partek distributes prep kit files for a variety of single cell technologies, such as 10x Genomics, Drop-seq, and Fluidigm C1. Prep kit files are required to process single cell fastq files. If you need to add a new prep kit in order to process your fastq files, you will need to get detailed information on how the library is constructed for the specific assay.
The following instructions use the 10X Genomics Chromium single cell gene expression 3' v3 chemistry as an example to illustrate how a prep kit tag library file is made in Partek Flow. Figure 1 is a schematic diagram of the single cell 3' v3.1 gene expression assay:
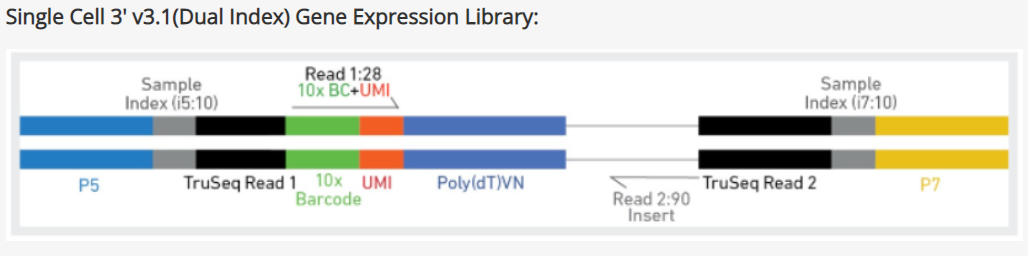
Figure 1. 10X Genomics single cell 3' v3.1 gene expression library schematic diagram
Click on the  button on this page, choose other/custom option from the drop-down list and specify a name e.g. Assay1 (Figure 2), choose the Build Prep kit option and click Create.
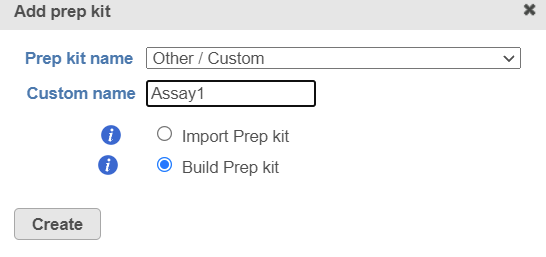
Figure 2. Add a new prep kit, name it Assay1
Select the Is paired end check button, and specify the information contained in each end:
Read 1: contains 10X barcodes and UMI, it is 28bp long. 10X Genomics has a barcode whitelist which contains all known barcode sequences during library preparation. You will need to make a .fasta file format of this information and click on the ![]() in the First mate segmentation (Figure 3) to add the barcode as the first segment in read 1.
in the First mate segmentation (Figure 3) to add the barcode as the first segment in read 1.
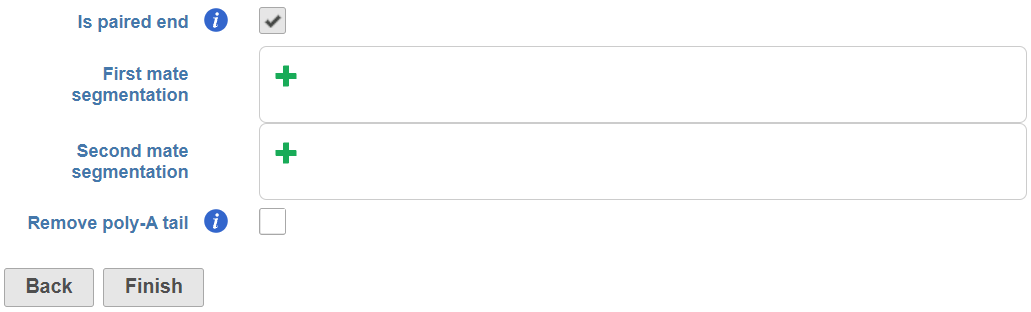
Figure 3. Click on the green + button to add the content
Specify the new segment, choose Barcode from the Type drop-down list, specify the barcode .fasta file. If the barcodes are random with a fixed length, choose Arbitrary and specify the length. You can also choose the Manual option to manually add the barcode sequences that are available for this assay. Specify number of mismatches are allowed. Click Add
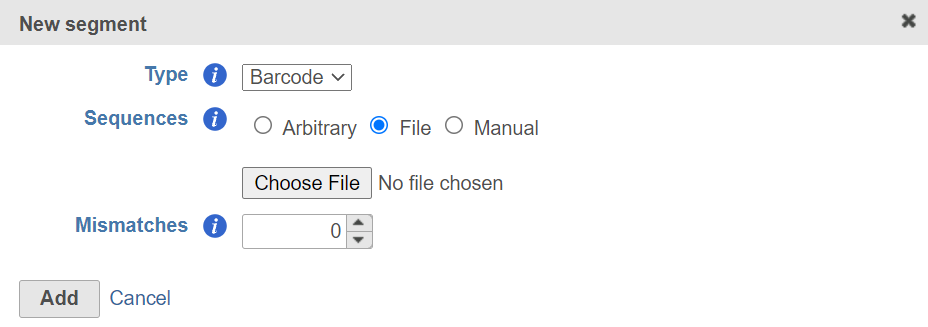
Figure 4. Specify Barcode segment
Click on the ![]() to remove a segment if you make a mistake. Click on the
to remove a segment if you make a mistake. Click on the ![]() next to Barcode to add more segments, e.g. UMI.
next to Barcode to add more segments, e.g. UMI.
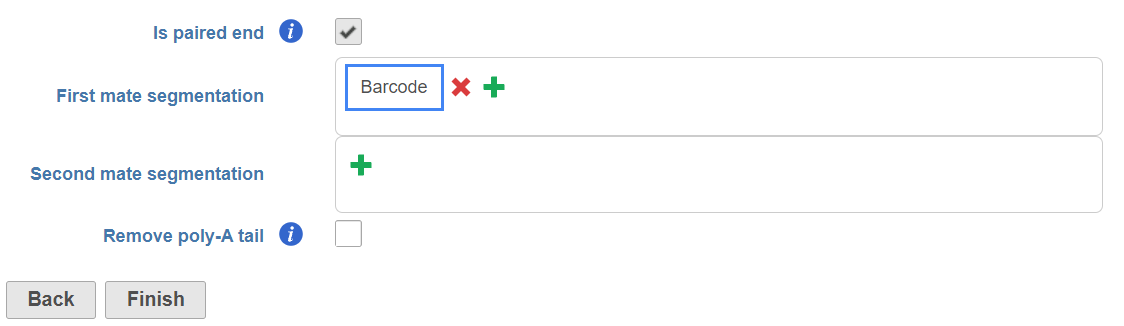
Figure 5. After Barcode segment, click on the green + button next to it to add UMI segment
According to the 10X 3' v3 assay, the UMI is a 12bp sequence (Figure 6).

Figure 6. Add UMI segment
Read 2 contains the 91bp insert sequence, click on the ![]() next to Second mate segmentation, choose Insert from the Type drop-down list and specify the minimum read length allowed (Figure 7).
next to Second mate segmentation, choose Insert from the Type drop-down list and specify the minimum read length allowed (Figure 7).

Figure 7. Add insert segment to read 2
Check the Remove poly-A tail button and click Finish. The new prep kit file is added to the library file database in Partek Flow (Figure 8).

Figure 8. Newly added assay displayed in the table
Click on ![]() to view the diagram (Figure 9).
to view the diagram (Figure 9).
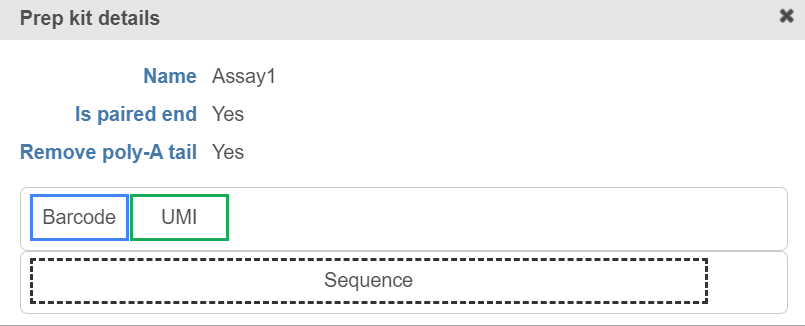
Figure 9. View the prep kit details
When you perform the trim tag task on fastq files, Partek Flow will remove read 1 and the downstream alignment task will only be performed on read 2. The barcode and UMI information will be added in the read name in the output file for downstream analysis.
Additional Assistance
If you need additional assistance, please visit our support page to submit a help ticket or find phone numbers for regional support.


| Your Rating: |
|
Results: |

|
11 | rates |
Overview
Content Tools