Page History
The data set accompanying this document consists of eight human samples processed by Illumina MethylationEPIC BeadChip arrays. The data set is taken from a study of DNA methylation in human pluripotent stem cells (hPCS) (Lee et al. Cell Rep 2017) and can be downloaded from Gene Expression Omnibus using the following accession number: GSE95531. To follow this tutorial, download the 16 32 .idat files associated with GSE95531 (note that two .idat files are generated for each array) and unzip them on your local computer . A discussion on import of files processed by Illumina’s Genome Studio package can be found in Appendix A.To load the .idat files to Partek Genomics Suite go to theusing 7-zip, WinRAR, or a similar program. The .idat files can be downloaded in a zipped folder using this link - Differential Methylation Analysis data set.
- Store the 32 .idat files at C:\Partek Training Data\Methylation or to a directory of your choosing. We recommend creating a dedicated folder for the tutorial
- Go to the Workflows drop down list,
...
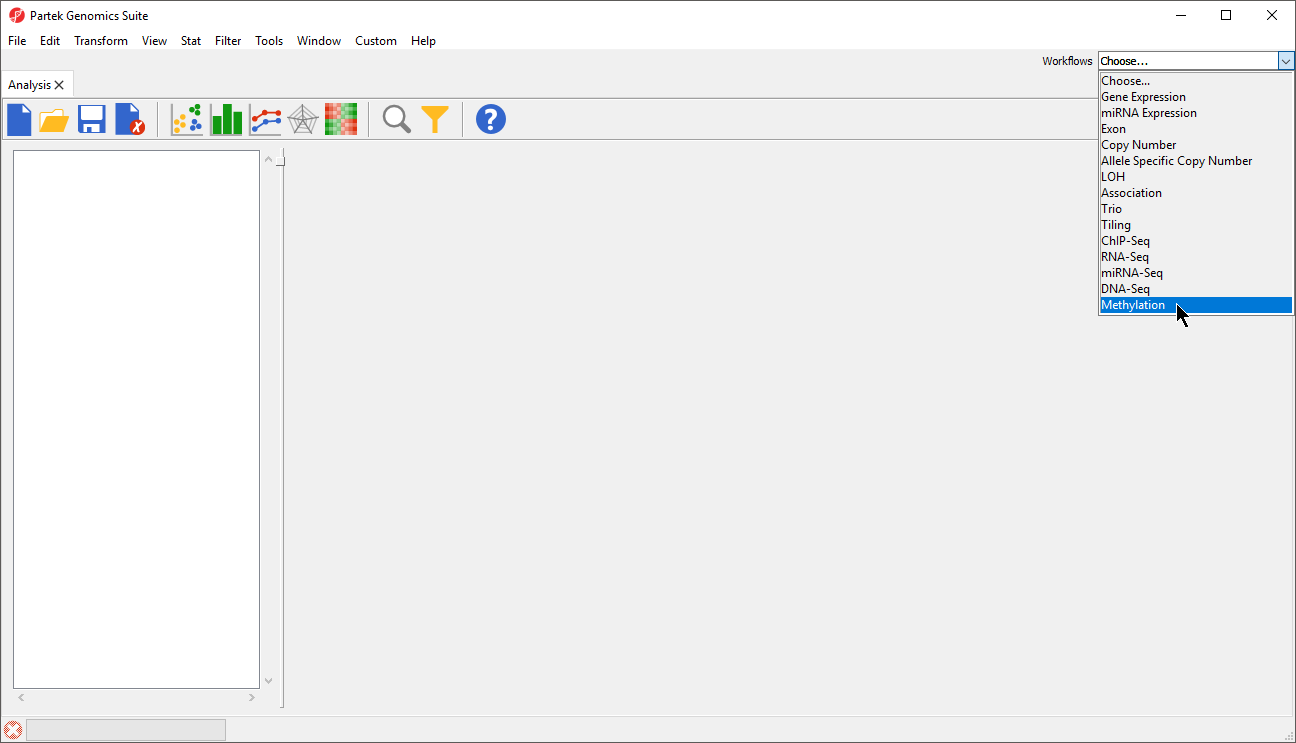
- select Methylation (Figure 1)
| Numbered figure captions | ||||
|---|---|---|---|---|
| ||||
|
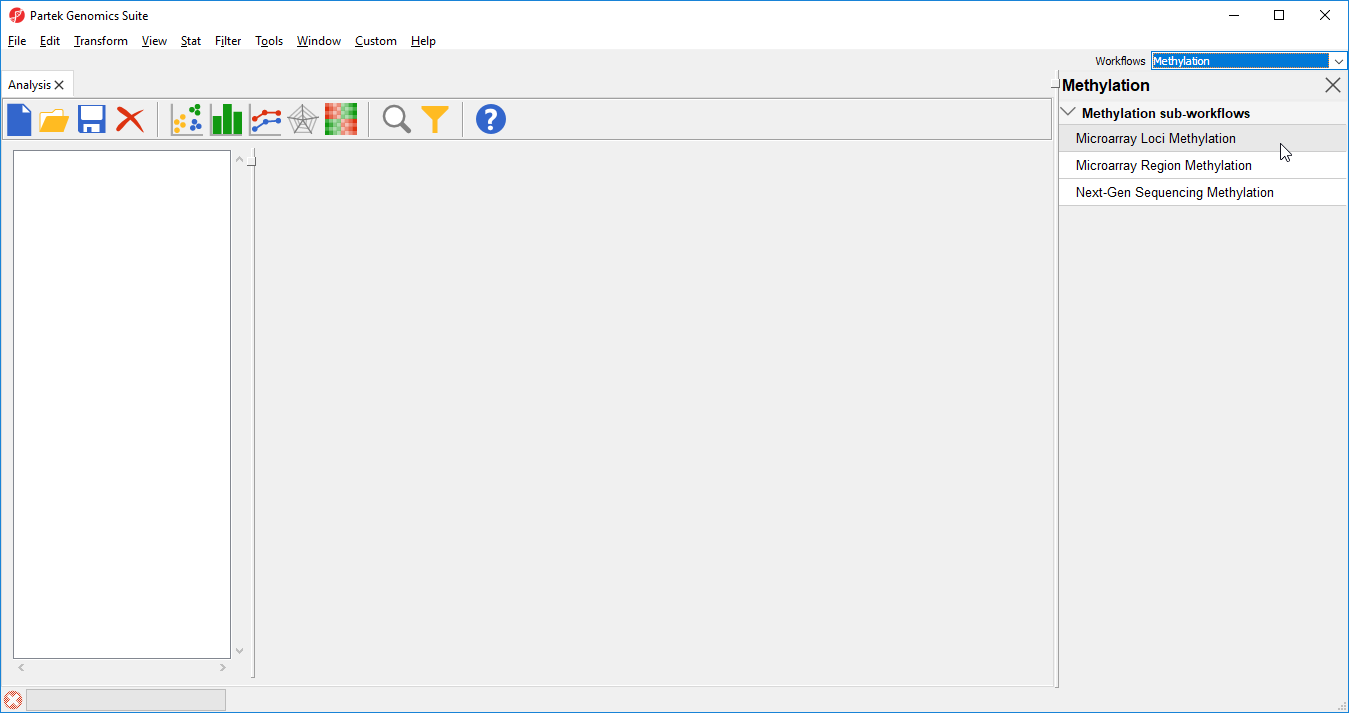
- Select Microarray Loci Methylation from the Methylation sub-workflows panel (Figure 2)
| Numbered figure captions | ||||
|---|---|---|---|---|
| ||||
|
- That will open Illumina BeadArray Methylation workflow (Figure
...
- 3)
| Numbered figure captions | ||||
|---|---|---|---|---|
| ||||
|
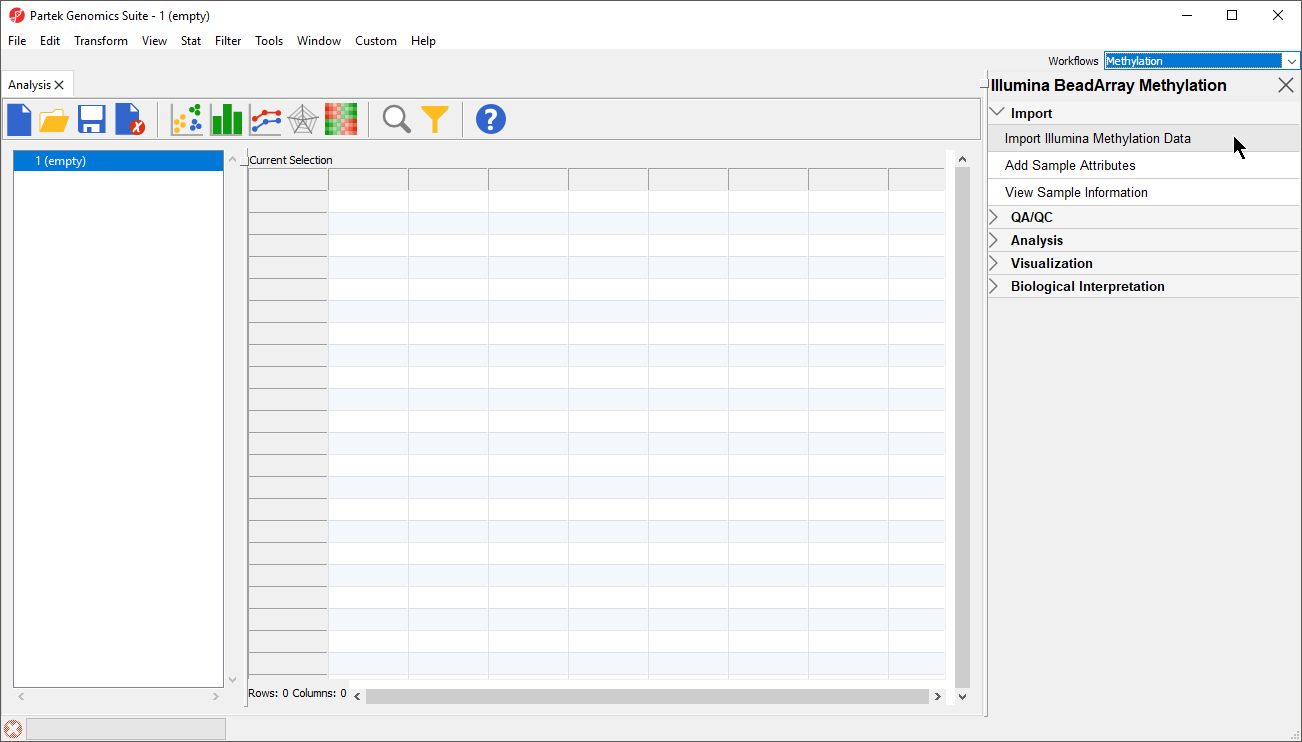
- Select Import Illumina Methylation Data
...
- to bring up the Load Methylation Data dialog
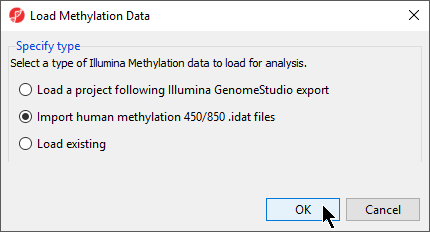
- Select Import human methylation 450/850 .idat
...
- files (Figure 4)
| Numbered figure captions | |
|---|---|
|
...
|
...

...
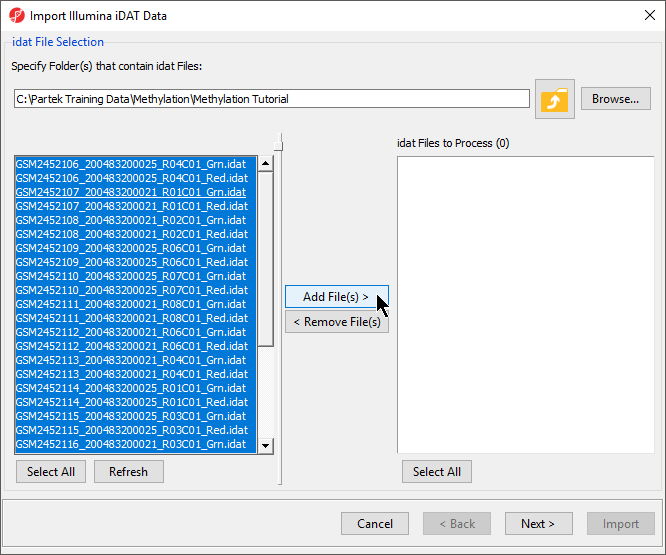
In the next dialog, use Browse… to point to the folder in which the .idat files were unzipped and use the Add File > button to move the .idat files to the box on the right (i.e. idat Files to Process; Figure 2). Select Next > to proceed.
...
| |
|
- Select OK
- Select Browse... to navigate to the folder where you stored the .idat files
All .idat files in the folder will be selected by default (Figure 5).
| Numbered figure captions | ||||
|---|---|---|---|---|
| ||||
|
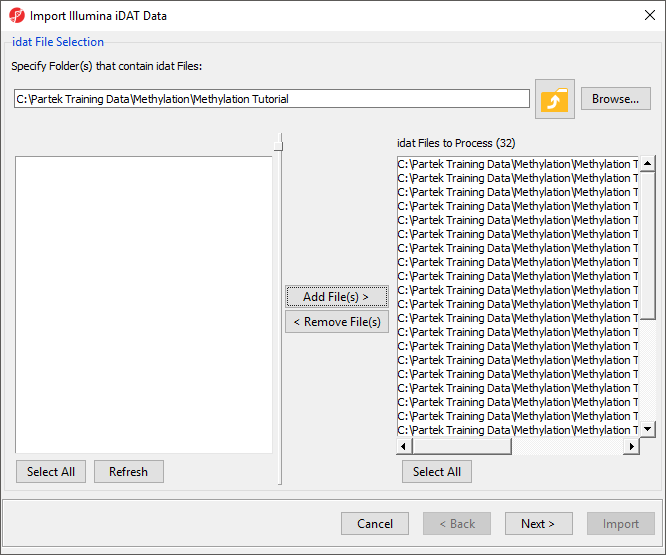
- Select Add File(s) > to move the files to the idat Files to Process pane of the Import Illumina iDAT Data dialog (Figure 6)
| Numbered figure captions | |
|---|---|
|
...
|
...

...
| |
|
- Select Next >
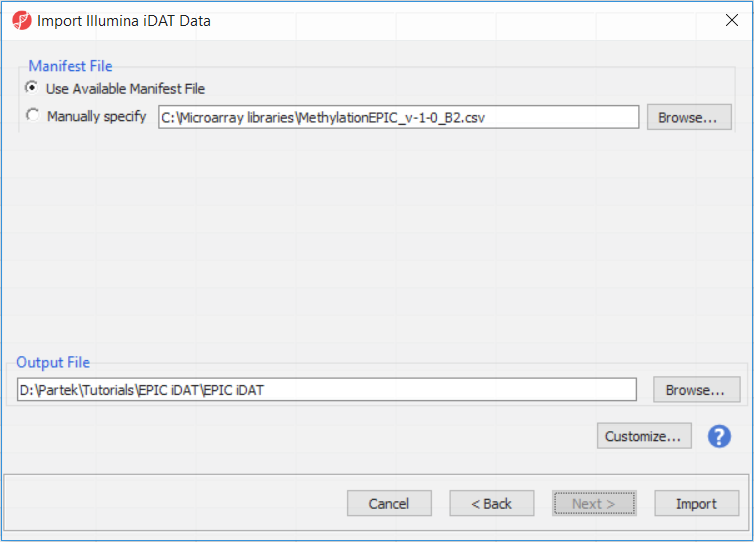
The following dialog (Figure 37) deals with the manifest file, i.e. probe annotation file. If a manifest file is not present locally, it will be downloaded in the Microarray libraries directory automatically. The download will take place in the background, with no particular message on the screen and it may take a few minutes, depending on the internet connection. If you have already downloaded the manifest file, to use it, select Use Available Manifest File option. If you have multiple versions available, you can pick an alternative by selecting Manually specify. The latter scenario corresponds to the situation where you In the future, you may want to reanalyze a data set at a later time. To enforce reproducibility, you may want to use using the same version of the manifest file that you used when the data was first processedduring the initial analysis, rather than downloading an up-to-date version. To facilitate this, the Manual specify option in the Manifest File section allows you to specify a specific version. For this tutorial, we will leave this on the default settings.
...
The Customize... button enables a granular control of the import process (Figure 4).
Section Heading
Section headings should use level 2 heading, while the content of the section should use paragraph (which is the default). You can choose the style in the first dropdown in toolbar.
| Numbered figure captions | |
|---|---|
|
...
| |||
|
By default the output file destination is set to the file containing your .idat files and the name matches the file folder name. The name and location of the output file can be changed using the Output File panel.
- Select Customize to view advanced options for data normalization
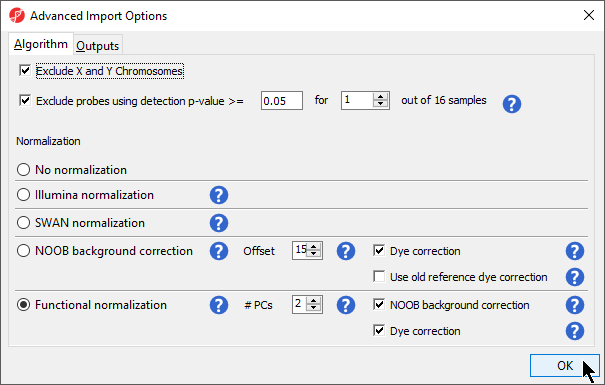
In the Algorithm tab of the Advanced Import Options dialog (Figure 8), there are two filtering options and five normalization options available. The filters allow you to exclude probes from the X and Y chromosomes or based on detection p-value. In this tutorial, we have male and female samples, so we will apply the X and Y chromosome Filter. We will also filter probes based on detection p-value to exclude low-quality probes.
- Select Exclude X and Y Chromosomes
Analysis of differentially methylated loci in humans and mice often excludes probes on the X and Y chromosomes because of the difficulties caused by the inactivation of one X chromosome in female samples.
- Select Exclude probes using detection p-value and leave the default settings of 0.05 and 1 out of 16 samples.
We recommend using the default option for normalization; however, advanced users can select their preferred normalization method. Select the (![]() ) next to each normalization option for details. If you want to import probe intensity, raw probe intensity, probe signals, raw probe signals, or anti-log probe intensity values, they can be added to the data import using the Outputs tab of the Advanced Import Options dialog. Probe intensities and raw probe intensities can be used for advanced troubleshooting purposes and antilog probe intensities can be used for copy number detection. The Outputs tab of the Advanced Import Options dialog also has an option to create NCBI GEO submission spreadsheets from your imported data. For this tutorial, we do not need to import any of these values or create GEO submission spreadsheets.
) next to each normalization option for details. If you want to import probe intensity, raw probe intensity, probe signals, raw probe signals, or anti-log probe intensity values, they can be added to the data import using the Outputs tab of the Advanced Import Options dialog. Probe intensities and raw probe intensities can be used for advanced troubleshooting purposes and antilog probe intensities can be used for copy number detection. The Outputs tab of the Advanced Import Options dialog also has an option to create NCBI GEO submission spreadsheets from your imported data. For this tutorial, we do not need to import any of these values or create GEO submission spreadsheets.
| Numbered figure captions | ||||
|---|---|---|---|---|
| ||||
|
- Select OK to close the Advanced Import Options dialog
- Select Import on the Import Illumina iDAT data dialog
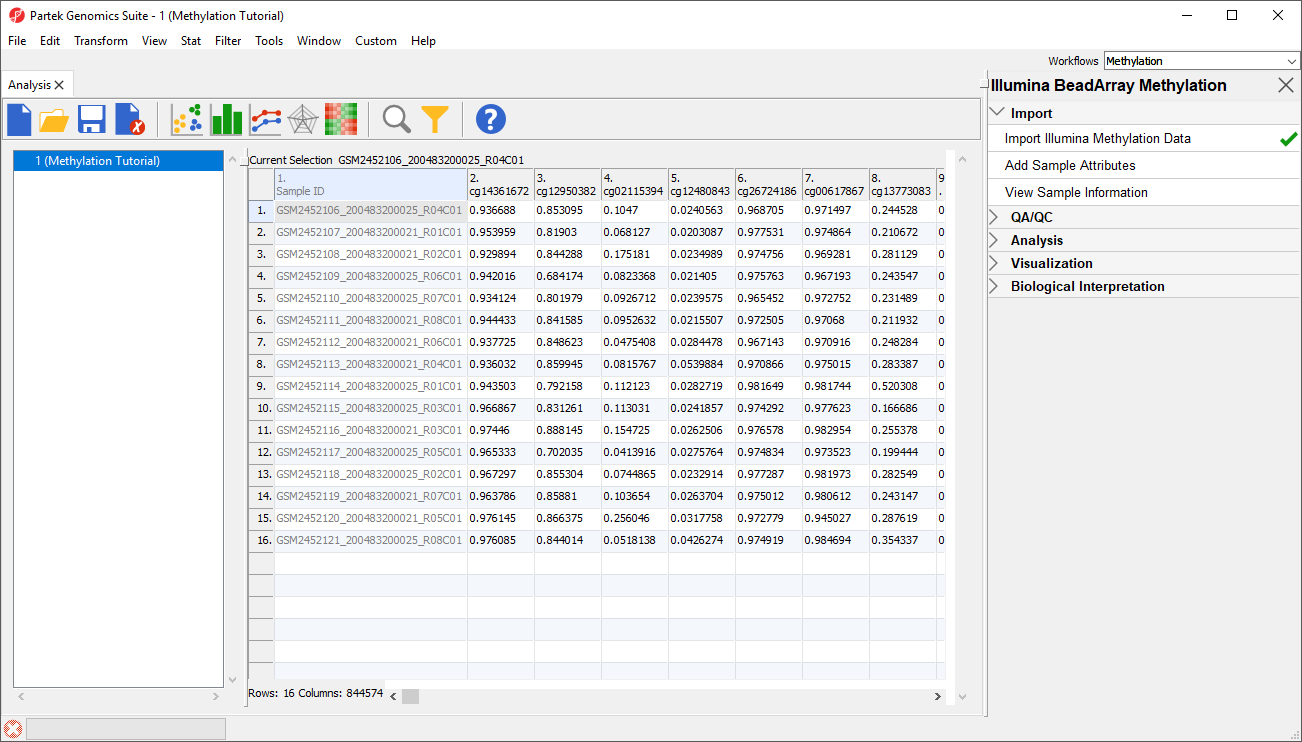
The imported and normalized data will appear as a spreadsheet 1 (Methylation Tutorial) (Figure 9)
| Numbered figure captions | ||||
|---|---|---|---|---|
| ||||
|
| Page Turner | ||
|---|---|---|
|
| Additional assistance |
|---|
|
| Rate Macro | ||
|---|---|---|
|
Overview
Content Tools