Join us for a webinar: The complexities of spatial multiomics unraveled
May 2
Page History
On the library file management page, click the green plus ( ) icon next to the Add annotation models green button in the Annotation models section header and , choose Gene/feature annotation from the Library type drop-down list in the dialog (Figure 1). Alternatively, click the Add library file button and choose Gene/feature annotation from the Library type drop-down list.
If you are using an assembly supported by Partek (e.g. human), annotation models from a variety of commonly used sources (e.g. RefSeq, ENSEMBL, GENCODE) will appear in the Annotation model drop-down list in the dialog. Choose an annotation model, select the Download annotation file radio button and click Create (Figure 1).
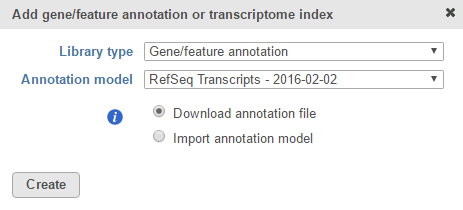
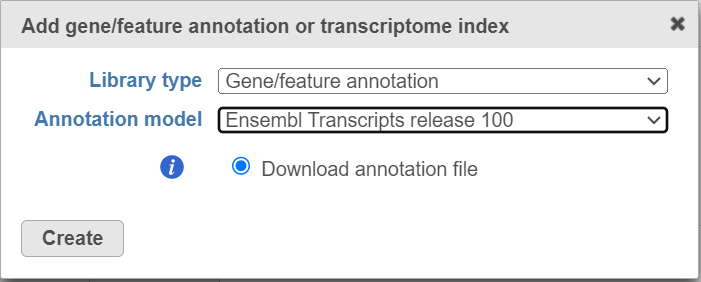
Figure 1. For many model organisms, automatic downloads of gene/feature annotation models from various sources are available from the Partek repository.
If you prefer to add a custom annotation file or if you are working with a custom assembly, choose Add annotation model from the Annotation model drop-down list (Figure 2). You may need to scroll to the bottom of the drop-down list to see this option. Name the annotation model by typing into the Custom Name box and click Create. Characters such as $ * | \ : " < > ? / % cannot be used in custom names.

Figure 2. Add a custom annotation model
A custom annotation model can be added from the Partek Flow Server, My Computer or a URL download link. The behavior of each option is similar to when importing a reference sequence (see Adding a Reference Sequence). When browsing for files on the Partek Flow server, only the files with relevant file extensions will be visible (.gtf, .gff, .gff3, .bed, .pannot, .txt and various compressed formats).
Select the source of annotation file and click Next. If the annotation file format is gtf, gff, gff3 or bed, a preview of the first 20 rows of the file will be shown on the screen (Figure 3). You must then specify the type of annotation file by choosing an option from the Annotation type drop-down list (Figure 3). Choose mRNA for whole transcriptome annotations, where both gene and transcript level information are present. Choose microRNA for precursor or mature microRNA transcript annotations. Choose Amplicon for targeted amplicon sequencing annotations. Choose Other for annotation files that do not fall into the other three categories (e.g. lncRNA).
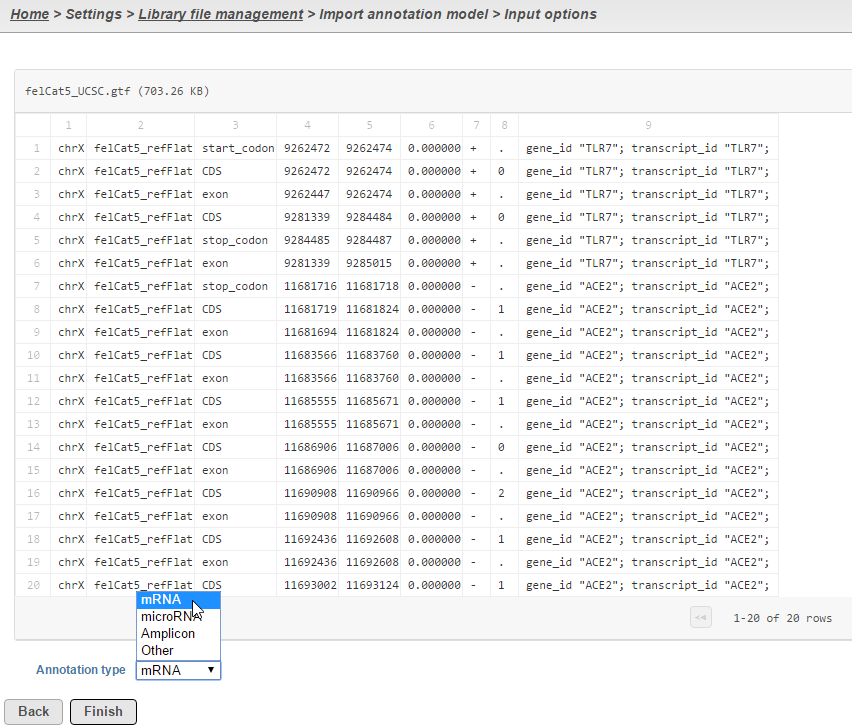
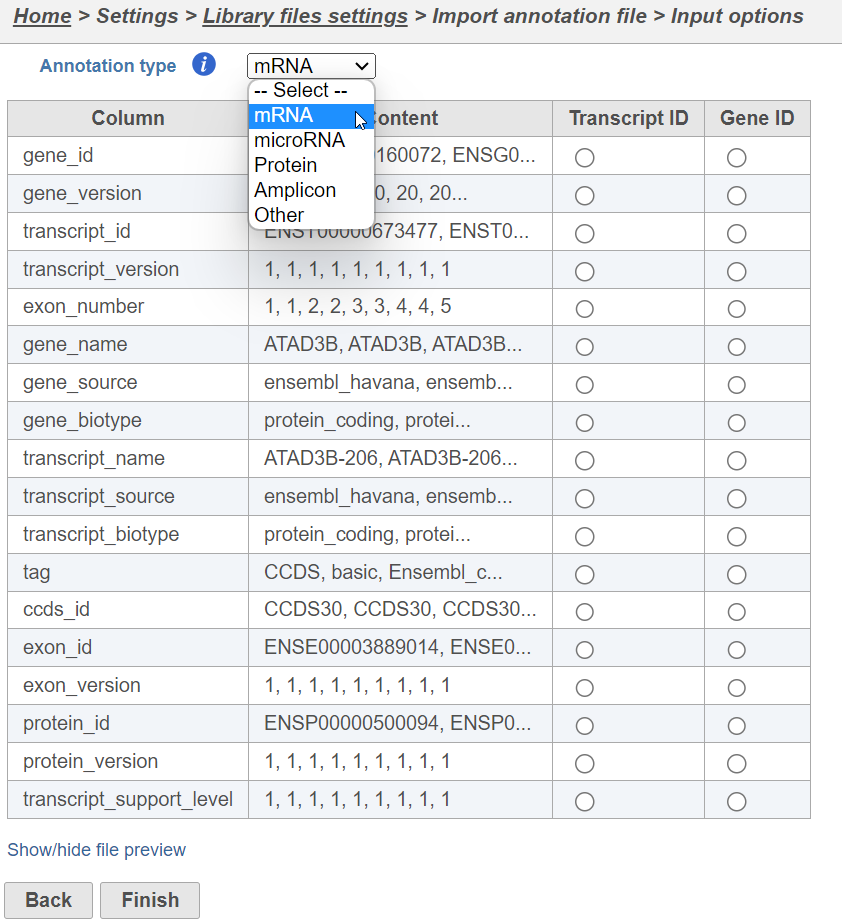
Figure 3. When importing an annotation model, the data type must be specified
For text annotations with both gene- and transcript-level information select mRNA from the drop-down menu. You can manually specify which column corresponds to the Transcript ID or Gene ID by selecting the corresponding radio button next to the column with that information (Figure 4).
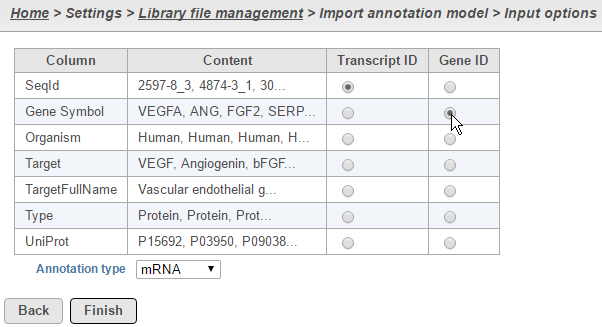
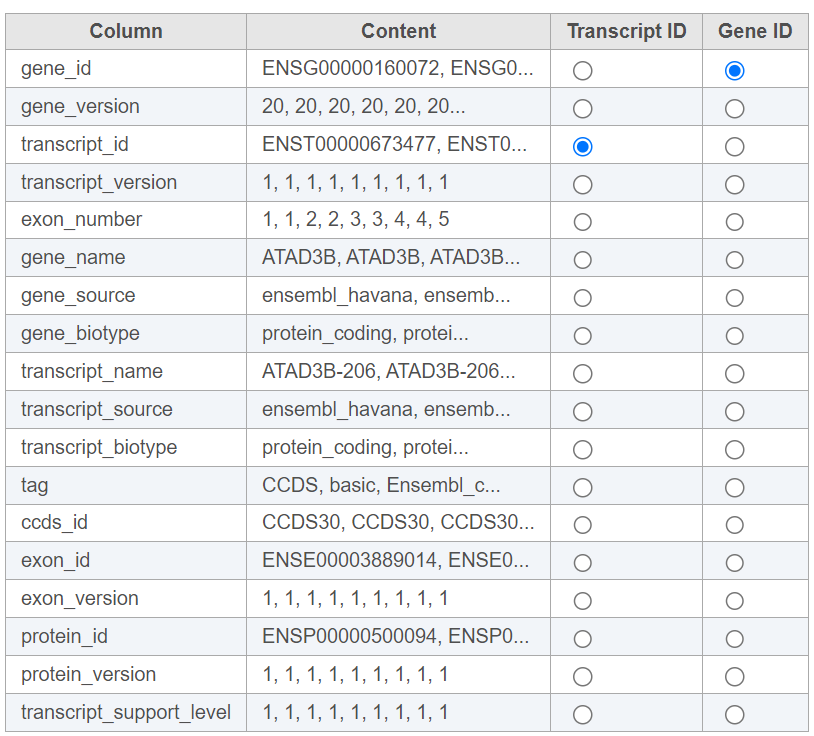
Figure 4. Select the column with gene- and transcript level information
...
Overview
Content Tools