The User added tasks feature in Partek Flow allows administrators to add their own executables and scripts to the set of analysis tools available on a given installation. These tasks can then be run through the Partek Flow graphical user interface and can be included as part of analysis pipelines.
The process of adding a task is only available to users with administrative privileges. However, once the task has been added to an instance of Partek Flow, all other users, including regular users, can use the task.
The instructions below assume that you are logged in as an admin.
Licensing
The User added tasks feature is a part of the Partek Flow Enterprise offerings and requires a separate license. Having this license allows the addition of new user added tasks and allows existing user added tasks to be run individually or within pipelines. To check if your installation is licensed, go to Settings > Licensing and make sure that the User added tasks is licensed (Figure 1).
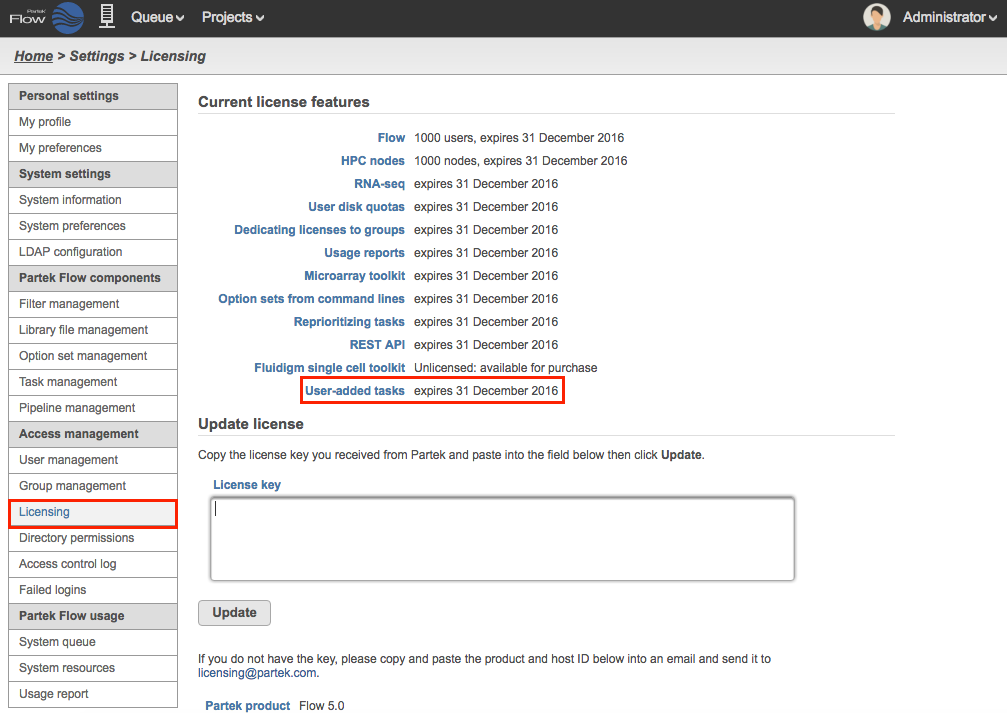
Figure 1. The User added tasks require a separate enterprise license
Creation
Prior to beginning, the analysis tool needs to be downloaded and installed in a directory the Partek Flow user has access to. The executable (or a symbolic link to it) must be in this directory: FLOWhome/user_tasks, where FLOWhome is the location of the database directory. This directory and any binaries within it must be available to all workers in a cluster install environment.
To create a new user added task, go to Settings > Task management. Select the Add task button and choose Create new task in the pop-up dialog (Figure 2).
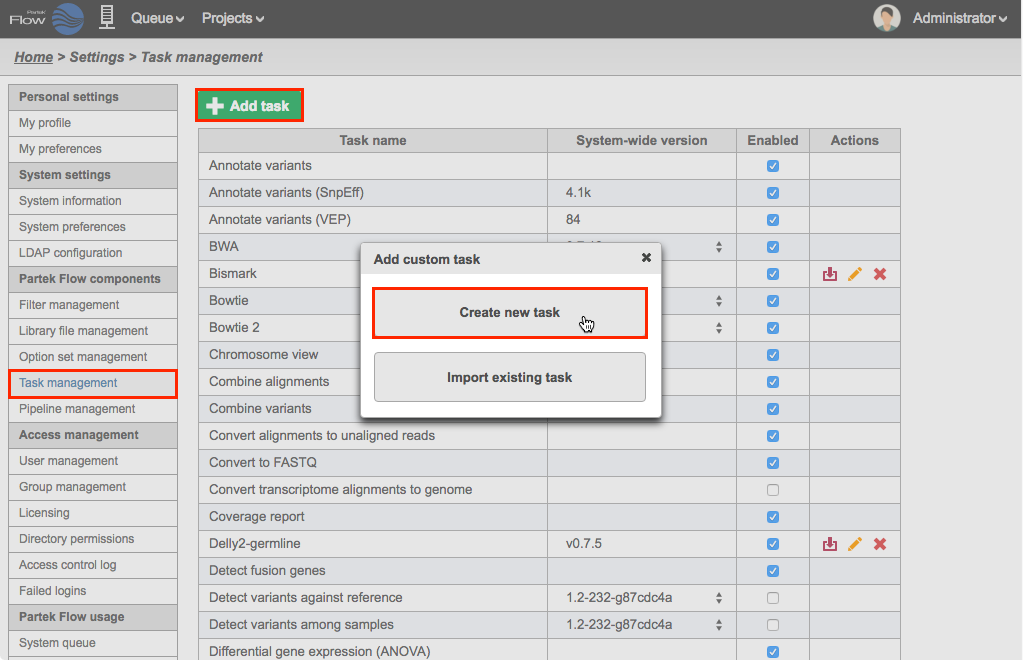
Figure 2. Adding a User added Task
The creation of a new user added task has four steps:
The task creation wizard will guide you through each step. Please consult the user documentation of the analysis tool you wish to add for details to enter into the task creation wizard.
Task details
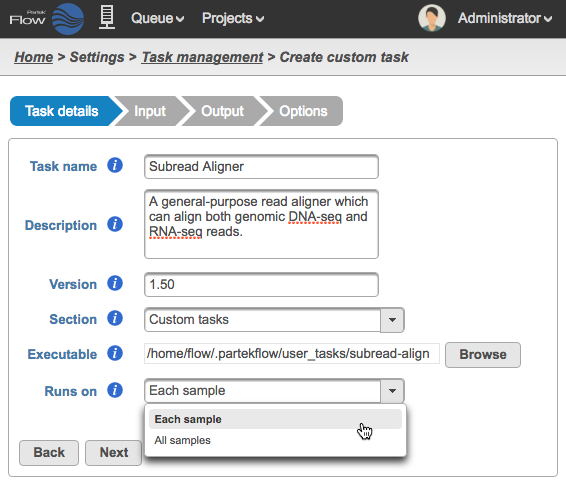
Figure 3. Defining the task details
In the Task details step (Figure 3), provide the following:
- Task name - a unique name for the task
- Description (optional) - a more thorough description of the task. This text will appear when the cursor hovers over the task in the Task Menu
- Version - a unique version number for the given task name. The combination of Task name + Version must be unique (i.e., no other task already installed can have the same combination)
Section - choose a section in the context-sensitive Task Menu in which this task will appear or define a new section by editing the text field (Figure 4)
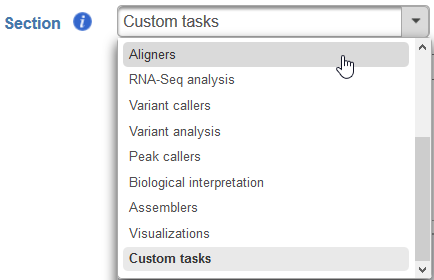
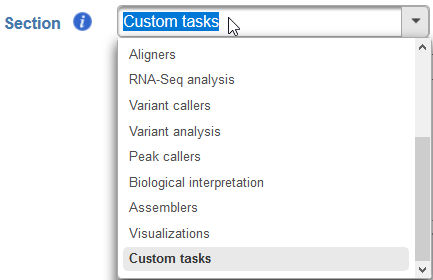 Figure 4. Choose which section in the Task Menu you want the added task to appear in. To keep all custom tasks in one section, choose 'Custom tasks' at the bottom of the drop-down list (left). To create a new section, highlight the text and manually type a new section name (right)
Executable - provide a full path to the executable that this task will run (Figure 5) by clicking Browse. The executable is the main binary or script to call which has arguments parsed in the command-lines. See 'Integration Scripts' part at the bottom to learn more about executables in Flow. In the example in Figure 3, the full path is /home/flow/.partekflow/user_tasks. The dialog (Figure 5 inset) lists all the available executables stored in the directory. Select the file and click Continue to proceed. Note that the flow server user must have execute permission on the binary.
SECURITY WARNING - Since binaries in this folder will be accessible through the Partek Flow web user interface, this directory should be highly restricted from modification by non-administrator users.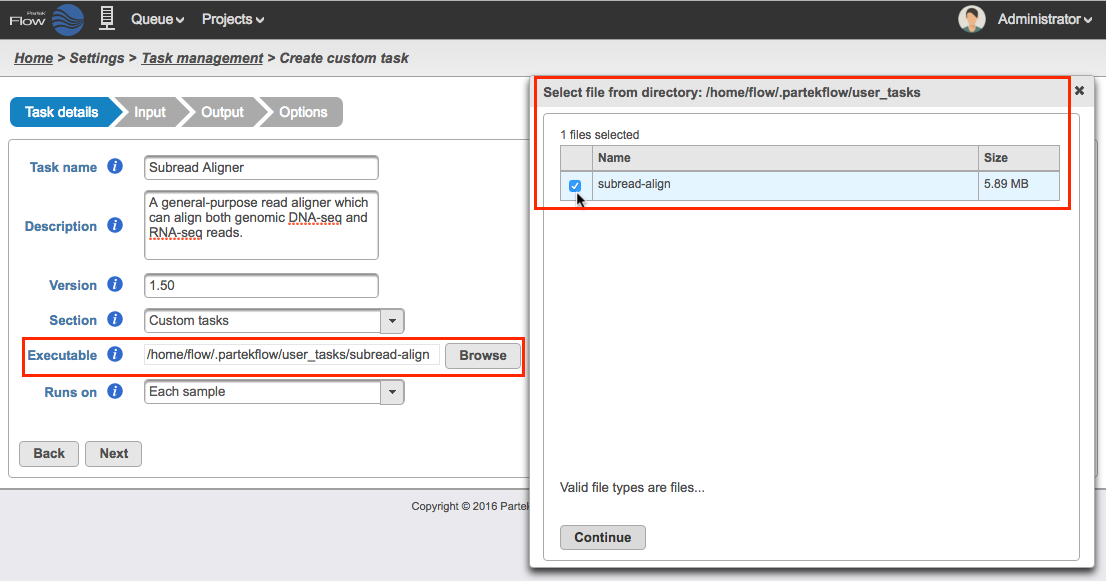 Figure 5. Selecting the executable (the inset shows the available binary saved in the folder)
Runs on - choose Each sample to run the executable once per individual sample (i.e., run the samples in parallel) or All samples to run the binary once with all the samples provided in a single command line (e.g, merge all samples into a single run) (Figure 6)
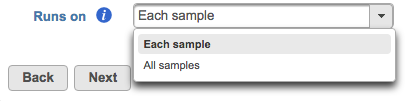 Figure 6. Selecting the run format
Click Next to proceed to the Input step
Input
In the Input step, specify what type of data the task can run on and how to pass that data on the command line (Figure 7).
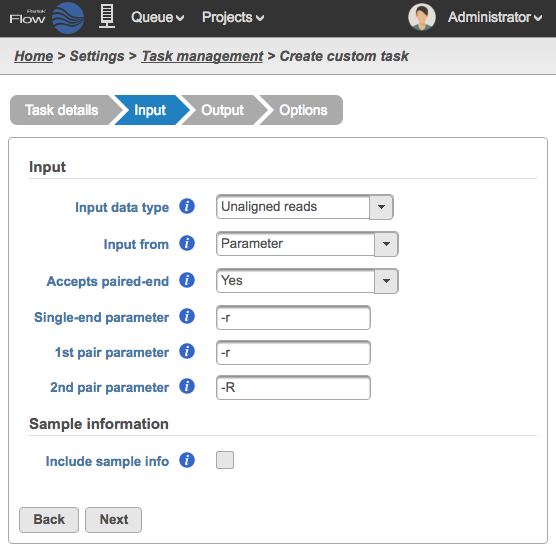
Figure 7. Defining the Input
- Input data type - This is the type of data the task can be performed on. In the Analyses tab, this is the type of data node that will be selected for to the task to appear in the context-sensitive Task menu. Partek Flow requires User added tasks to be performed on either: Unaligned reads, Aligned reads, Quantification, and Variants. Additional inputs can be specified in the Options step. The type of Input data selected from the drop-down menu will determine the additional fields that need to be defined. In Figure 7 the Subread Aligner task accepts Unaligned reads.
- Input from - choose Parameter if the input file(s) is specified using an option (e.g. -r) on the command line/executable or Last option if the executable assumes the input file(s) is placed at the end of the command
- Accepts paired-end - choose between Yes, No or Exclusively with respect to the task's behavior with paired-end reads
- Single-end parameter - enter the parameter to add before single-end reads
- 1st pair parameter - enter the parameter to add before the first file (_1) in a paired-end reads set
- 2nd pair parameter - enter the parameter to add before the first file (_2) in a paired-end reads set
You can optionally include Sample information as an argument to pass to the command (Figure 8). Select Include sample info and enter the Sample info parameter. The parameter is used to specify the sample information file on the command line.
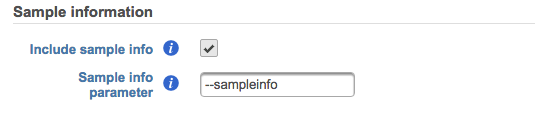
Figure 8. Including the Sample Information
A tab-delimited text file will be passed to the command line using the specified parameter. Each row in the file will be composed of the File name, Sample name, and its associated attributes in that project (Figure 9). When running the command on All samples, the text file will have all sample files as rows. When running the command as Each sample then there will be one info file per command and it will only contain the rows for the files in that sample.

Figure 9. Example of a tab-delimited text file containing the sample information that can be passed to the command line
Output
The expected outputs of the task must be defined and configured. To add a new output, select the Add output button (Figure 10), then configure the dialog (Figure 11).
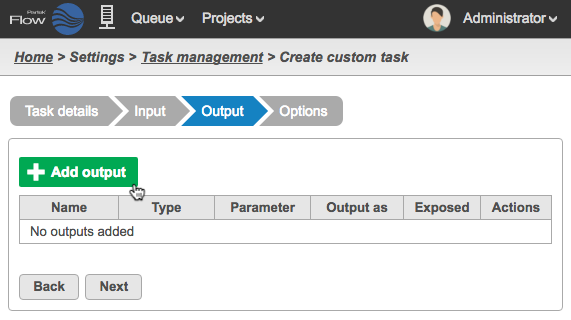
Figure 10. Table of Output of a User Added Task
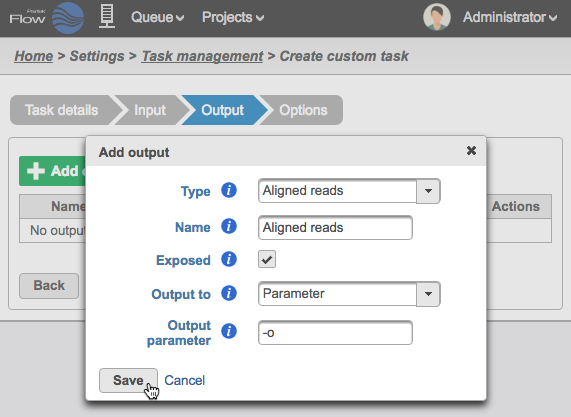
Figure 11. Configuring a task output
- Type - choose the type of data produced by the task from the drop-down list. The set of output types is restricted to those currently supported by downstream Partek Flow tasks: Unaligned reads, Aligned reads, Assembled reads, Quantification, HTML, Image, Annotated counts, or Variants. If you want to output a data type that is not part of this set, select Custom and this will produce an output that can be downloaded.
- Name - enter a name for the output data node (this will be the data node that will display in the Analyses tab)
- Exposed - if checked, this output will be exposed as a node on the Analyses tab, otherwise this task will not produce a data node and the output will be accessible through the task result page
- Required - if checked the task will fail if the executable failed to produce this output. If left unchecked then this output is optional and task will succeed even if this output was never be produced by the executable.
Output files as - (for Custom types) choose between a Single file output, All files with prefix, and a list of files in a Directory
- Output prefix - to restrict only output files with the given prefix
Output to - placement of output on the command line, which can be: Last Option, Parameter, Standard Out
Output parameter - parameter to place on the command line before this output which is the same in executable.
After configuring the dialog, click Save. The Output will appear in the Table (Figure 12). Any existing output can be edited ![]() or deleted
or deleted ![]() using the action buttons on the far right of the table.
using the action buttons on the far right of the table.
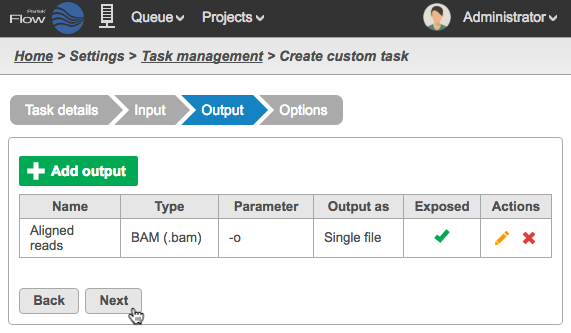
Figure 12. Defined output of a User Added Task
Options
Additional input options to the command line can be configured. To add a new input, select the Add option button (Figure 13), then configure the dialog (Figure 14).
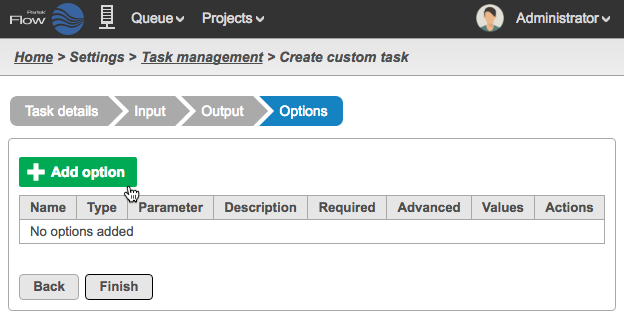
Figure 13. Table of Options for the User Added Task
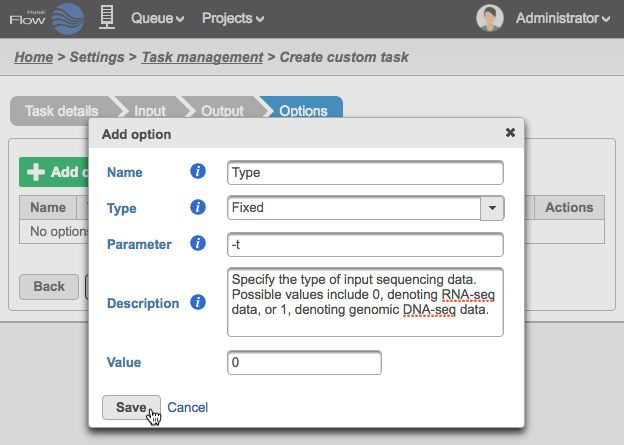
Figure 14. Configuring additional task options
- Name - a label that concisely describes the option, keeping this short ensures that the option label is well displayed and easy to find
Type - the type of value this option can assume, which determines the interface used to choose the value during task setup
Number - spinner component to select number values
- Yes/No - check box to select boolean values
- List - select one or more item from a list of string values
- Text - input box to select arbitrary string values
- Fixed - input box to select a fixed string value (will not show up on the configuration UI of the user task)
- File - file selector for a single file
- Directory - file selector for a directory
- Library file - selector for supported, built in library files (e.g. reference fasta, reference VCF)
Parameter - the parameter used to identify this option on the command line/executable. For example: -a [value], where '-a' is the parameter
- Description - additional information about the option will be available in an 'info' icon (tooltip) when configuring the option
- Advanced - options that are set to advanced will be moved to the advanced options dialog, and can be saved to option sets
- Required - options that are set to required must be filled with a value when configured, otherwise the option is something that can be left off the command line
- Only Integers - if checked, this option will not allow fractional numbers, such as 74.42
- Values range - enter two values to define a range of values
- Default value - enter a default value
- Allow multiple - if checked, allows one or more of the list items to be selected
- Add Value - (for List types) enter one or more strings
- Library type - (for Library file types) can be a Reference sequence or Variant database
After configuring the dialog field, click Save. The Option will appear in the Table as in Figure 15. Any existing option can be edited ![]() or deleted
or deleted ![]() using the action buttons on the far right of the table.
using the action buttons on the far right of the table.
Complete the addition of the User added task by clicking the Finish button from the Options step.
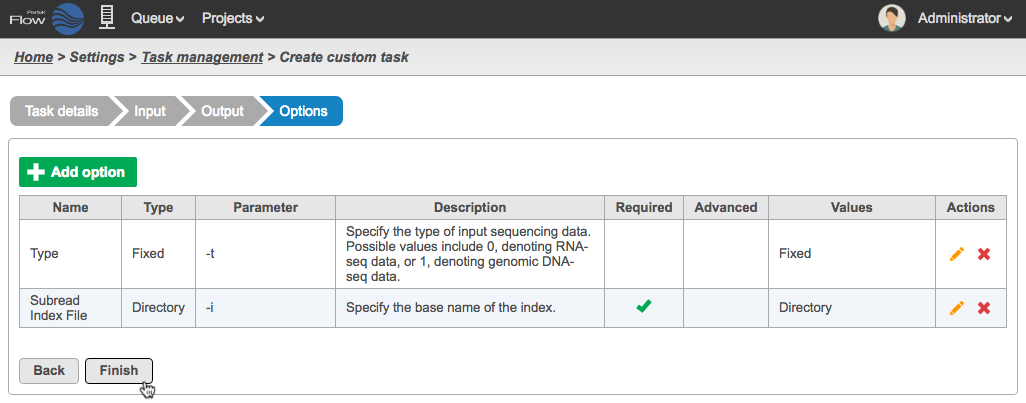
Figure 15. Defined additional input options a User Added Task
Management
The new task will show up as an entry in the Task management table (Figure 16).
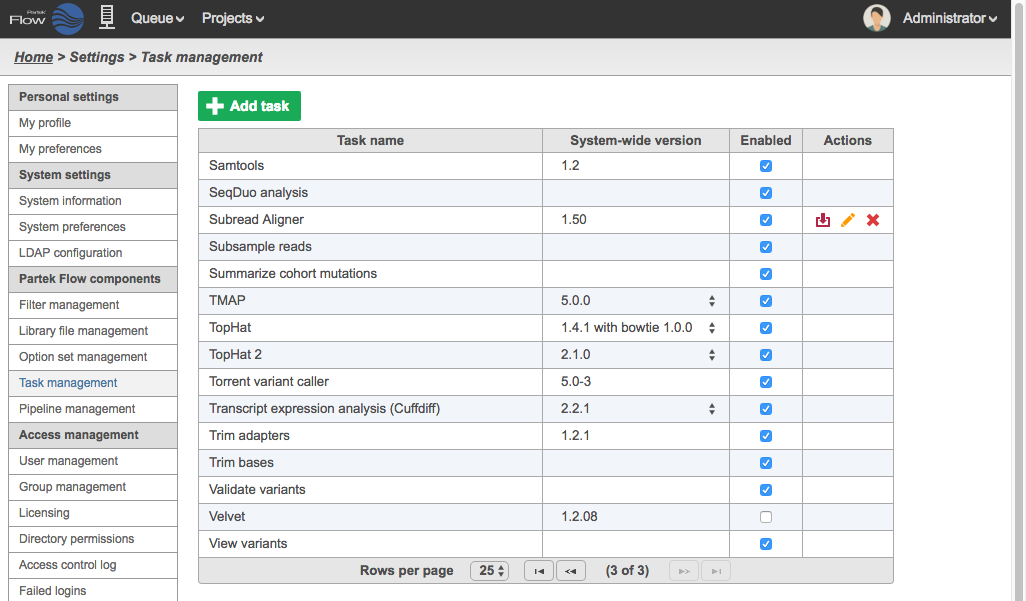
Figure 16. Task management table showing a User added task
Like native Partek Flow tasks this task can have its system wide version set, and can be globally enabled or disabled. Unlike native Partek Flow tasks, there are additional actions that can be taken on user added tasks:
![]() - Download: Downloads the task definition as a file that can be imported into other Partek Flow installations.
- Download: Downloads the task definition as a file that can be imported into other Partek Flow installations.
![]() - Edit: Opens the add task wizard with all fields pre-filled. This is a clone operation, so a new task name or version must be selected.
- Edit: Opens the add task wizard with all fields pre-filled. This is a clone operation, so a new task name or version must be selected.
![]() - Delete: Removes the task
- Delete: Removes the task
Running a Task
User added tasks appear in the context sensitive Task Menu when a selected data node matches the Input data type (Figure 17).
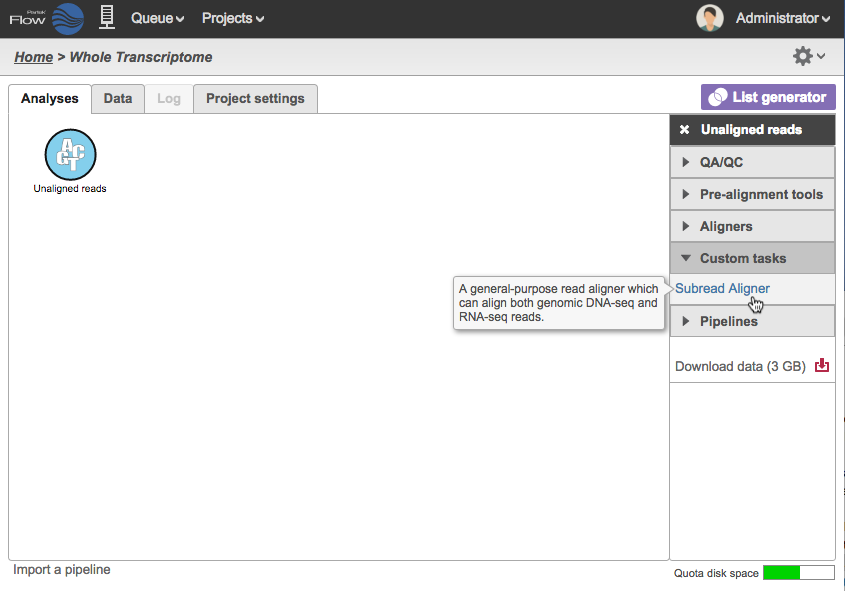
Figure 17. User added tasks appear in the Task Menu
If there are additional options that need to be defined, a task wizard will appear (Figure 18).
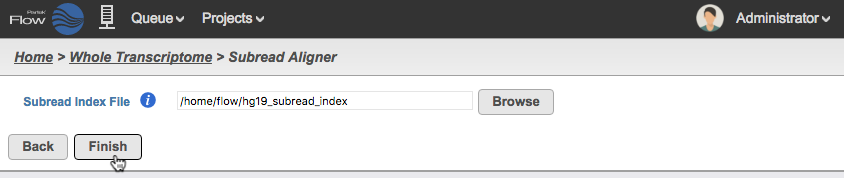
Figure 18. A task wizard will appear depending on the task options
The Name of the User added task will appear as a task node in the Analyses tab (Figure 19).
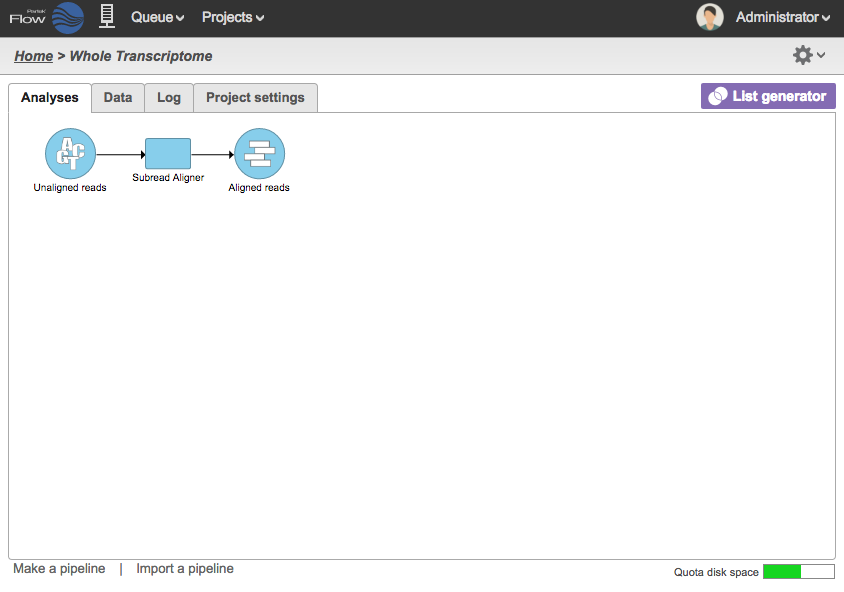 Figure 19. A successful run of a User added task
Integration Scripts
User added tasks has some format restrictions for passing arguments to the command line.
For example, a binary that has multiple positional arguments cannot be directly wrapped. To execute these binaries through Partek Flow’s User added tasks, one must first wrap the binary in a script that can, for example, parse parameterized arguments into positional arguments. This can be done using any scripting language executable by the Partek Flow server.
User added tasks also require a single binary per task. So if you wish to execute multiple steps and have that represented as a single task in Partek Flow, one must first wrap those steps in a script that can be imported into Partek Flow.
Additional Assistance
If you need additional assistance, please visit our support page to submit a help ticket or find phone numbers for regional support.


| Your Rating: |
|
Results: |

|
39 | rates |
Overview
Content Tools
1 Comment
Melissa del Rosario
author: mdelrosario