The Pipeline management page allows users to view and manage the pipelines within a Partek Flow instance. To access the page, click the avatar on the top right corner, choose Settings, then select Pipelines on the left. This page can be accessed by administrative and non-administrative users. The table (Figure 1) shows a list of pipelines with their description, creation date, and the display name of the owner (the user who created or imported the pipeline). Non-administrative users can see pipelines created by other Partek Flow users in the table if the pipeline has been shared by the user. Administrative users can see all details.
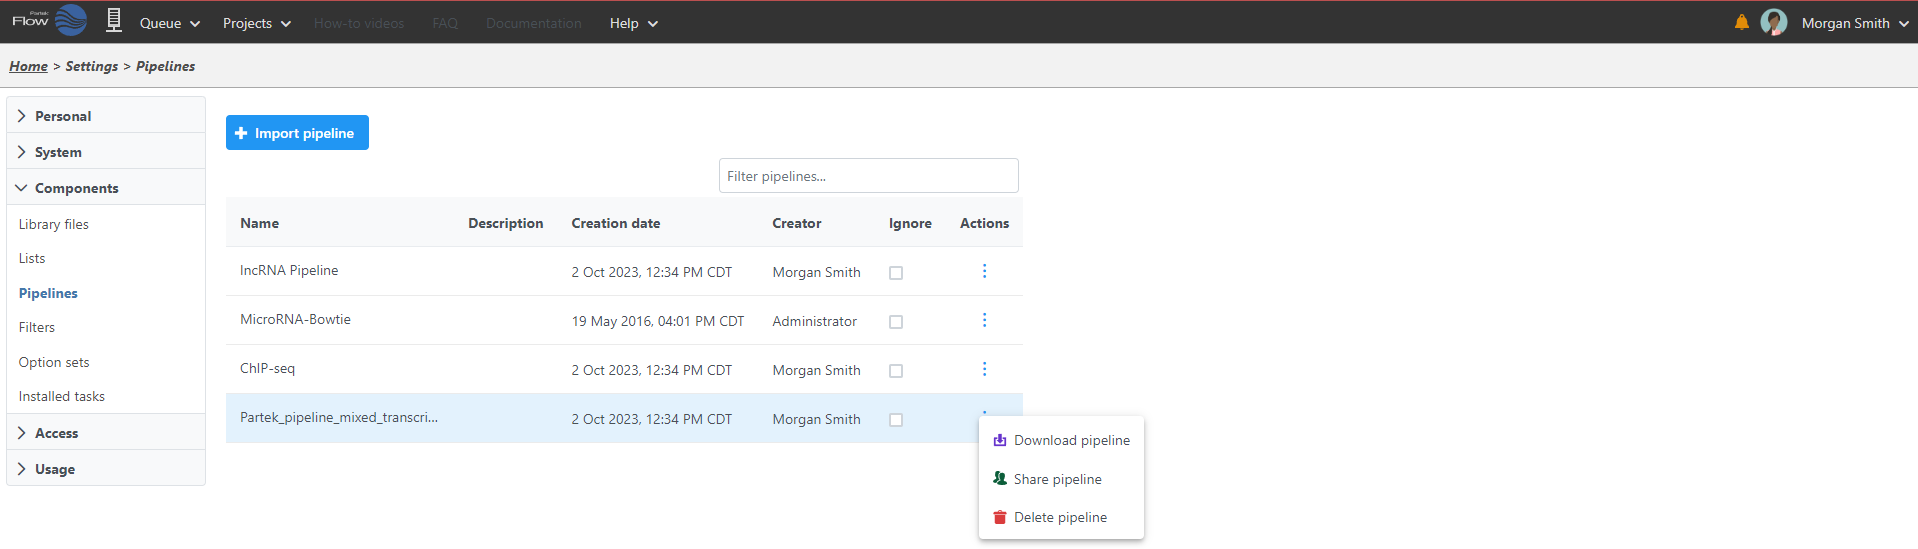
Figure 1. Pipeline Management Page view of an administrative user. The view for non-administrative users will not have the 'Enable by default' column and pipelines created by other users will appear as 'Anonymous'
Hiding Pipelines
All pipelines that have been created or imported within the same Partek Flow instance can be shared by all users. The pipeline manager allows each user to choose the pipelines that appear on their Task Menu. To hide a pipeline, select the corresponding checkbox in the Ignore column (Figure 1).
Downloading a pipeline
To download a pipeline, click the ![]() Download pipeline in the Actions column. A file with the extension *.pipeline will be download to the default download directory of your local computer.
Download pipeline in the Actions column. A file with the extension *.pipeline will be download to the default download directory of your local computer.
Deleting a pipeline
Pipelines can be deleted by the owner (as listed in the Creator column) or by a user with admin privileges. Clicking ![]() Delete pipeline in the Actions column will delete the pipeline and it will no longer be available to any Partek Flow user. Note that deleting a pipeline affects all users of the same Partek Flow instance.
Delete pipeline in the Actions column will delete the pipeline and it will no longer be available to any Partek Flow user. Note that deleting a pipeline affects all users of the same Partek Flow instance.
Importing a Pipeline
Within the Pipeline management page, you can upload a pipeline from your local computer or import a pre-built pipeline directly from the Partek website. You can import a pipeline even before you create or open a project within Partek Flow.
From My Computer
- To import a .pipeline file from your local machine, click on the Import pipeline button

- By default, the My computer option at the top of the Import pipeline page should already be selected. Click the Choose button (Figure 2)
- Browse to the location of the .pipeline file on your local machine and select it for upload. The selected file name will be displayed next to the Choose pipeline button
- If you wish to give the pipeline a new name, type a new name into the Rename pipeline box and click Import
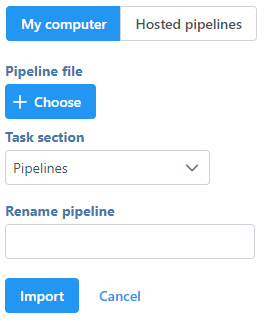 Figure 2. Importing a pipeline from your local machine
From Partek Website
- To download a pipeline from the Partek website, click on the Import pipeline button
- Select Hosted pipelines (Figure 3). This will display all available pre-built pipelines from the Partek website.
- Click the Import pipeline button next to the pipeline you wish to import (Figure 3). Alternatively, click Import all pipelines at the bottom of the page to import all pipelines displayed.
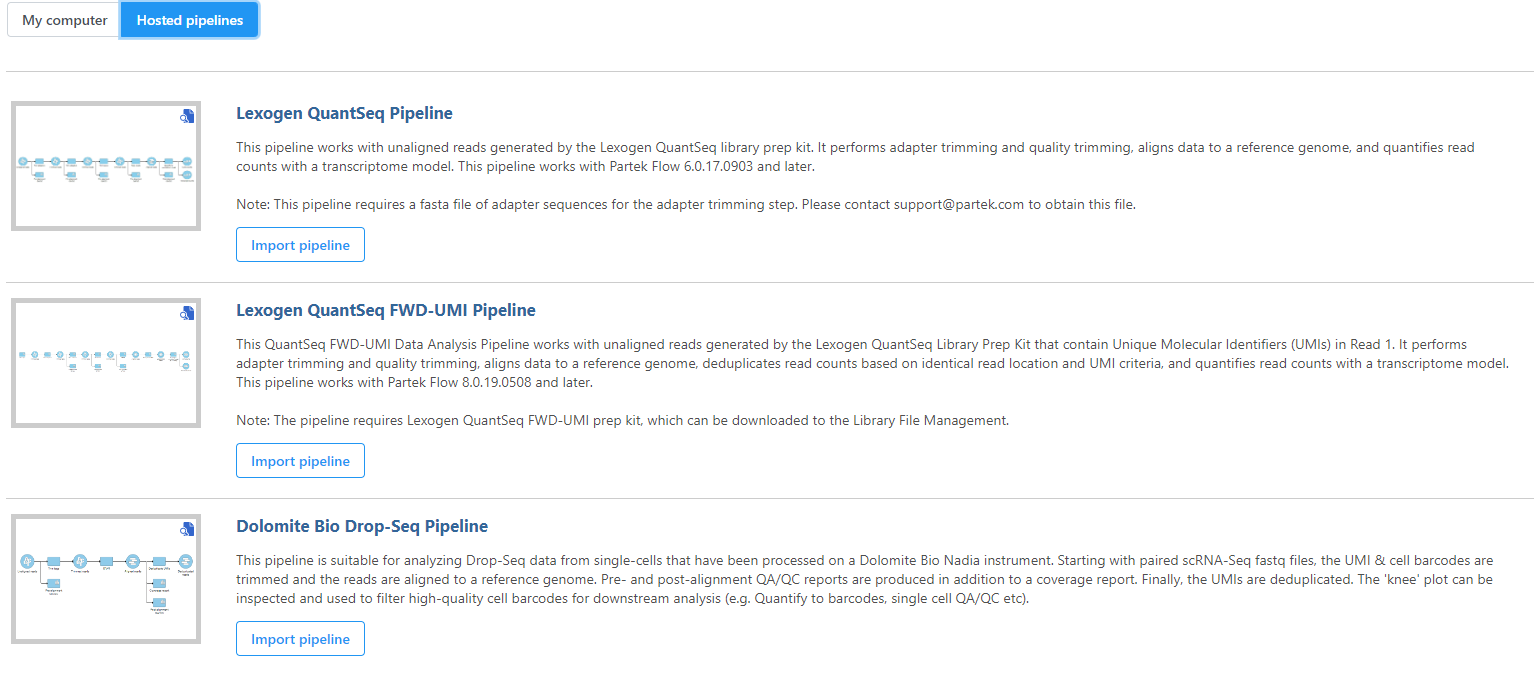 Figure 3. Pre-built pipelines that can be imported from the Partek website. To preview a pipeline to see more detail, click the pipeline image
For additional information, visit the Pipelines documentation page.
Figure 3. Pre-built pipelines that can be imported from the Partek website. To preview a pipeline to see more detail, click the pipeline image
For additional information, visit the Pipelines documentation page.
Additional Assistance
If you need additional assistance, please visit our support page to submit a help ticket or find phone numbers for regional support.


| Your Rating: |
|
Results: |

|
34 | rates |
Overview
Content Tools
1 Comment
Melissa del Rosario
author: mdelrosario