A user can browse through the results by using one of the tools in the navigation bar (on the top of the view; Figure 1). Select tracks tool is the topic of a separate section, while the remaining tools are described below.
Figure 1. Navigation bar of the chromosome view (from left): Select tracks tool, Search box, Position box, mode selector (pointer, zoom, pan), zoom tool, bookmarks, save icon (the position in the figure is an example)
You can use the Search box to zoom to genomic features that are available in the annotation track. Start typing a search term and Partek Flow will show you the first 10 suggestions (Figure 2). To select one, use the arrow keys or mouse, or type the full feature name and hit enter.
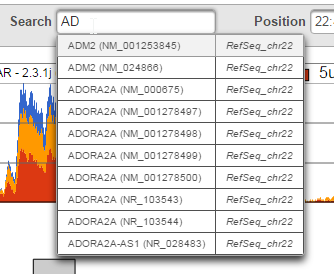
Figure 2. Search box of the Chromosome view. To zoom in on a feature, start typing the feature name; Partek Flow will show suggestions available in the corresponding annotation file (the current annotation is visible in the column on the right) (an example is shown)
The Position box enables the user to visualize a region in the genome. Coordinates are accepted in the following format: chromosome:start – end (zero-based). To show an entire chromosome, it is sufficient to enter just the chromosome number. The U-turn icon on the right ![]() takes you back to the original view, i.e. resets the zoom level to the view that was shown when the viewer was first opened.
takes you back to the original view, i.e. resets the zoom level to the view that was shown when the viewer was first opened.
Next, the mode selector (Figure 3) helps you to quickly navigate through the results.
Figure 3. Mode selector (from left): pointer mode, zoom mode, pan mode
When pointer mode is activated, the appearance of the cursor will change to an arrow (Figure 4). Pointer mode provides details on any item (e.g. short sequencing read, variant, microarray probe, annotation feature) selected on the canvas. The selected item is highlighted by a green box (Figure 4).

Figure 4. Highlighted item in chromosome view: the microarray probe highlighted by a green box was selected using the pointer mode (microarray probes are used just as an example)
When zoom mode is activated, the appearance of the cursor will change to a plus sign ( + ). With the zoom mode on, you can magnify a specific region by positioning the cursor ( + ) to the left of the area of interest and then <left-click> & drag the mouse to the right of the area of interest (Figure 5). When the viewer refreshes, it will come "closer" to the region that was selected (by halving the number of basis displayed on the screen).
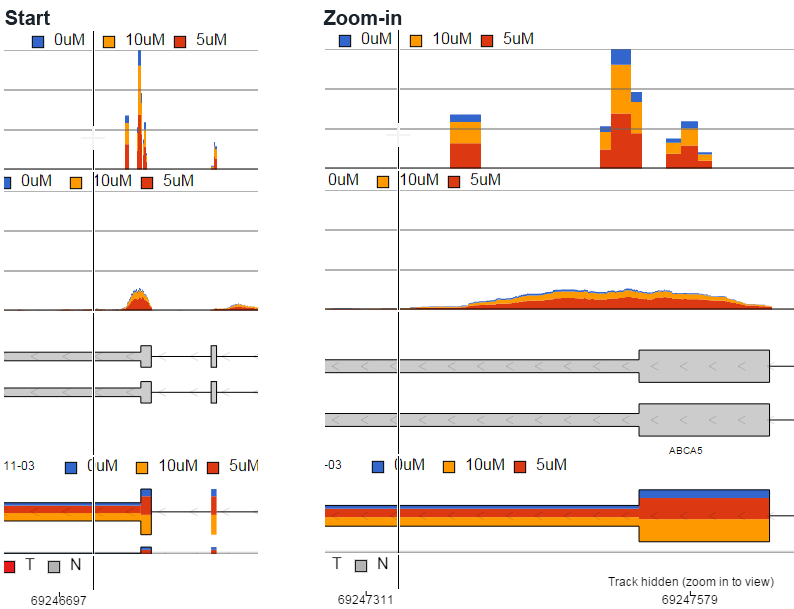
Figure 5. Using & dragging mouse to zoom into a region of genome (start magnification shown on the left). After releasing the left mouse button, Partek Flow will zoom into the highlighted region (right panel; an example is shown)
Alternatively, <left-click> on the canvas and Partek Flow will zoom in one level, by halving the number of bases visible on the screen. To zoom out one level Ctrl & <left-click> should be used; as a result, the number of visible bases will be roughly doubled.
When panning mode is activated, the appearance of the cursor will change to four arrows (Figure 6). <Left-click> and drag the canvas to the left or to the right to move upstream or downstream in the genome, respectively.
Figure 6. Appearance of the mouse cursor when the panning mode is on
Zooming out and in can also be achieved with the zoom tool (Figure 7) by moving the golden slider left or right, respectively, or by selecting the magnifying glass icons (– and +).
 Figure 7. Zoom tool
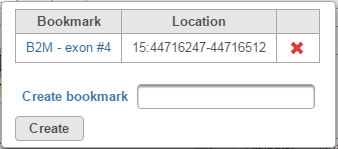
Figure 8. Bookmark dialog.The 'B2M' is shown as an example of an existing bookmark
The next time you want to go directly to the same location, select the name of the bookmark (example in the Figure 8 lists B2M - exon #4 as the bookmark name) and Partek Flow will plot the region as defined in the Location column. To remove a bookmark, select the red cross icon ![]() .
.
Once the plot has been modified, you can save the current appearance of the canvas by using the save icon ![]() . The resulting dialog (shown in Figure 9) enables you to change the image Format (options include: .svg, .png, .pdf), Size, and Resolution. The image will be saved in your Downloads directory.
. The resulting dialog (shown in Figure 9) enables you to change the image Format (options include: .svg, .png, .pdf), Size, and Resolution. The image will be saved in your Downloads directory.
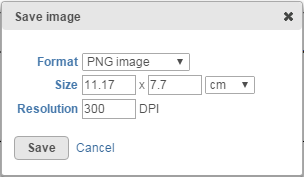
Figure 9. Save image dialog. Upon selecting Save, saves the current visualisation on the canvas
Additional Assistance
If you need additional assistance, please visit our support page to submit a help ticket or find phone numbers for regional support.


| Your Rating: |
|
Results: |

|
36 | rates |
Overview
Content Tools
1 Comment
Melissa del Rosario
author: ilukic