Obtain and add files to the project
The project includes Human Breast Cancer (In Situ Replicate 1) and Human Breast Cancer (In Situ Replicate 2) files in one project.
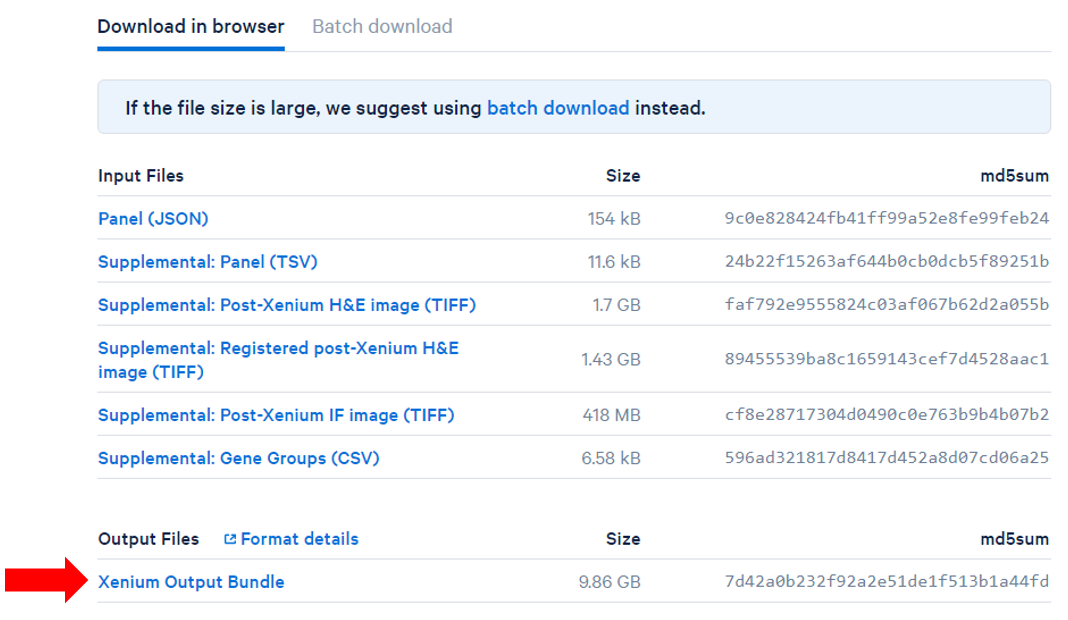
- Obtain the Xenium Output Bundles (Figure 1) for each sample.
- Navigate the options to select 10x Genomics Xenium Output Bundle as the file format for input.
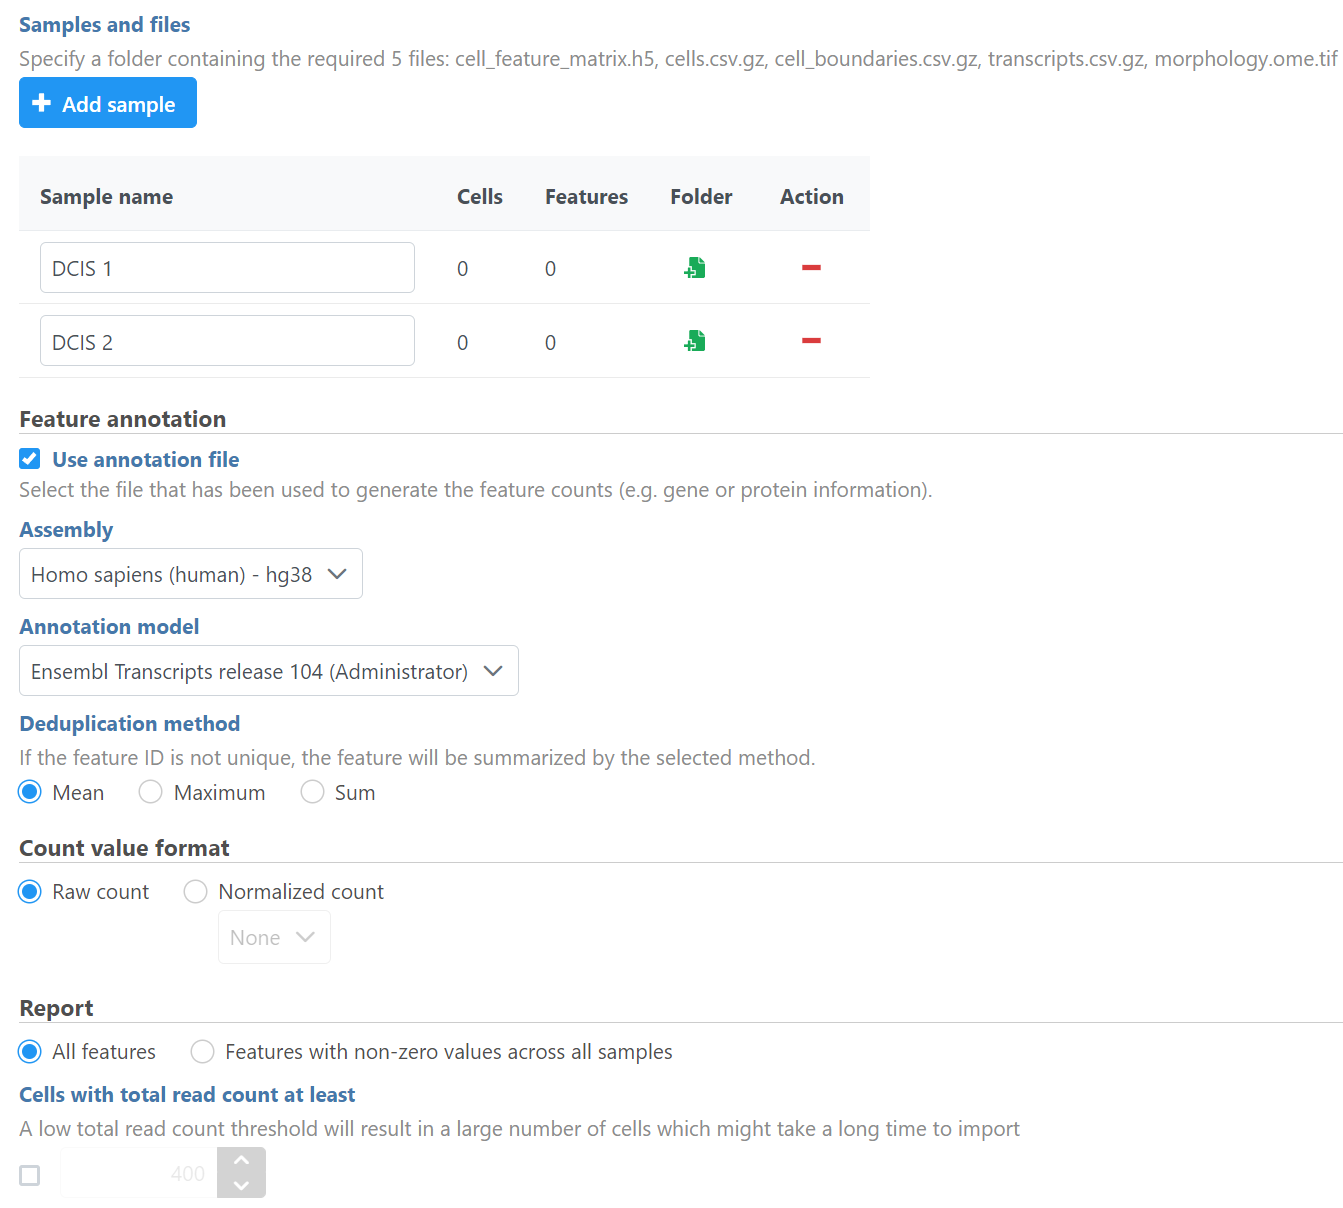
Choose to import 10x Genomics Xenium for your project (Figure 2).
- Click Transfer files on the homepage, under settings, or during import.
- Click the blue + Add sample button then use the green Add sample button to add each sample's Xenium output bundle folder. If you have not already transferred the folder to the server, this can be done using Transfer files to the server (Figure 3).
- Navigate to the appropriate folder for each sample using Add sample (Figure 4).
The Xenium output bundle should be included for each sample (Figure 4). Each sample requires the whole sample folder or a folder containing these 5 files: cell_feature_matrix.h5, cells.csv.gz, cell_boundaries.csv.gz, transcripts.csv.gz, morphology.ome.tif. Once added, the Cells and Features values will update. You can choose an annotation file during import that matches what was used to generate the feature count.
Do not limit cells with a total read count since Xenium data is targeted to less features.
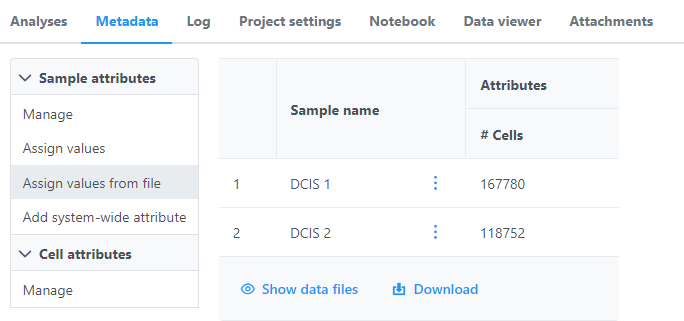
Once the download completes, the sample table will appear in the Metadata tab, with one row per sample (Figure 5).
The sample table is pre-populated with one sample attributes: # Cells. Sample attributes can be added and edited manually by clicking Manage in the Sample attributes menu on the left. If a new attribute is added, click Assign values to assign samples to different groups. Alternatively, you can use the Assign values from a file option to assign sample attributes using a tab-delimited text file. For more information about sample attributes, see here. Cell attributes are found under Sample attributes and can be added by publishing cell attributes to a project.
For this tutorial, we do not need to edit or change sample attributes.
Additional Assistance
If you need additional assistance, please visit our support page to submit a help ticket or find phone numbers for regional support.


| Your Rating: |
    
|
Results: |
    
|
0 | rates |


