The data set accompanying this document consists of sixteen human samples processed by Illumina MethylationEPIC BeadChip arrays. The data set is taken from a study of DNA methylation in human B cells and B cells infected with Epstein-Barr virus (EBV). The data files can be downloaded from Gene Expression Omnibus using accession number GSE93373.
To follow this tutorial, download the 32 .idat files associated with GSE93373 (note that two .idat files are generated for each array) and unzip them on your local computer using 7-zip, WinRAR, or a similar program. The .idat files can be downloaded individually by selecting the links for each sample or all together in one zipped folder by selecting the GSE93373_RAW.tar file at the bottom of the page.
- Store the 32 .idat files at C:\Partek Training Data\Methylation or to a directory of your choosing. We recommend creating a dedicated folder for the tutorial
- Go to the Workflows drop down list, select Methylation (Figure 1)

Figure 1. Selecting the methylation workflow
- Select Illumina BeadArray Methylation from the Methylation sub-workflows panel (Figure 2)

Figure 2. Selecting the Illumina BeadArray Methylation workflow
- That will open Illumina BeadArray Methylation workflow (Figure 3)

Figure 3. Illumina BeadArray Methylation workflow
- Select Import Illumina Methylation Data to bring up the Load Methylation Data dialog
- Select Import human methylation 450/850 .idat files (Figure 4)
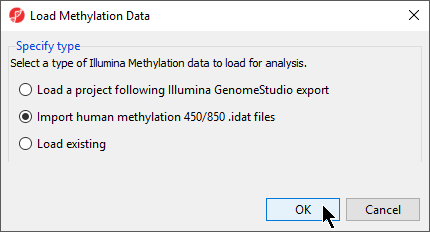
Figure 4. Selecting human methylation 450/850 .idat file type for import
- Select OK
- Select Browse... to navigate to the folder where you stored the .idat files
All .idat files in the folder will be selected by default (Figure 5).

Figure 5. Selecting .idat files to import
- Select Add File(s) > to move the files to the idat Files to Process pane of the Import Illumina iDAT Data dialog (Figure 6)

Figure 6. Confirming selection of .idat files for import
- Select Next >
The following dialog (Figure 7) deals with the manifest file, i.e. probe annotation file. If a manifest file is not present locally, it will be downloaded in the Microarray libraries directory automatically. The download will take place in the background, with no particular message on the screen and it may take a few minutes, depending on the internet connection. In the future, you may want to reanalyze a data set using the same version of the manifest file used during the initial analysis, rather than downloading an up-to-date version. To facilitate this, the Manual specify option in the Manifest File section allows you to specify a specific version. For this tutorial, we will use the latest available manifest file.

Figure 7. Selecting manifest file and output file
By default the output file destination is set to the file containing your .idat files and the name matches the file folder name. The name and location of the output file can be changed using the Output File panel.
- Select Customize to view advanced options for data normalization
In the Algorithm tab of the Advanced Import Options dialog (Figure 8), there are five options available. Select the (![]() ) next to each method for details. We recommend using the default options; however, advanced users can select their preferred normalization method. If you want to import probe intensity, raw probe intensity, probe signals, raw probe signals, or anti-log probe intensity values, they can be added to the data import using the Outputs tab of the Advanced Import Options dialog. Probe intensities and raw probe intensities can be used for advanced troubleshooting purposes and antilog probe intensities can be used for copy number detection. For this tutorial, we do not need to import any of these values.
) next to each method for details. We recommend using the default options; however, advanced users can select their preferred normalization method. If you want to import probe intensity, raw probe intensity, probe signals, raw probe signals, or anti-log probe intensity values, they can be added to the data import using the Outputs tab of the Advanced Import Options dialog. Probe intensities and raw probe intensities can be used for advanced troubleshooting purposes and antilog probe intensities can be used for copy number detection. For this tutorial, we do not need to import any of these values.

Figure 8. Advanced Import Options offers choice of normalization method and additional data outputs
- Select OK to close the Advanced Import Options dialog
- Select Import on the Import Illumina iDAT data dialog
The imported and normalized data will appear as a spreadsheet 1 (Methylation) (Figure 9)

Figure 9. Viewing the imported methylation data in a spreadsheet
Additional Assistance
If you need additional assistance, please visit our support page to submit a help ticket or find phone numbers for regional support.


| Your Rating: |
|
Results: |

|
1 | rates |
Overview
Content Tools