Page History
...
| Multimedia | ||||
|---|---|---|---|---|
|
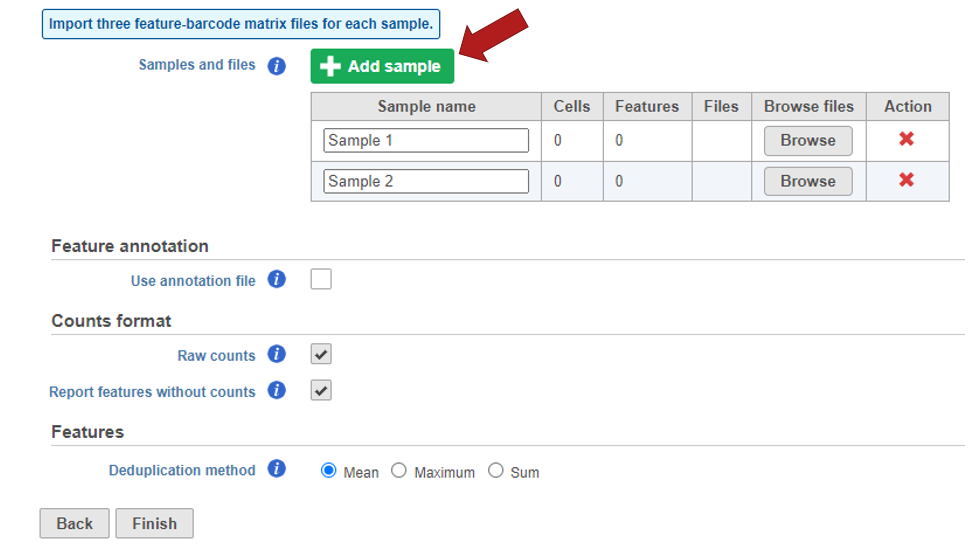
Importing matrices into Partek Flow (this Market Exchange Format is popular for public repositories)
To import the matrices into Partek Flow, create a new project and click Import > Import scRNA count feature-barcode-mtx.
...
| Numbered figure captions | ||||
|---|---|---|---|---|
| ||||
|
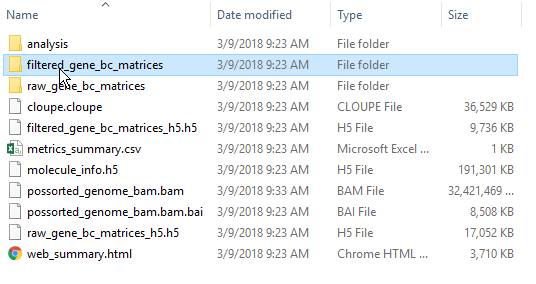
You must first transfer the files to the server. Use the ![]() Transfer files button on the Partek® Flow® homepage or use the
Transfer files button on the Partek® Flow® homepage or use the ![]() transfer files link to upload data to the server. Navigate to the folder containing your filtered matrices. By default, the Cell Ranger pipeline output will have a folder called filtered_gene_bc_matrices. It is helpful to rename and organize the files prior to transfer.
transfer files link to upload data to the server. Navigate to the folder containing your filtered matrices. By default, the Cell Ranger pipeline output will have a folder called filtered_gene_bc_matrices. It is helpful to rename and organize the files prior to transfer.
Drag and drop or click my device to browse files from the device.
Click browse to modify the upload directory. The ![]() upload directory should be specified, known, and distinguishable for project file management. You will return to this directory and access the files to import them into a project.
upload directory should be specified, known, and distinguishable for project file management. You will return to this directory and access the files to import them into a project.
| Numbered figure captions | ||||
|---|---|---|---|---|
| ||||
|
...
Overview
Content Tools