| Table of Contents |
|---|
| maxLevel | 2 |
|---|
| minLevel | 2 |
|---|
| exclude | Additional Assistance |
|---|
|
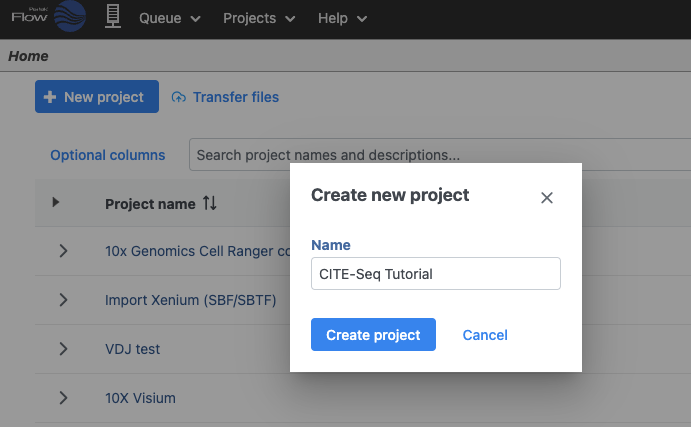
Create a new Project
Let's start by creating a new project.
- On the Home page, click New project (Figure 1)
- Give the project a name
- Click Create project
| Numbered figure captions |
|---|
| SubtitleText | Create a new project and give it a meaningful name (e.g. CITE-Seq tutorial) |
|---|
| AnchorName | Creating a new project |
|---|
|
|
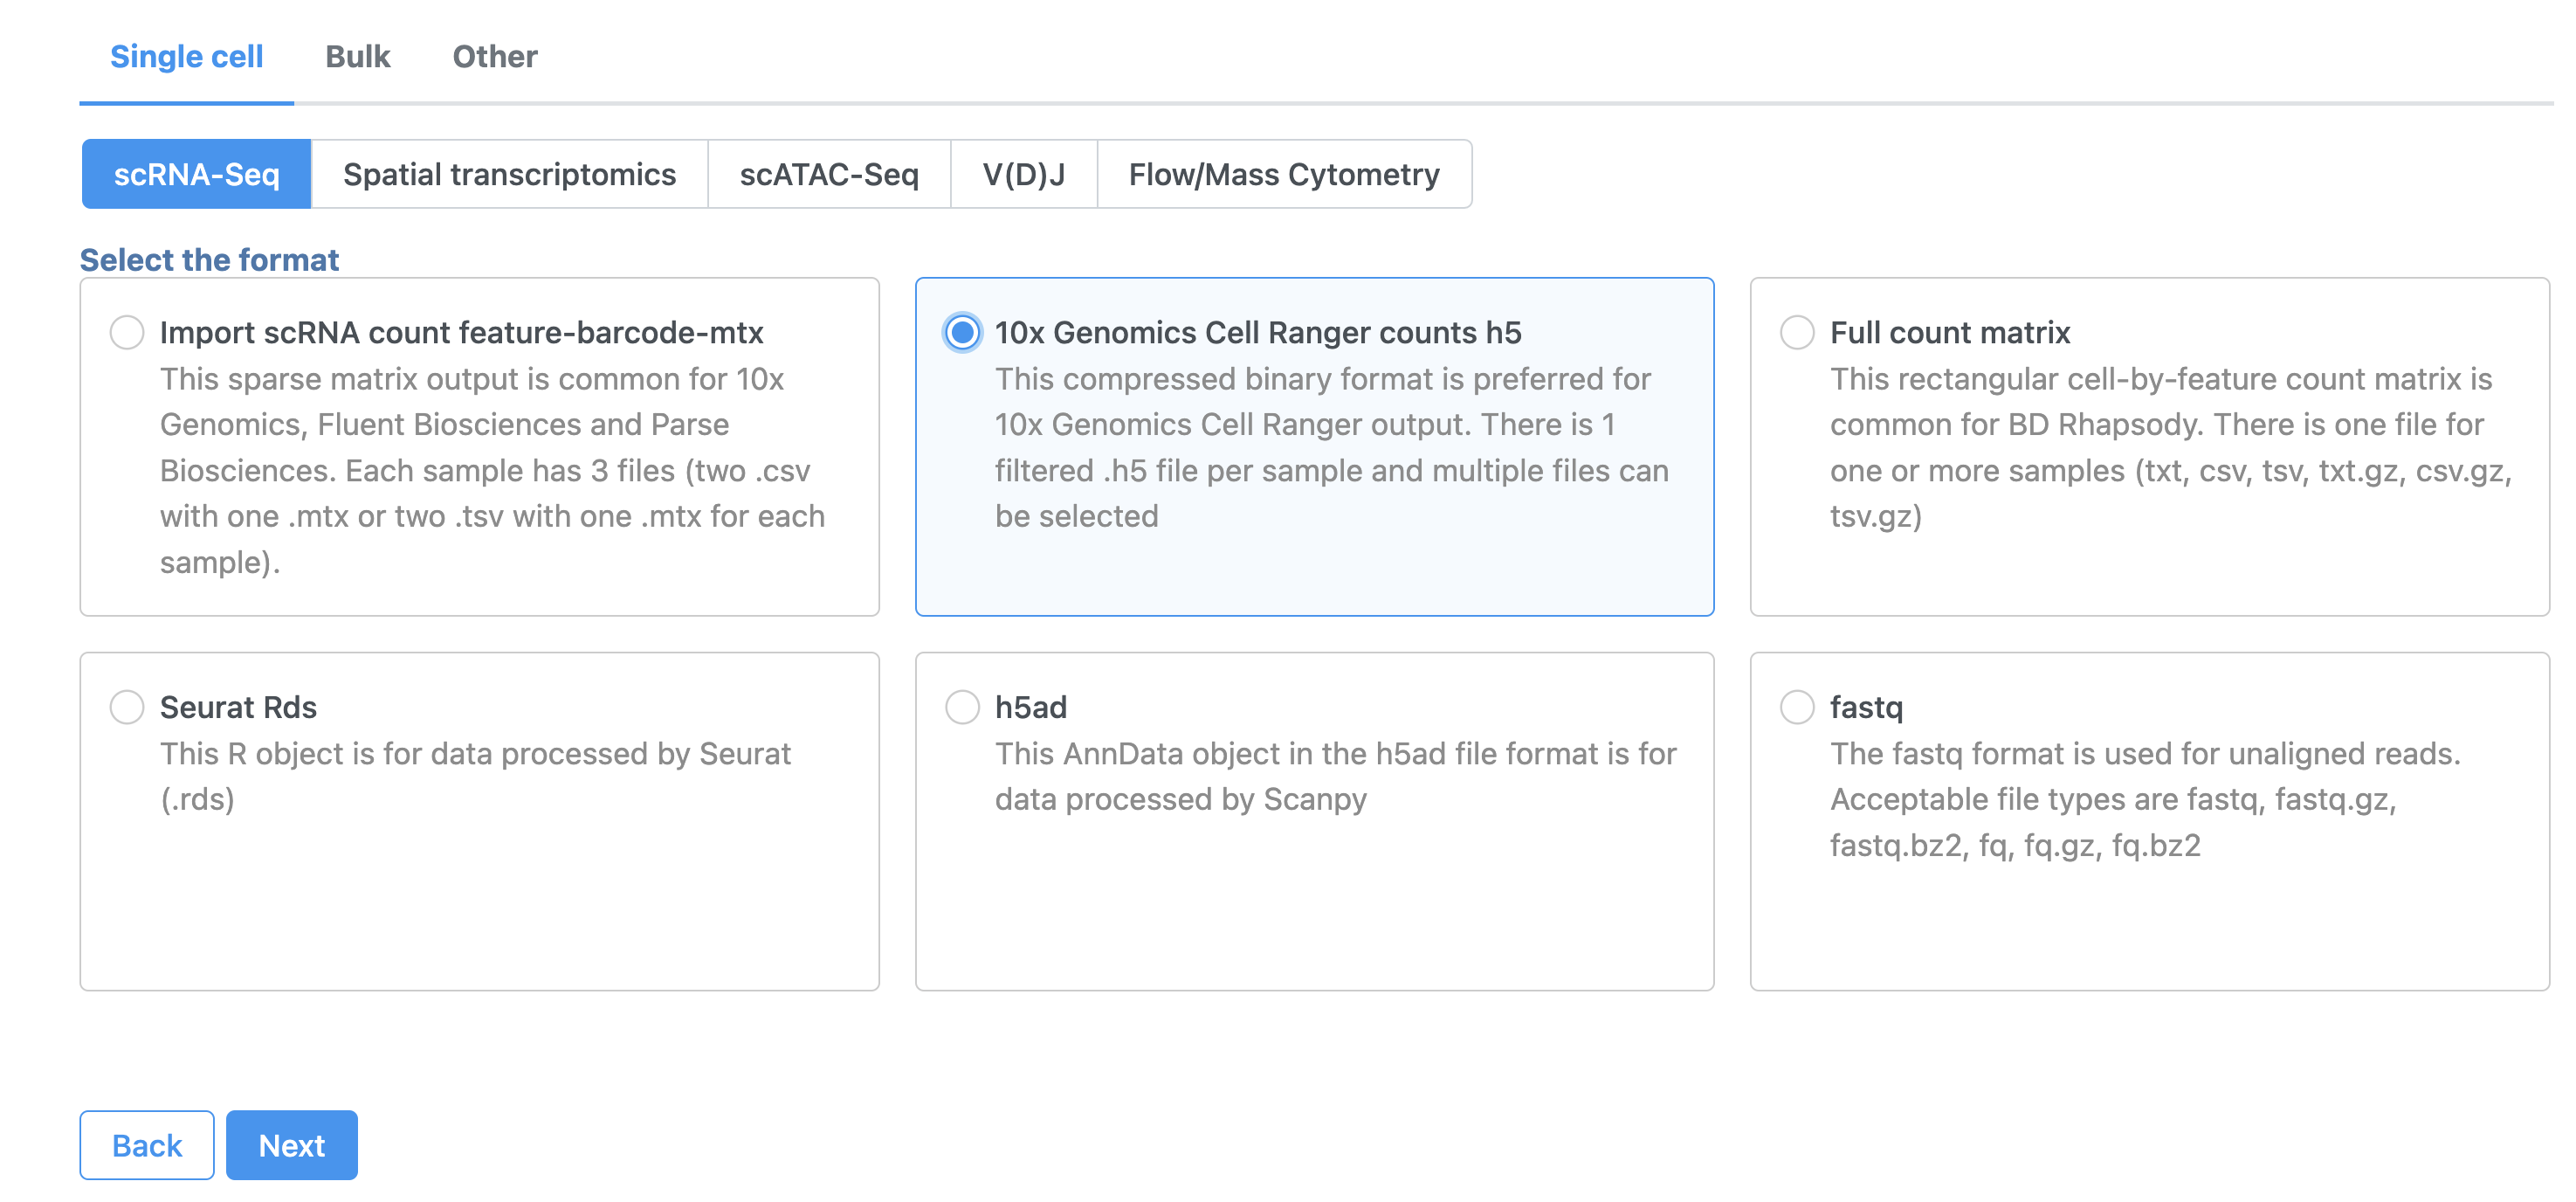
Import data
- In the Analyses tab, click Add data
- Click 10x Genomics Cell Ranger counts h5 (Figure 2)
- Choose the filtered HDF5 file for the MALT sample produced by Cell Ranger
| Numbered figure captions |
|---|
| SubtitleText | Import options for CITE-Seq tutorial data |
|---|
| AnchorName | Import options for CITE-Seq tutorial data |
|---|
|
|
Move the .h5 file to where Partek Flow is installed using  , then browse to its location.
| Numbered figure captions |
|---|
| SubtitleText | Import options for CITE-Seq tutorial data |
|---|
| AnchorName | Import options for CITE-Seq tutorial data |
|---|
|
|
Note that Partek Flow also supports the feature-barcode matrix output (barcodes.tsv, features.tsv, matrix.mtx) from Cell Ranger. The import steps for a feature-barcode matrix are identical to this tutorial.
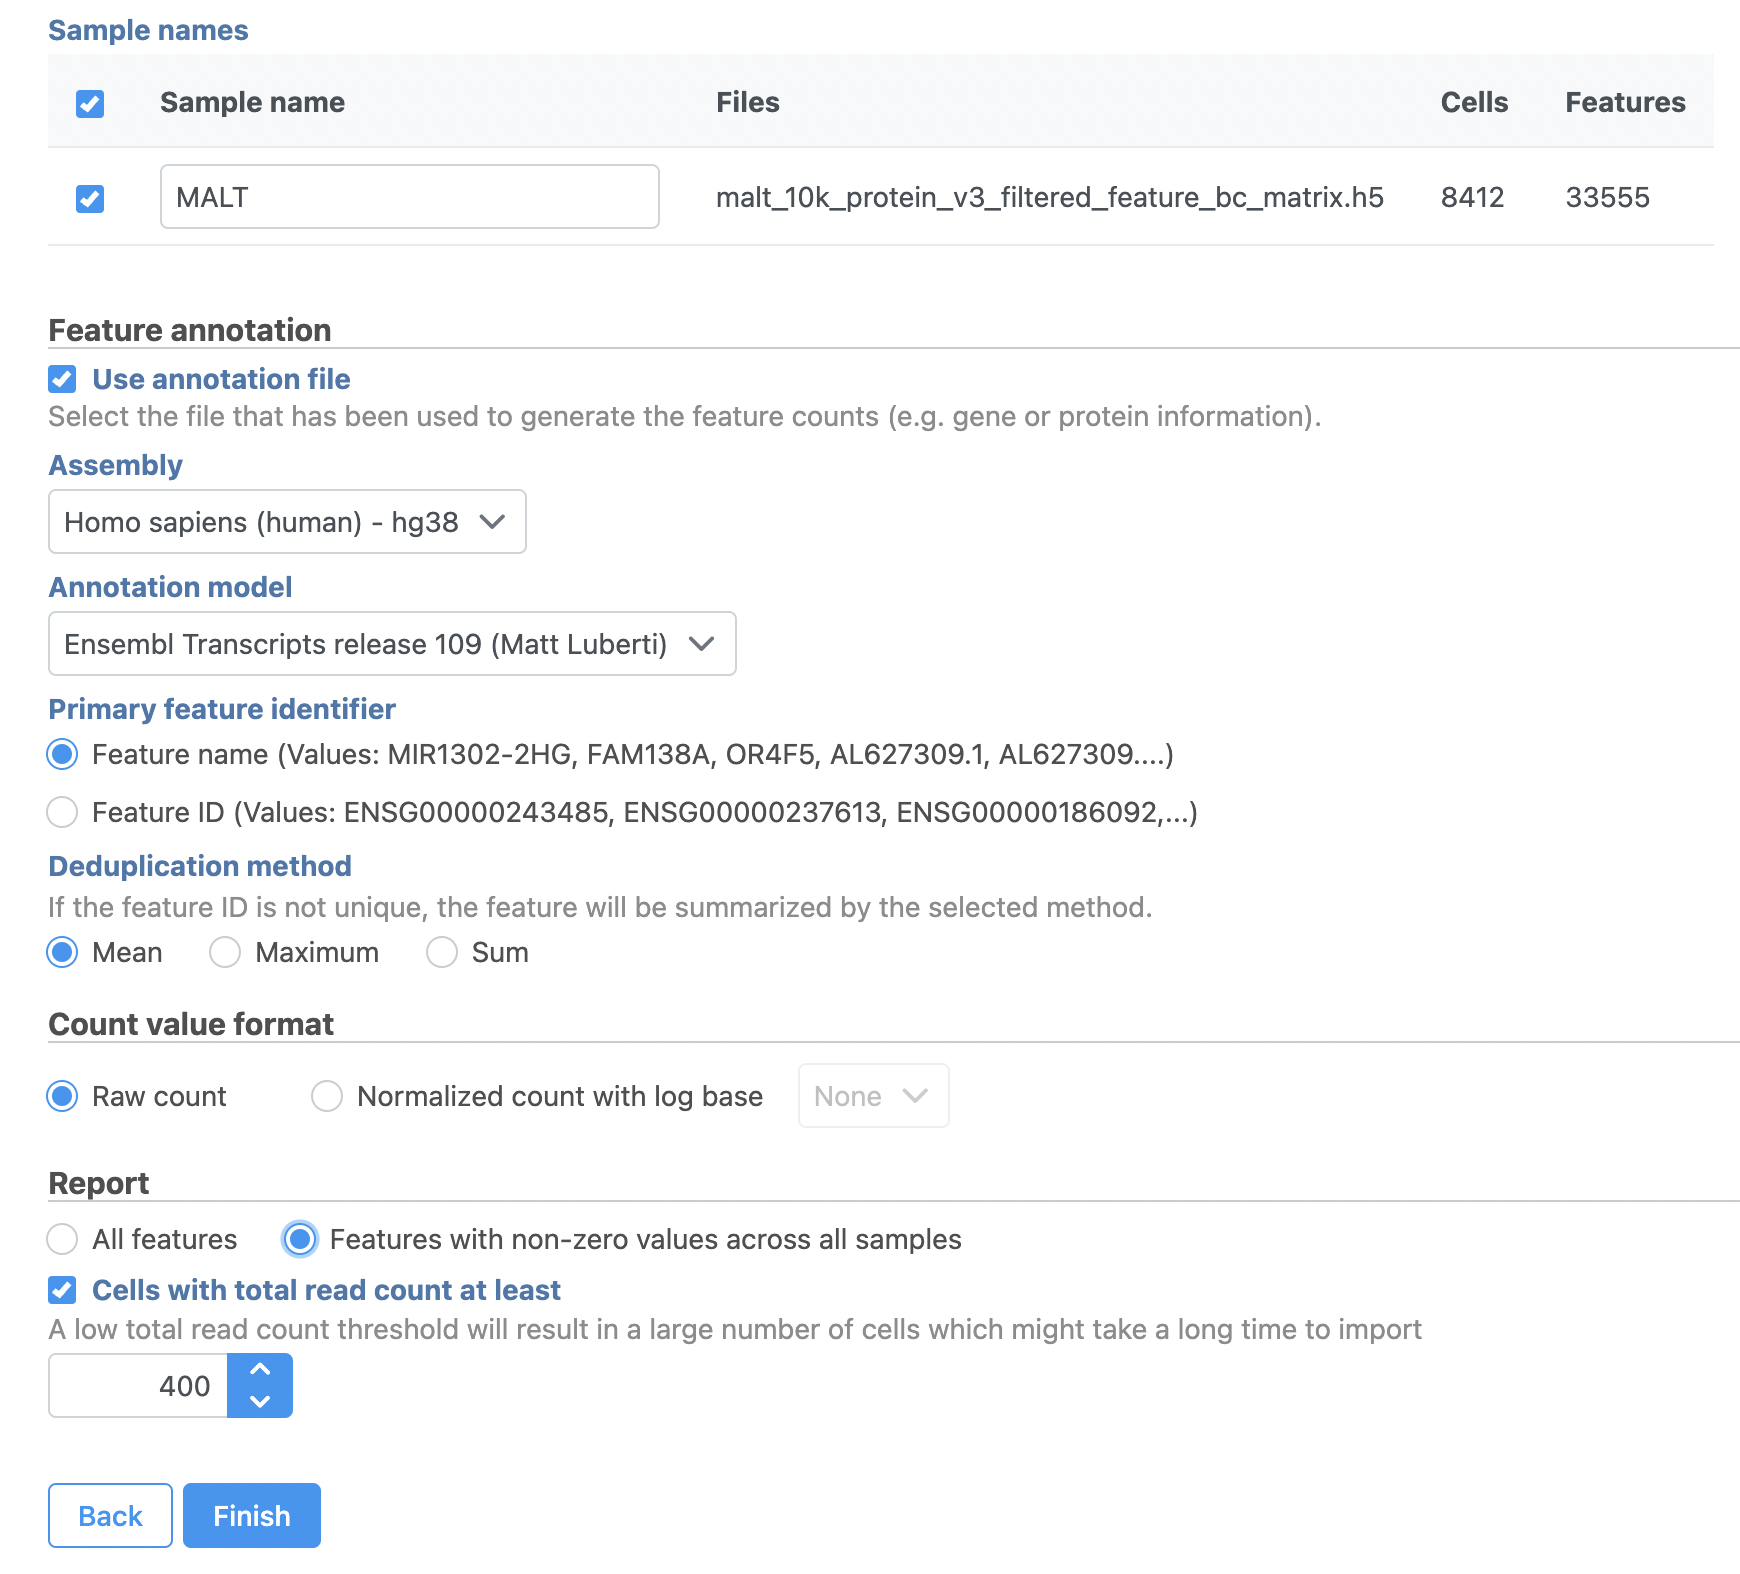
- Click Next
- Name the sample MALT (the default is the file name)
- Specify the annotation used for the gene expression data (here, we choose Homo sapiens (human) - hg38 and Ensembl Transcripts release 109). If Ensembl 109 is not available from the drop-down list, choose Add annotation and download it.
- Check Features with non-zero values across all samples in the Report section
- Click Finish (Figure 3)
| Numbered figure captions |
|---|
| SubtitleText | File format options for MALT data set |
|---|
| AnchorName | CITE-Seq file format options |
|---|
|
|
A Single cell counts data node will be created under the Analyses tab after the file has been imported. We can move on to processing the data.