Page History
...
| Numbered figure captions | ||||
|---|---|---|---|---|
| ||||
|

In the next dialog, use Browse… to point to the folder in which the .idat files were unzipped and use the Add File > button to move the .idat files to the box on the right (i.e. idat Files to Process; Figure 2). Select Next > to proceed.
| Numbered figure captions | ||||
|---|---|---|---|---|
| ||||
|

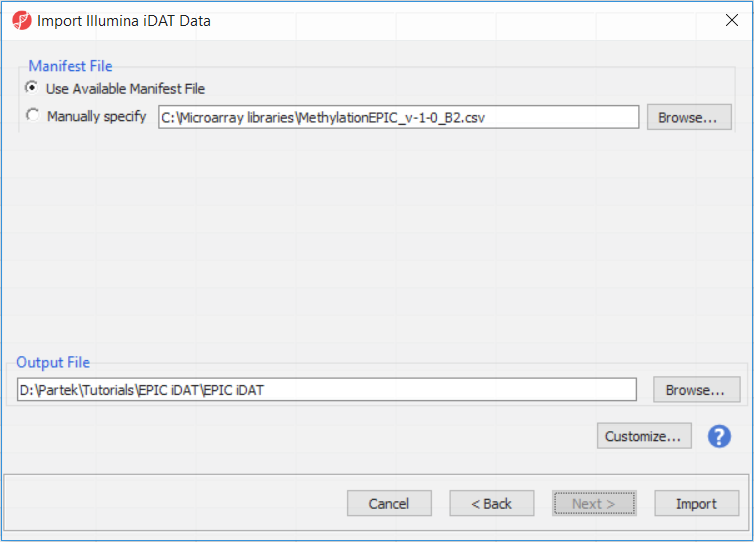
The following dialog (Figure 3) deals with the manifest file, i.e. probe annotation. If a manifest file is not present locally, it will be downloaded in the Microarray libraries directory automatically. The download will take place in the background, with no particular message on the screen and it may take a few minutes, depending on the internet connection. If you have already downloaded the manifest file, to use it, select Use Available Manifest File option. If you have multiple versions available, you can pick an alternative by selecting Manually specify. The latter scenario corresponds to the situation where you want to reanalyze a data set at a later time. To enforce reproducibility, you may want to use the same version of the manifest file that you used when the data was first processed, rather than downloading an up-to-date version.
...
| Numbered figure captions | ||||
|---|---|---|---|---|
| ||||
|
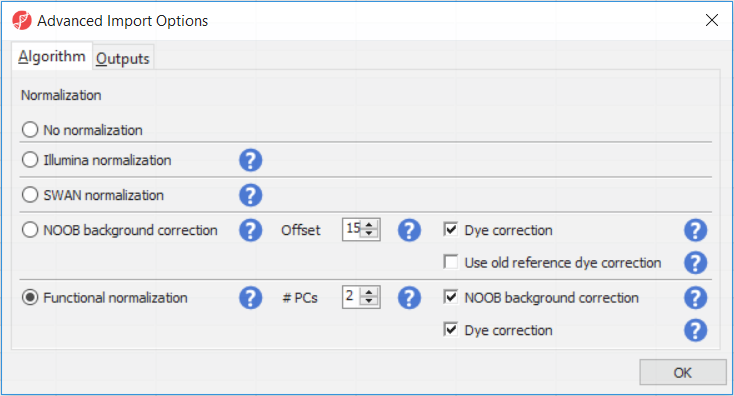
The Customize... button enables a granular control of the import process (Figure 4). First, the normalisation procedure is specified on the Algorithm tab (Figure 4).
...
| Numbered figure captions | ||||
|---|---|---|---|---|
| ||||
|
| Numbered figure captions | ||||
|---|---|---|---|---|
| ||||
|
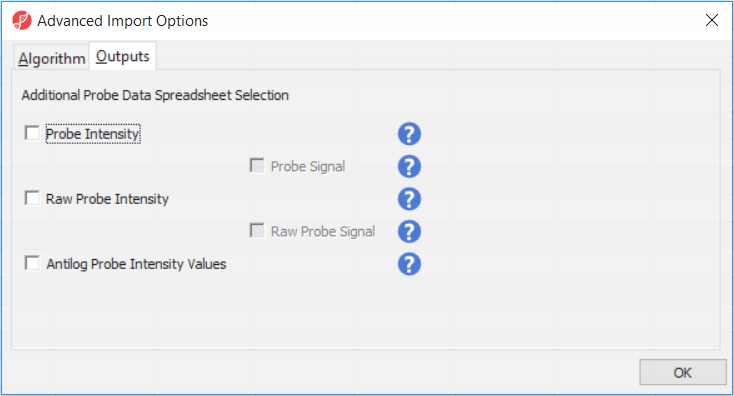
Probe Intensity results in a spreadsheet with samples on rows (with suffix _probe added to the file name), probes on columns, and the sum of raw methylated and unmethylated probe intensities in the cells (the spreadsheet name will also have suffix _probe). Upon selecting Probe Intensity, you can additionally select Probe Signal, which will append rows to the "probe intensity" spreadsheet: for each sample a row with methylated (suffix _meth) and a separate row with unmethylated (suffix _unmeth) intensities (in the other words, three rows per sample).
...
Overview
Content Tools