Page History
| Table of Contents | ||||
|---|---|---|---|---|
|
Project Deletion
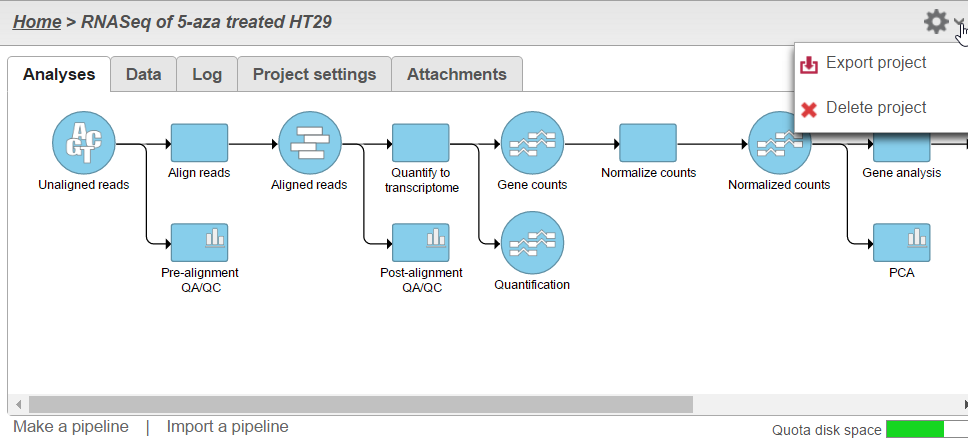
A project may be deleted from the Partek Flow server using the ![]()
![]() button on the upper right side of the Project View page (Figure 1).
button on the upper right side of the Project View page (Figure 1).
| Numbered figure captions | ||||
|---|---|---|---|---|
| ||||
|
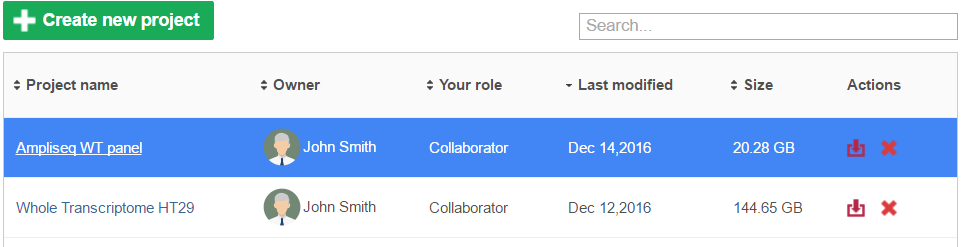
Alternatively, you can also delete a project your projects directly from the Home page Homepage by clicking the button under the
![]() Delete project under the Actions column (Figure 2).
Delete project under the Actions column (Figure 2).
| Numbered figure captions | ||||
|---|---|---|---|---|
| ||||
|
Selecting
...
Files for Deletion
After clicking the button
![]() Delete project, a page displaying all the files associated with the project appears. Clicking the triangle
Delete project, a page displaying all the files associated with the project appears. Clicking the trianglewill expand the list. Select the files to be deleted from the server by clicking the corresponding checkboxes next to each file (Figure 3). By default, all output files generated by the project will be deleted.
| Numbered figure captions | ||||
|---|---|---|---|---|
|
...
|
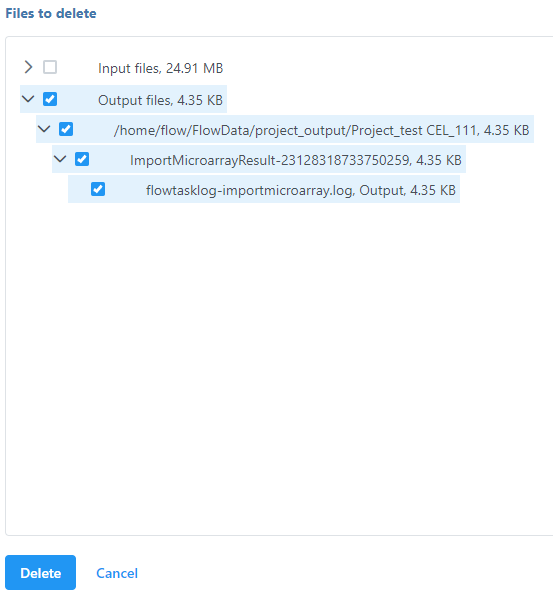
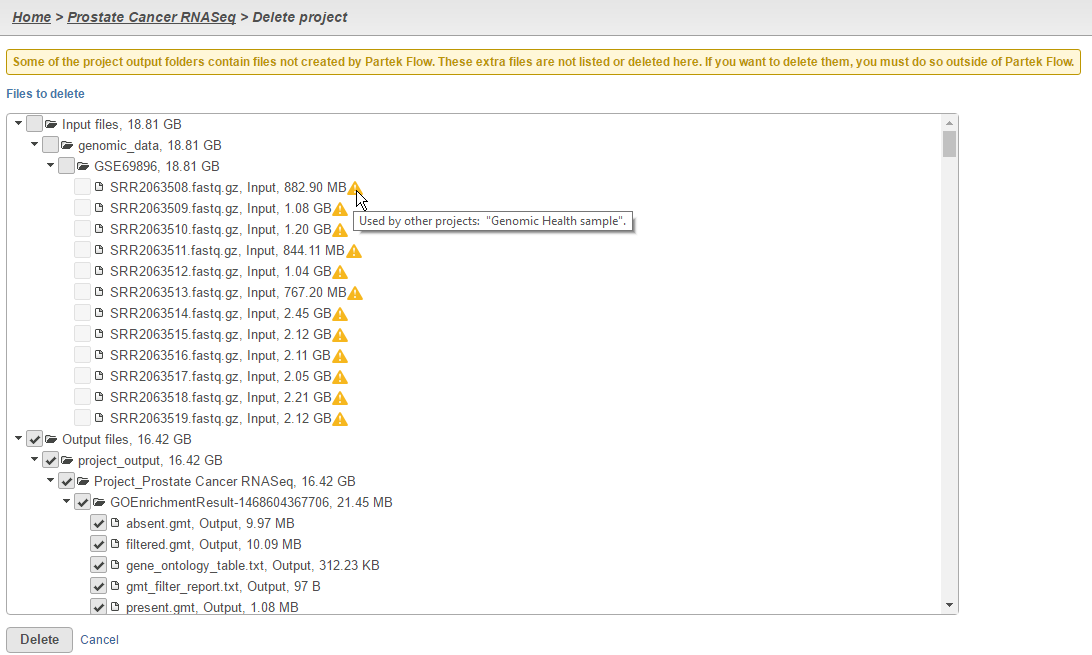
If you wish to delete the input files associated with the project, you can do that as well by clicking the Input files checkbox. Note that a warning icon  appears next to input files that are used in other projects (Figure 4). These cannot be deleted until all projects associated with them are deleted.
| Numbered figure captions | ||||
|---|---|---|---|---|
| ||||
|
Project Import and Export
Every project can be exported before it is removed from the server. By exporting old projects, so you can free up some server storage on your server, and . You can import the exported project in to back into Partek Flow later on if needed. When you are an opened project,
Exporting a Project
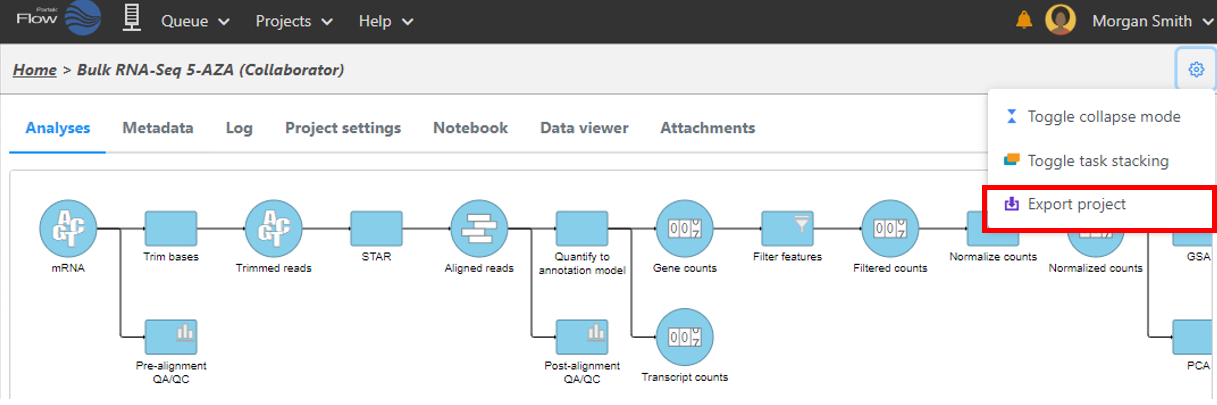
Open a project and on the analysis page, click on the ![]() button to choose gear
button to choose gear  button and choose
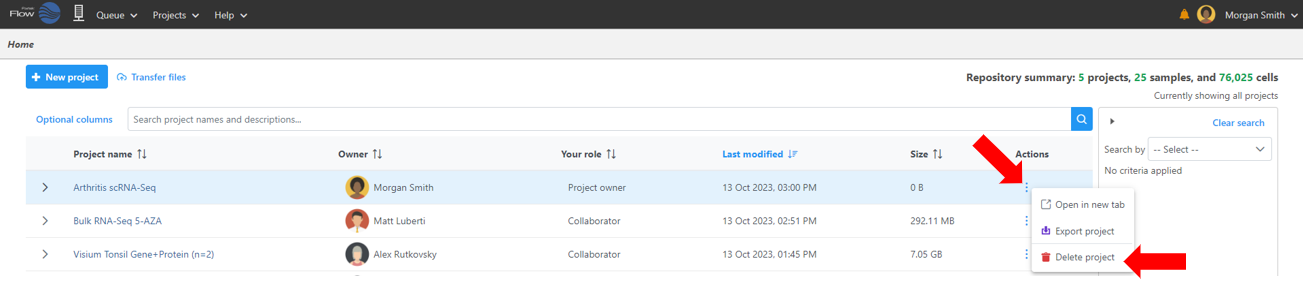
 ![]() Export project option (Figure 1), or on the . You can also export the project directly from Partek Flow home page , click on the
Export project option (Figure 1), or on the . You can also export the project directly from Partek Flow home page , click on the button by clicking the
 ![]() icon under the Action column (Figure 2).
icon under the Action column (Figure 2).
When you export a project, you will be asked whether to include library files to export , if or not. If you choose Yes, the current version of library files used in the project will be archived , and you can reproduce the result when you later import the project and re-do the analysis. However, however, it will make the archive size bigger. When If you choose No, the library files will not be exported, when later on . Note that when you import the project later, you can only use the available version of needed library files to re-do the same analysis, and the result results might not be the same.
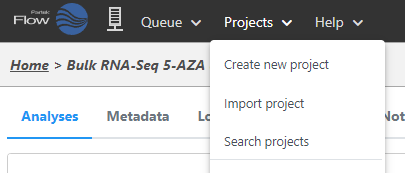
Importing a Project
The Import project import option is under Projects drop-down menu on the top of the Partek Flow page (Figure 5). This can be accessed on any Partek Flow page.
| Numbered figure captions | ||||
|---|---|---|---|---|
|
...
|
The input of this option is the zipped file format of the exported project. Browse to the file location which can either be either on the Partek Flow server, or a local machine, or an a URL. The zip file first needs to be uploaded to the Partek Flow server (if it is not on the server already), and then Partek Flow will unpack the zip file into a project. The project name will be the same as the exported project name.
| Additional assistance |
|---|
|
If the project with the same name already exists, the imported project will have a number appended to it (e.g., ProjectName_1).
The owner of the imported project will be the user that imported it.
| Page Turner | ||||||
|---|---|---|---|---|---|---|
|
| Additional assistance |
|---|
| Rate Macro |
|---|
Overview
Content Tools