Page History
...
We will be using the RNA-seqSeq workflow to analyze RNA-seq Seq data throughout this tutorial. The commands included in the RNA-seq Seq workflow are also available form the command toolbar, but may be labeled differently.
- Select the RNA-seq Seq workflow by selecting it from the Workflow drop-down menu in the upper right-hand corner of the Partek Genomics Suite window (Figure 1)
| Numbered figure captions | ||||
|---|---|---|---|---|
|
...
|

The Partek Genomics Suite software can import next generation sequencing data that has been aligned to a reference genome. Two standard types of alignment formats can be imported: .BAM and .SAM. It is also possible to concert ELAND .txt files to .BAM files with the converter found in the Tools menu in the main command bar. The data used in this tutorial was aligned using the Partek® Flow software ® software and saved as .BAM files.
- To import the .BAM files, select Import and Manage Samples from the Import section of the RNA-seq Seq workflow. The Sequence Import dialog box will open (Figure 2)
| Numbered figure captions | ||||
|---|---|---|---|---|
| ||||
|
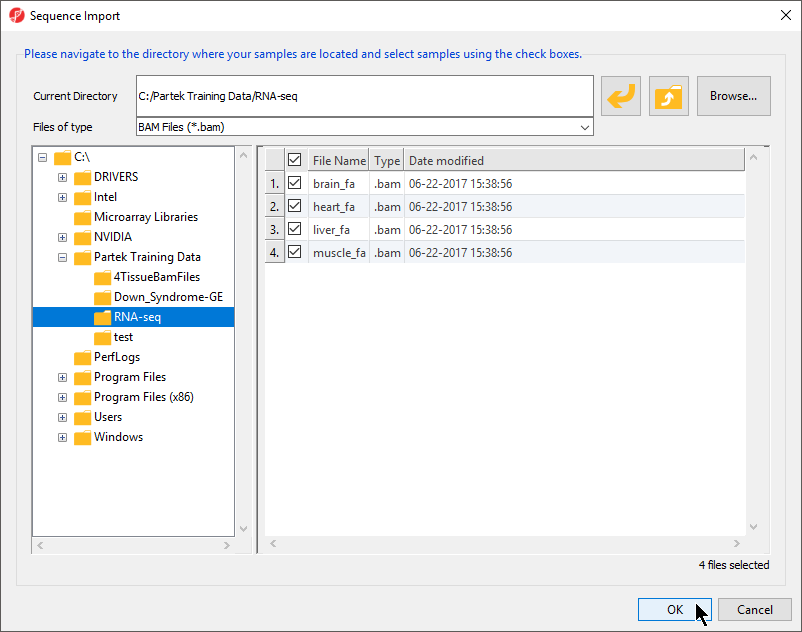
- Select BAM Files (*.bam) from the Files of type drop-down menu if not set by default
- Use the file browser panel on the left-hand side of the Sequence Dialog or select Browse... to navigate to the folder where you stored the tutorial .BAM files
- Files with checked boxes next to the file name will be imported. For this tutorial, select brain_fa, heart_fa, liver_fa, and muscle.fa
- Select OK to confirm the file selection and open the next dialog (Figure 3)
| Numbered figure captions | ||||
|---|---|---|---|---|
| ||||
|
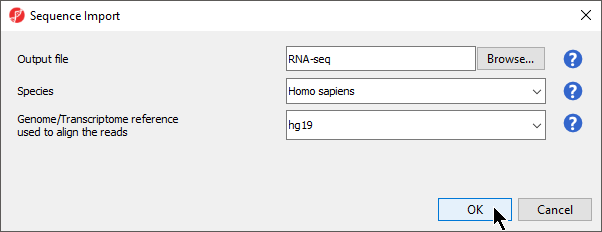
- Configure the dialog as shown (Figure 3)
Output file provides a name for the top-level spreadsheet. Browse can be used to change the output directory.
- Select Homo sapiens from the Species drop-down menu
This will allow us to select a human genome reference assembly alignment.
- Select hg19 for Genome/Transcriptome reference used to align the reads
This is the reference genome our tutorial data was aligned to using Partek Flow.
- Select OK to open the BAM Sample Manager dialog (Figure 4)
| Numbered figure captions | ||||
|---|---|---|---|---|
| ||||
|
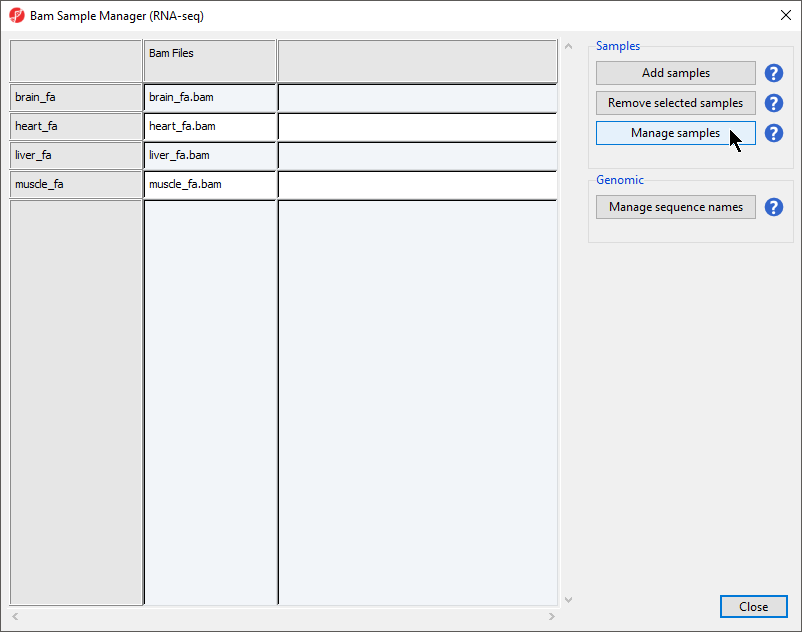
The Bam Sample Manager dialog allows additional samples to be added or removed after the initial sample import. To remove a sample, select a sample from the list and then select Remove selected samples. This dialog also allows us to modify samples.
- Select Manage samples to open the Assign files to samples dialog
Sample ID is by default set to the file name, which may be too long or uninformative, so the Assign files to samples dialog can be used to give informative names to samples.
- Change the samples names to Brain, Heart, Liver, and Muscle as shown (Figure 5)
The Assign files to samples dialog also allows multiple .BAM files to be merged into one sample. This is useful if reads from one sample are split into multiple .BAM files.
| numbered-figure-captions | ||||
|---|---|---|---|---|
| ||||
|
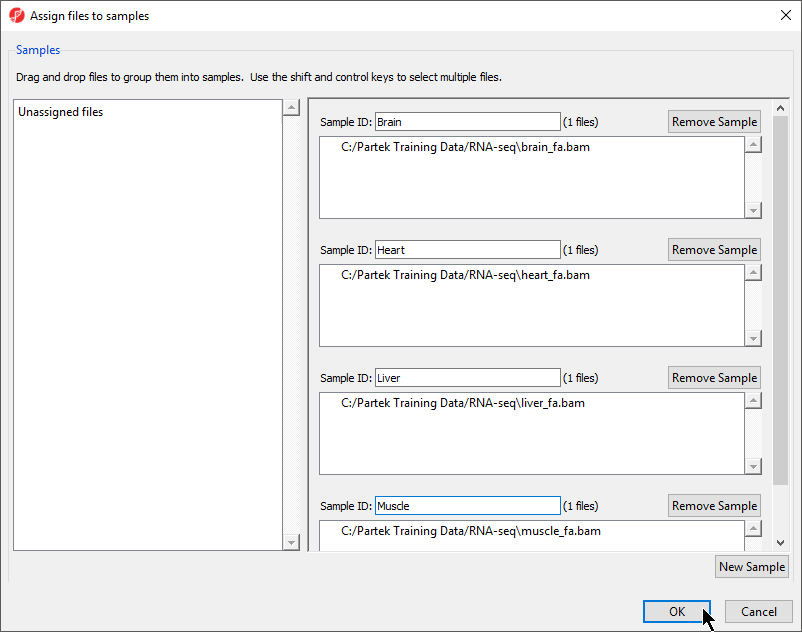
- Select OK to close the Assign files to samples dialog
- Select Close to exit the Bam Sample Manager dialog and view the imported data (Figure 6)
| Numbered figure captions | ||||
|---|---|---|---|---|
| ||||
|
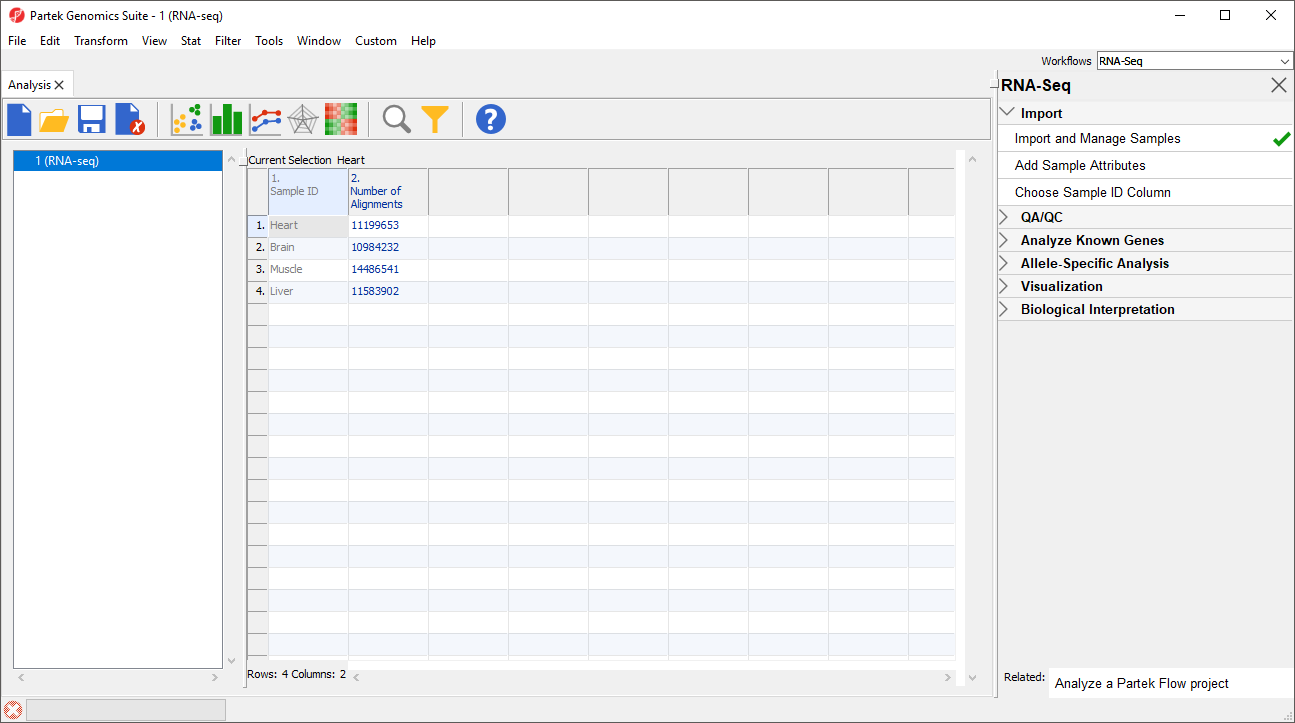
Additional files can be added to this spreadsheet using the Bam Sample Manager dialog. The Bam Sample Manager dialog can also be used to add imported samples to a separate spreadsheet by selecting a new option in the dialog, Add new experiment.
| Page Turner | ||
|---|---|---|
|
| additional-assistance |
|---|
|
| Rate Macro | ||
|---|---|---|
|
Overview
Content Tools