Page History
...
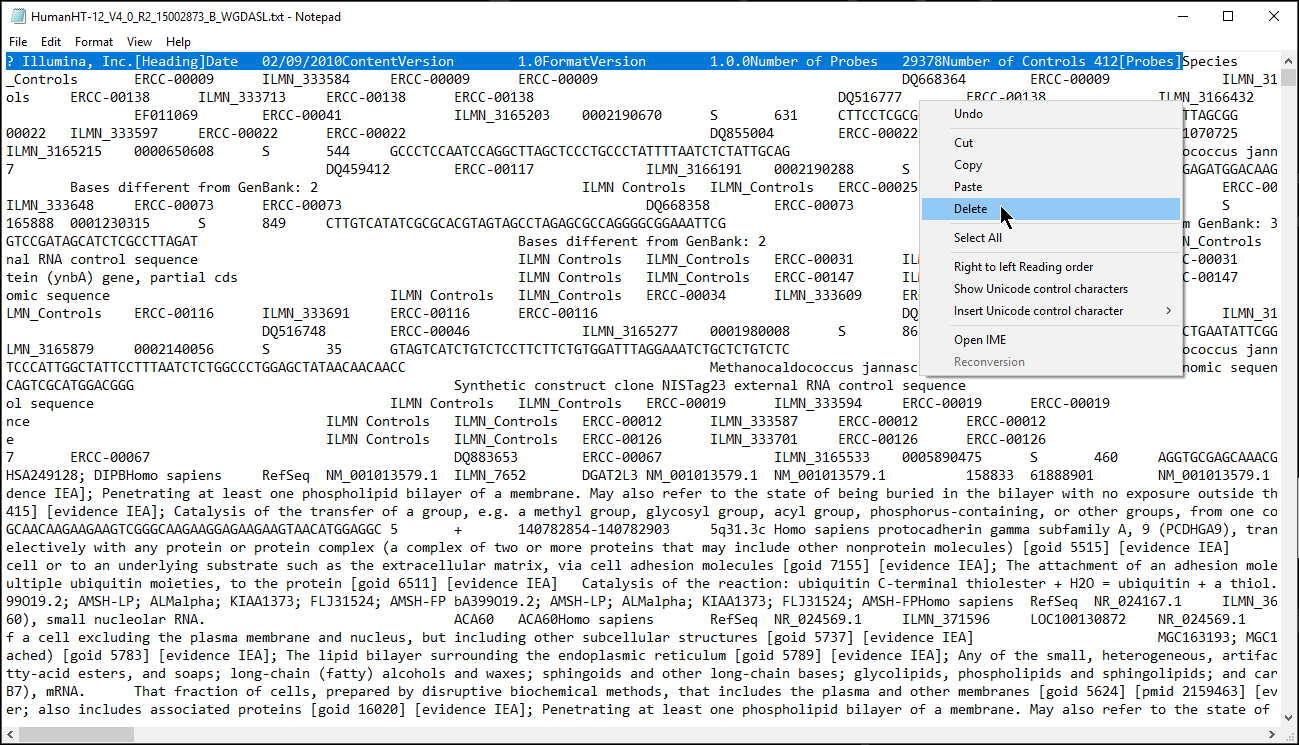
- Open the annotation file with a text editor such as Notepad++/WordPad/TextEdit (Microsoft Excel is not recommended to edit text files, for instance when used default settings, it converts gene names to dates and floating-point numbers)
Microsoft Excel is not recommended for viewing text files because on default settings it converts some gene names to dates and others to floating-point numbers
- Verify that a column in the annotation file matches the identifier in your data spreadsheet, e.g probe ID, the identifier has to must be unique to each row
- Remove the text before the first column header (Figure 1) or add # to each text box and save box
- Save the annotation file file as a .txt file
| Numbered figure captions | ||||
|---|---|---|---|---|
| ||||
|
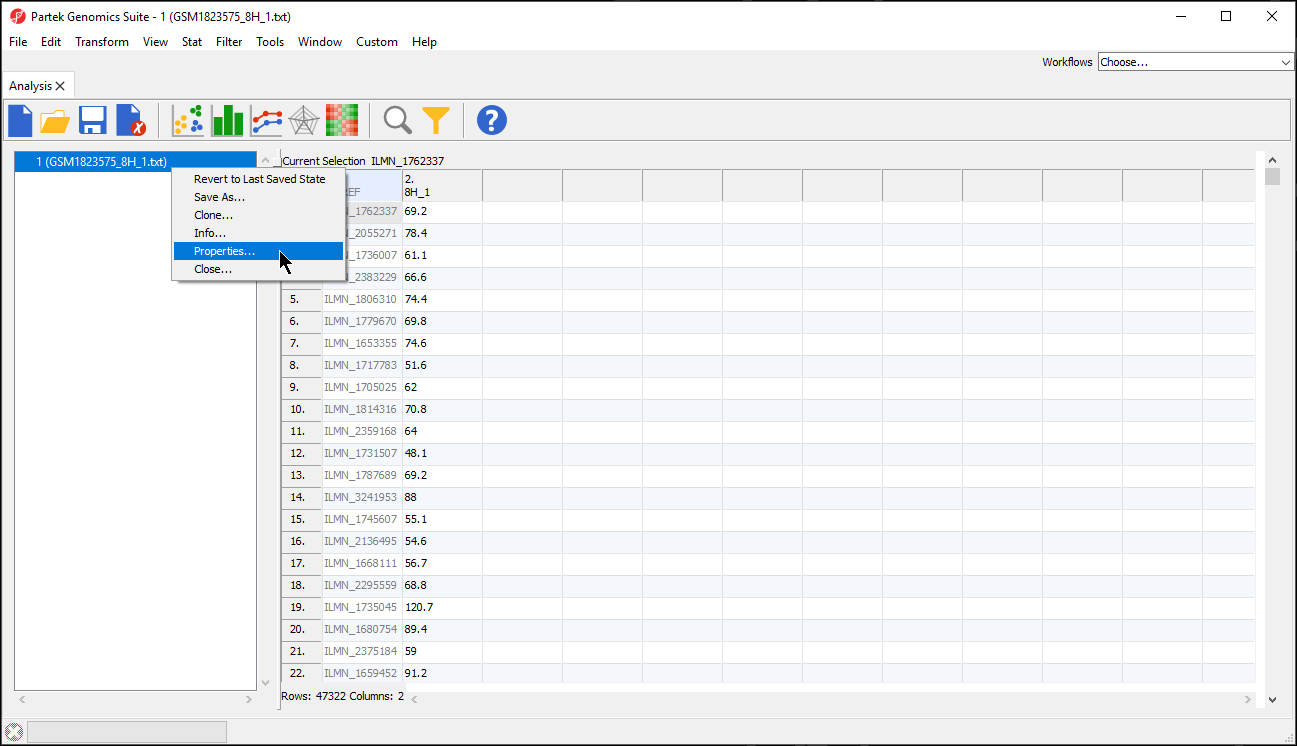
- Right-click the spreadsheet you want to annotate in the spreadsheet tree panel, select Properties from the pop-up menu (Figure 2) or Choose File > Properties from the menu on the selected spreadsheetor select Properties from the File menu on the main toolbar
| Numbered figure captions | ||||
|---|---|---|---|---|
| ||||
|
...
The Configure Genomic Properties dialog will now open.
- Select the appropriate option for Choose the type of genomic data; here we have chosen Gene Expression (Figure 4).
- Select the appropriate options for Location of genomic features in spreadsheet
...
Selecting Gene Symbol instead of Marker ID allows biological interpretation tasks like GO Enrichment or Pathway Enrichment to be performed without an annotation file because the gene symbol can be used to look up the gene set or pathway database.
Location of genomic features in spreadsheet allows you to specify whether genomic features (e.g. genes, miRNAs, probes, SNPs, CpGs etc) are represented by columns or rows:
...
. For Feature in column label
...
, each feature is on a column, each row is a sample
...
. For Feature in column
...
, each feature is on a row
...
and the feature ID
...
for each feature is located in the column chosen with the drop-down menu.
Choose chips/reference and annotation files section allow allows you to specify feature an annotation file associates to associate with the current spreadsheet.
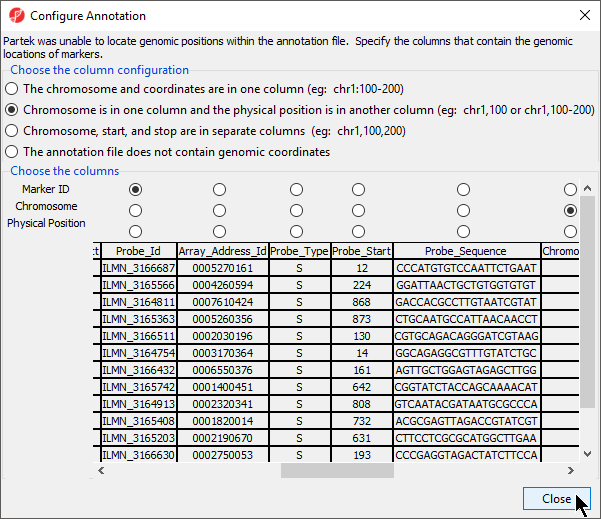
- Select Browse... from Choose chips/references and annotation files
- Select your annotation spreadsheet file using the file selection interface
...
- Select Close to return to the Configure Genomic Properties
An index file for the genomic location data of the annotation file is generated in the same folder as the annotation file, ; it has the same file name as the annotation file, but the file extension name is .idx. If you need to re-configure the genomic location field in the annotation file, you need to first manually delete the .idx file and re-do the above step steps to re-generate .idx generate a new index file for the annotation file.
| Numbered figure captions | ||||
|---|---|---|---|---|
| ||||
|
The Chip/Reference text field will be populated with the annotation file name. You can edit this text field this if you wish.
...
| Numbered figure captions | ||||
|---|---|---|---|---|
| ||||
|
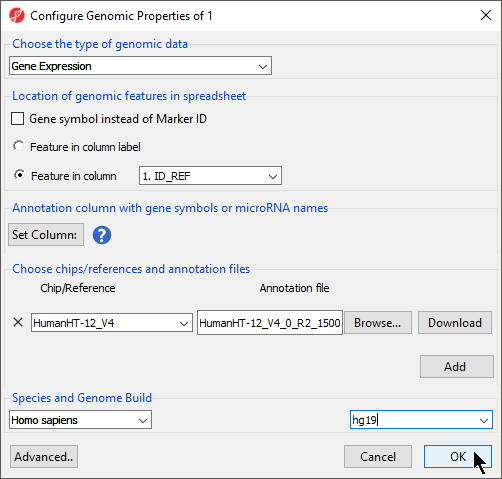
For the Annotation column with gene symbols or miRNA names: in the annotation file, if the gene symbol field is labeled as Gene Symbol, PGS is using this field to look up gene set/pathway database, however, if the gene symbol/or miRNA name field is labels as something else, e.g. SystematicName, you need to manually specify this field as gene symbol field.
- Click on Set Column: button to view/ or select the field corresponding gene symbol information
Note: section, if Gene symbol instead of Marker ID is selected, this field is used automatically populated with the gene symbol column; however, if it is not selected, you will need to manually specify the column in the annotation file that corresponds with gene symbols or miRNA names.
- Select Set Column:
Select the appropriate column from the dialog
Species and gene symbol information is required for biological interpretation analysis.
- Select the correct species and genome build from the drop-down menus; we have chosen Homo sapiens and hg19
- Select OK apply the annotation file to your data spreadsheet
...
To invoke a genome view of your data, your annotation file must also have one or more columns that contain the genomic location in a format that Partek Genomics Suite can recognize. The annotation file must also contain a column that has the chromosome and base pair location (start and stop or physical position). Cytoband and/or strand can also be included.
The table below provides possible column labels, a description of the format for that field, and an example.
...
Overview
Content Tools