Page History
The User added tasks feature in Partek® Flow® allows Partek® Flow® allows administrators to add their own executables and scripts to the set of analysis tools available on a given installation. These tasks can then be run through the Partek Flow graphical Partek Flow graphical user interface and can be included as part of analysis pipelines.
The process of adding a task is only available to users with administrative privileges. However, once the task has been added to an instance of Partek Flow, all other users, including regular users, can use the task.
The instructions below assume that you are logged in as an admin.
| Table of Contents | ||||
|---|---|---|---|---|
|
...
| Numbered figure captions | ||||
|---|---|---|---|---|
| ||||
|
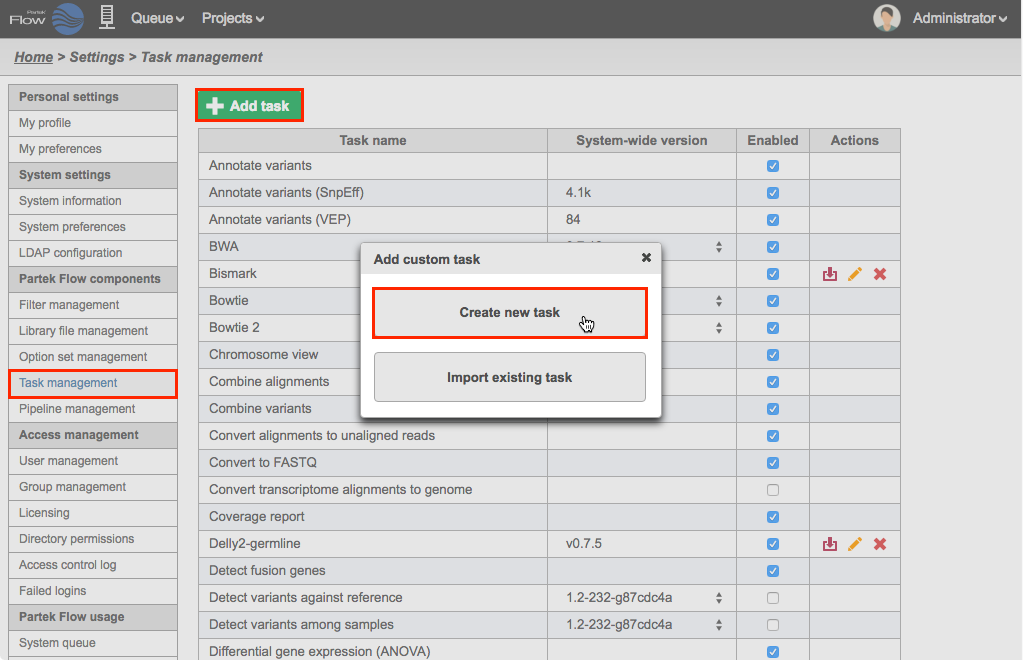
The creation of a new user added task has four steps: Task details, Input, Output, and Options. The task creation wizard will guide you through each step. Please consult the user documentation of the analysis tool you wish to add for details to enter into the task creation wizard.
Task details
| Numbered figure captions | ||||
|---|---|---|---|---|
| ||||
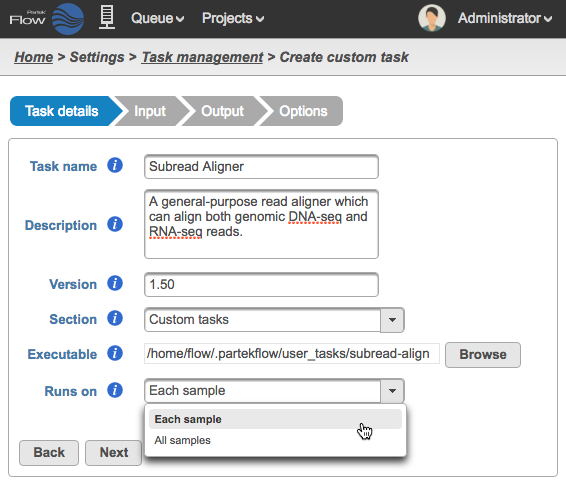 |
In the Task details step details step (Figure 3), provide the following:
- Task name - a unique name for the task
- Description Description (optional) - a more thorough description of the task. This text will appear when the cursor hovers over the task in the Task Menu
- Version Version - a unique version number for the given task name. The combination of Task name of Task name + Version must be unique (i.e., no other task already installed can have the same combination)
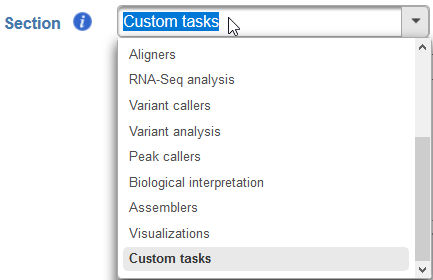
Section - choose a section in the context-sensitive Task Menu in which this task will appear or define a new section by editing the text field (Figure 4)
Numbered figure captions SubtitleText Choose which section in the Task Menu you want the added task to appear in. To keep all custom tasks in one section, choose 'Custom tasks' at the bottom of the drop-down list (left). To create a new section, highlight the text and manually type a new section name (right) AnchorName Choose which section in the Task Menu you want the added task to appear in. To keep all custom tasks in one section, choose 'Custom tasks' at the bottom of the drop-down list (left). To create a new section, highlight the text and manually type a new section name (right) 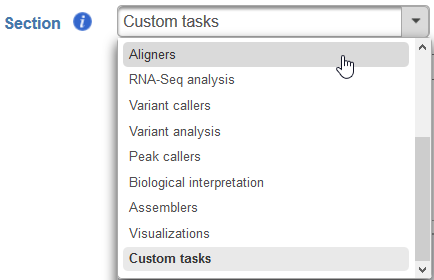
Executable - provide a full path to the executable that this task will run (Figure 5) by clicking Browse. The The executable is the main binary or script to call when the user added task is run. In the example in Figure 3, the full path is /home/flow/.partekflow/user_tasks. The The dialog (Figure 5 inset) lists all the available executables stored in the directory. Select the file and click Continue to proceed.
SECURITY WARNING - Since binaries in this folder will be accessible through the Partek Flow web user interface, this directory should be highly restricted from modification by non-administrator users.Numbered figure captions SubtitleText Selecting the executable (the inset shows the available binary saved in the folder) AnchorName Selecting the executable (the inset shows the available binary saved in the folder) 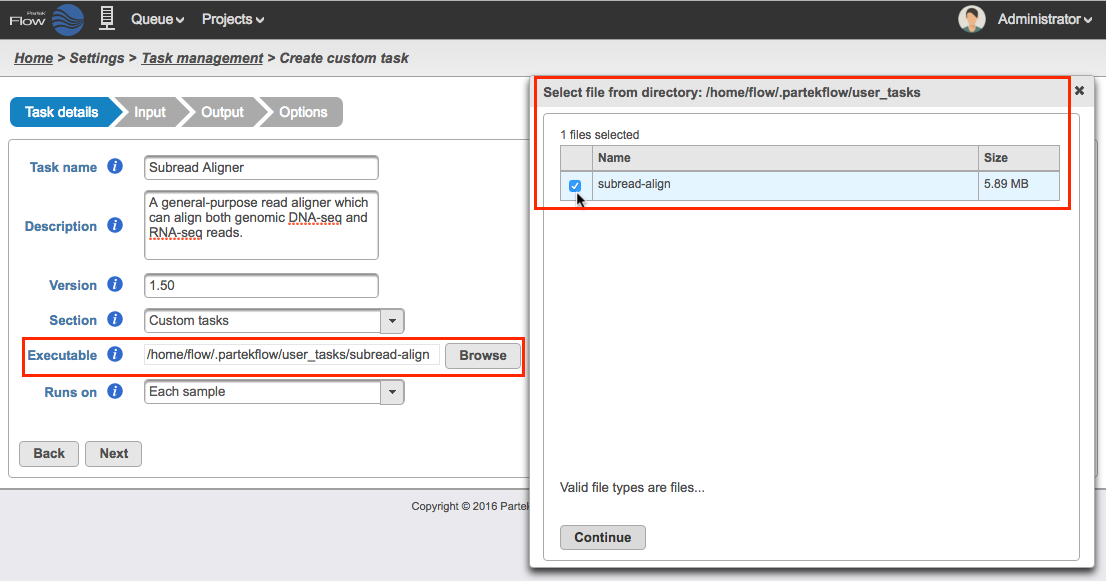
...
Click Next to proceed to the Input step
Input
In the Input step Input step, specify what type of data the task can run on and how to pass that data on the command line (Figure 7).
| Numbered figure captions | ||||
|---|---|---|---|---|
| ||||
|
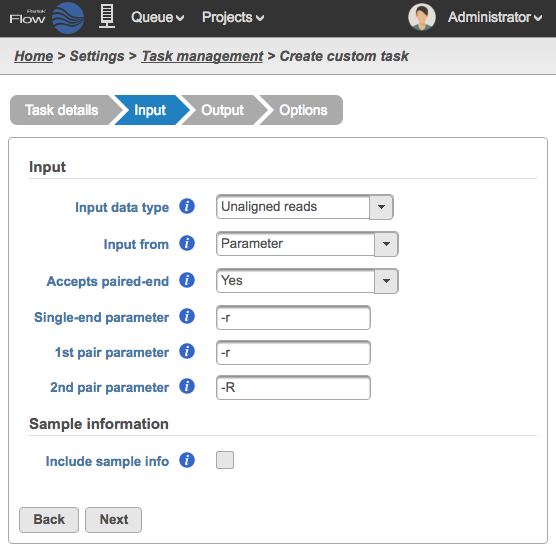
- Input data type - This is the type of data the task can be performed on. In the Analyses tab, this is the type of data node that will be selected for to the task to appear in the context-sensitive Task menu. Partek Flow requires User added tasks to be performed on either: Unaligned reads, Aligned reads, and Variants. Additional inputs can be specified in the Options step. The type of Input data selected from the drop-down menu will determine the additional fields that need to be defined. In Figure 7 the Subread Aligner task accepts Unaligned reads.
- Input from - choose Parameter if the input file(s) is specified using an option (e.g. -r) on the command line or Last option if the executable assumes the input file(s) is placed at the end of the command
- Accepts paired-end - choose between Yes, No or Exclusively with respect to the task's behavior with paired-end reads
- Single-end parameter - enter the parameter to add before single-end reads
- 1st pair parameter - enter the parameter to add before the first file (_1) in a paired-end reads set
- 2nd pair parameter - enter the parameter to add before the first file (_2) in a paired-end reads set
...
Overview
Content Tools