Page History
| Table of Contents | ||||||
|---|---|---|---|---|---|---|
|
This tutorial presents an outline of the basic series of steps for analyzing a single cell RNA-Seq experiment in Partek Flow starting with the count matrix file
If you are starting with the raw data (FASTQ files), please begin with our Processing Single Cell RNA-seq FASTQ Files tutorial, which will take you from raw data to a count matrix file.
This tutorial includes only one sample, but the same steps will be followed when analyzing multiple samples. For notes on a few aspects specific to a multi-sample analysis, please see our Single Cell RNA-Seq Analysis (Multiple Samples) tutorial. guide illustrates how to process FASTQ files produced using the 10x Genomics Chromium Single Cell ATAC assay to obtain a Single cell counts data node, which is the starting point for analysis of single-cell ATAC experiments.
If you are new to Partek Flow, please see Getting Started with Your Partek Flow Hosted Trial for information about data transfer and import and Creating and Analyzing a Project for information about the Partek Flow user interface.
Filtering cells
An important step in analyzing single cell RNA-Seq data is to filter out low quality cells. A few examples of low-quality cells are doublets, cells damaged during cell isolation, or cells with too few reads to be analyzed. You can do this in Partek Flow using the Single cell QA/QC task.
- Click on the Single cell data node
- Click on the QA/QC section of the task menu
- Click on Single cell QA/QC
...
Transfer files and create a new project
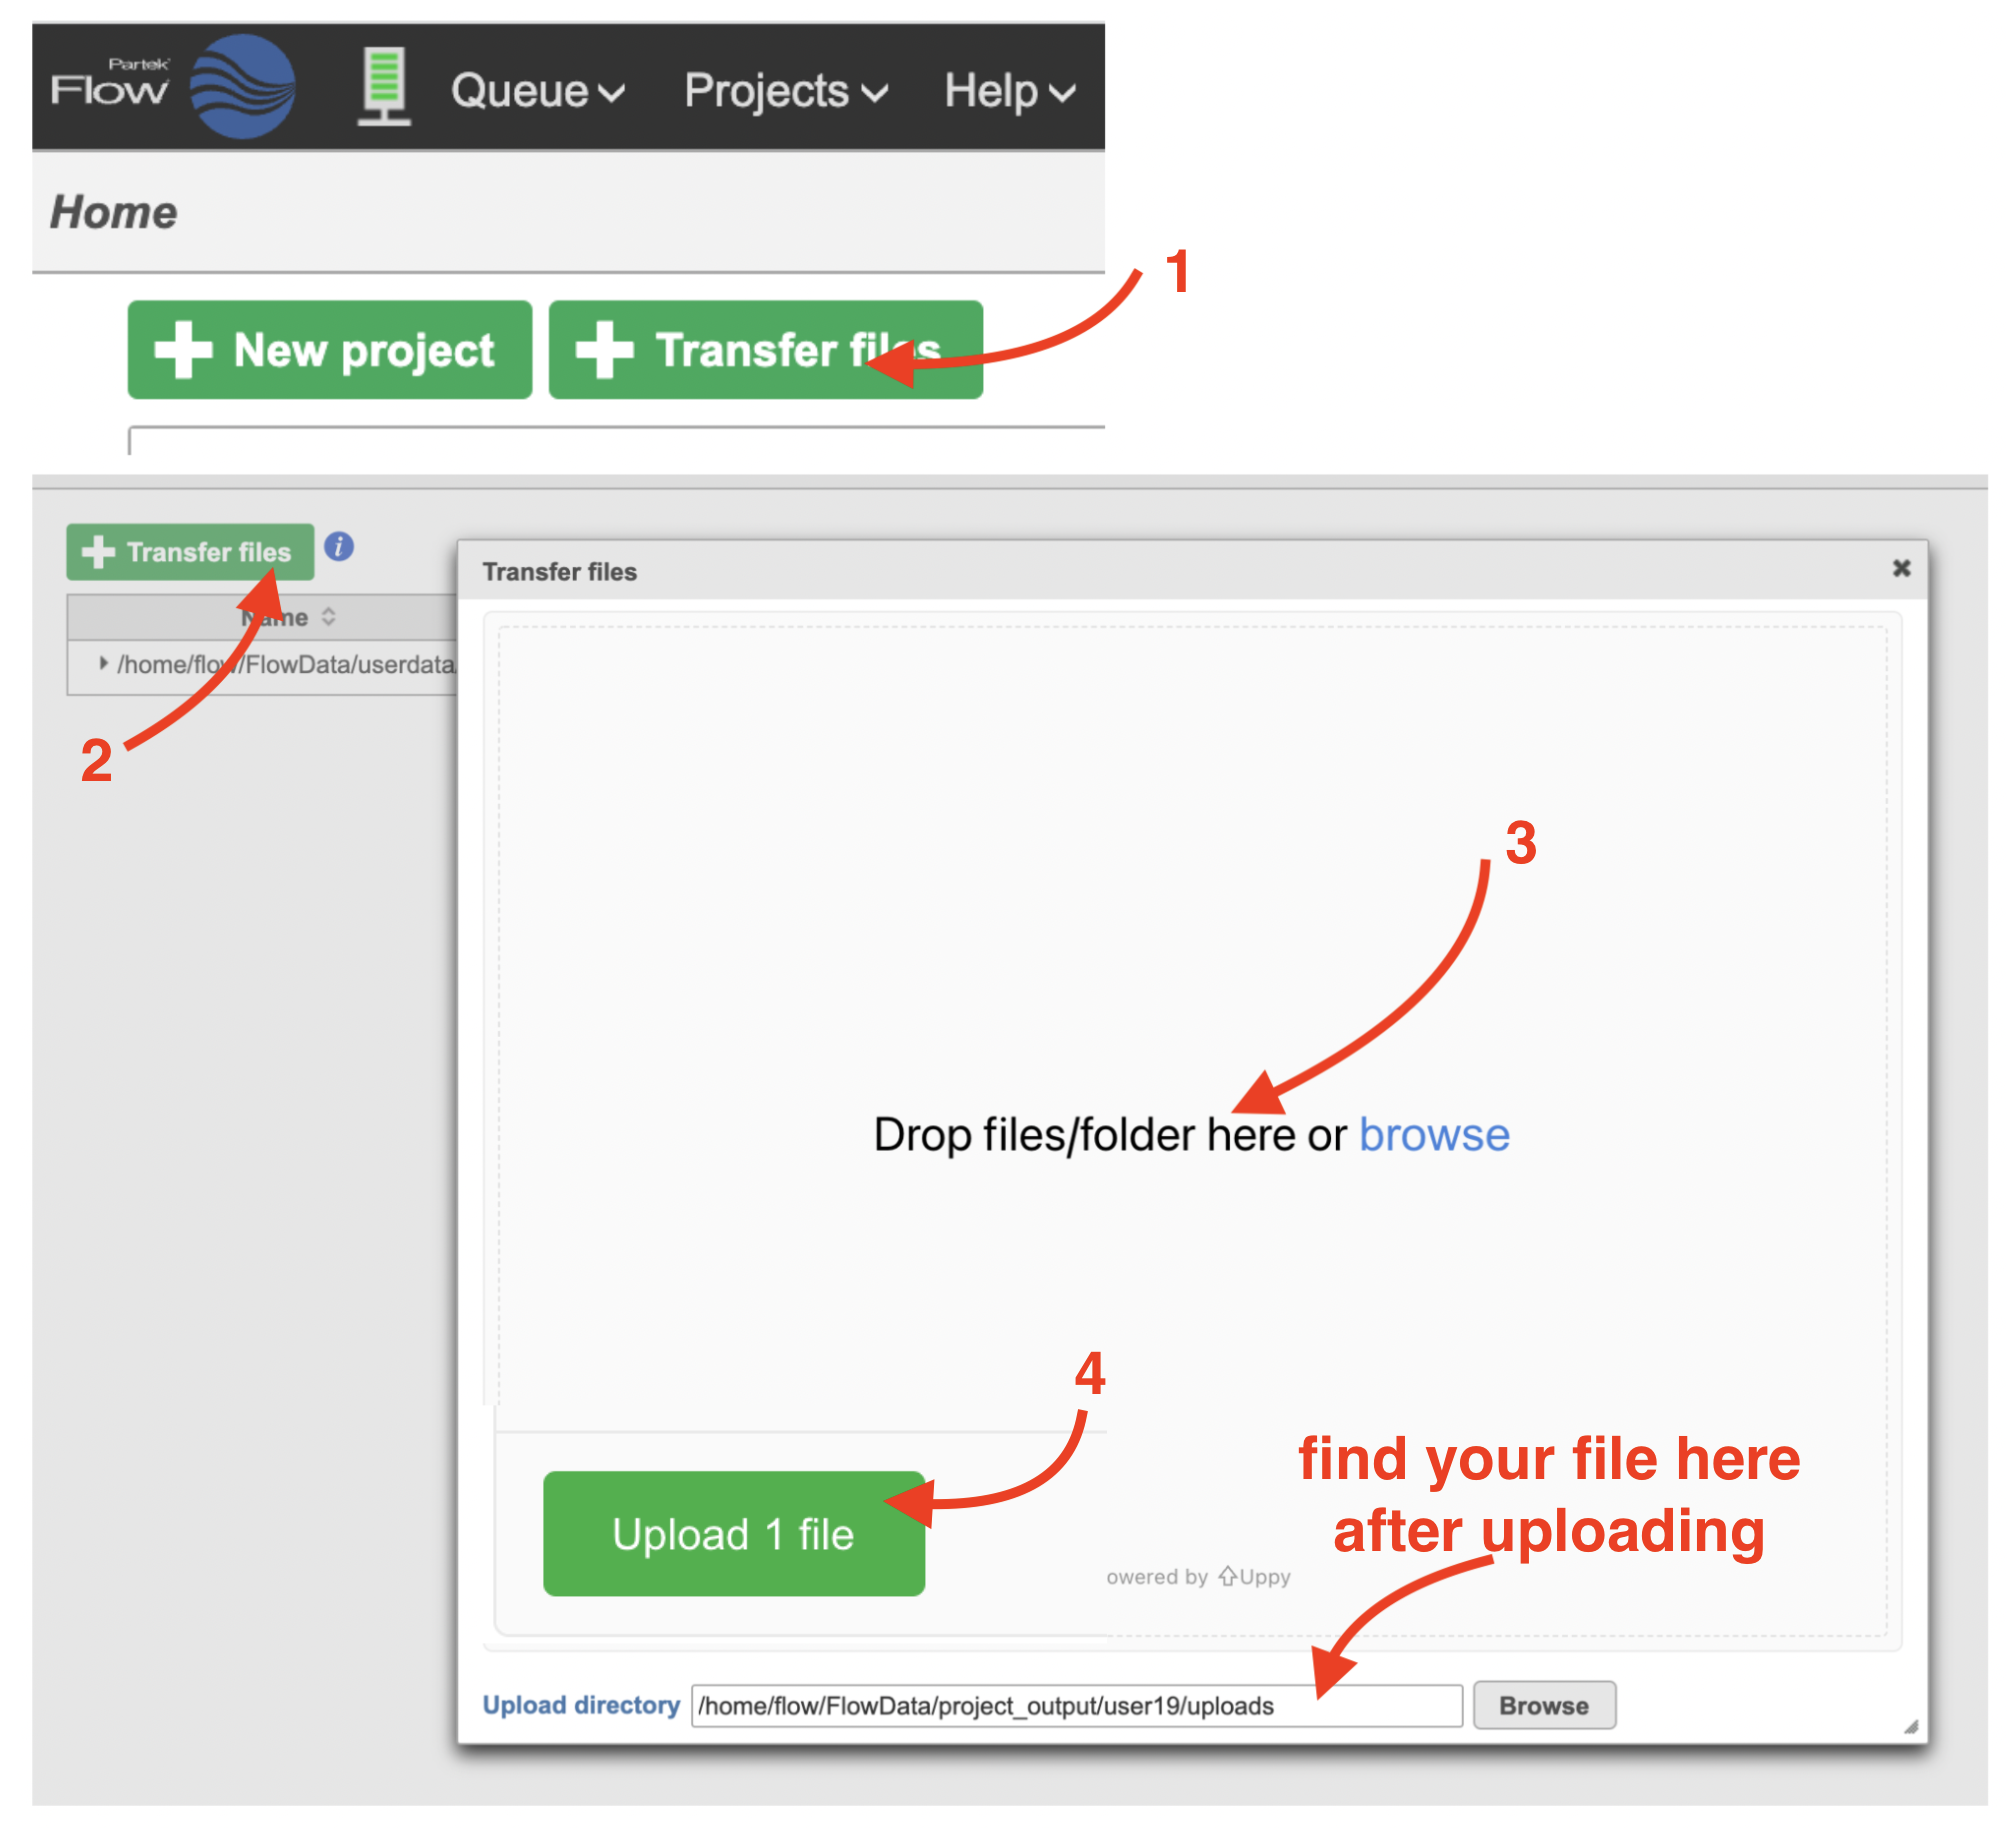
We recommend uploading your FASTQ files (fastq.gz) to a folder on the Partek® Flow® server before importing them into a project. Data files can be transferred into Flow from the Home page by clicking the Transfer file button (Figure 1). Following the instruction In Figure 1 to complete the data transfer. Users have the option to change the Upload directory by clicking the Browse button and either select another existing directory or create a new directory.
To create a new project, from the Home page click the New Project button; enter a project name and then click Create project (Figure 1). Once a new project has been created, the user is automatically directed to the Data tab of the Project View.
| Numbered figure captions | ||||
|---|---|---|---|---|
| ||||
- Click the Single cell QA/QC node once it finishes running
- Double-click the Task report in the task menu
...

