The preferred method for importing a generic data spreadsheet into Partek Genomics Suite is as a text file. Here, we illustrate importing a list of genes with p-value and fold-change from an experiment comparing two conditions.
- Select File from the main toolbar
- Select Import
- Select Text (.csv .txt)...
- Select the text file using the file browser to launch the Import .txt, .tsv, or .csv File dialog
The File Type section of the Import dialog includes a preview of the text file and import options (Figure 1).
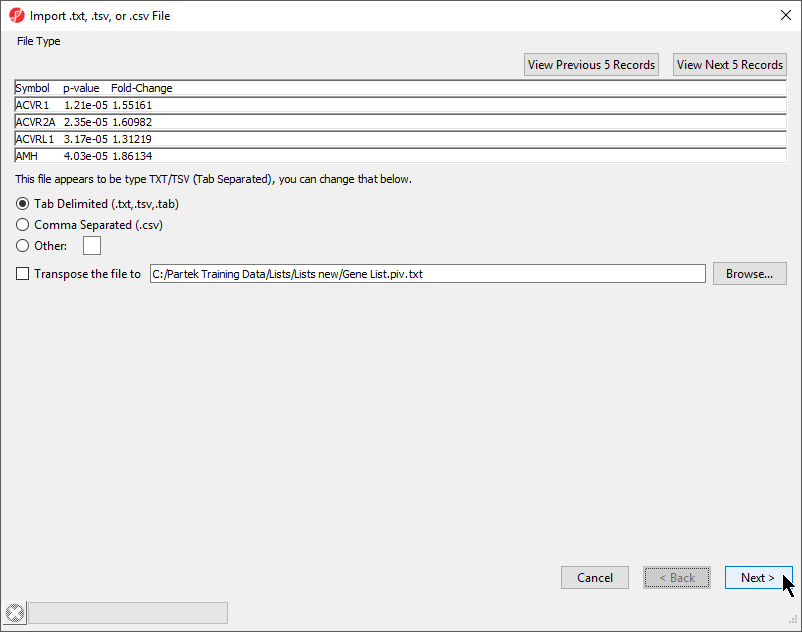
Figure 1. Import .txt, .tsv, or .csv file dialog
The columns in the import file can be separate by a tab, comma, or any other character.
For most applications, the items on the list should be in rows while attributes or values should be in columns. If a list is oriented with items on columns, select Transpose the file to to import a transposed spreadsheet.
- Select Next > to move to the Data Type section
- Select your data type; here we have chosen Genomic Data because it is a gene list (Figure 2)
We have also deselected Is the data log transformed (LOG_base (x+offset) ) ?
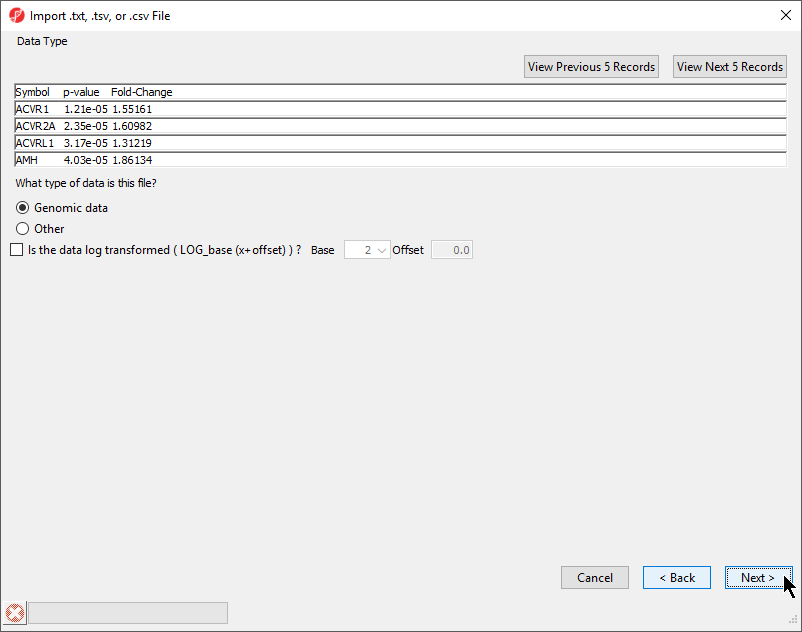
Figure 2. Selecting the data type
Selecting Genomic Data will open a dialog after import to configure properties for the imported list including selecting the type of genomic data, the location of genomic features in the spreadsheet, the annotation column with gene symbols, the chip or reference source and annotation file, the species, and reference genome build.
- Select Next >
The next step is to identify where the data starts and where the optional header is found using Identify Column Labels, Start of Data (Figure 3). The line that contains the header (if present) must precede the data. If there are lines to be skipped in the file (like comments), they may only appear at the top of the file, before the header line or data begin.
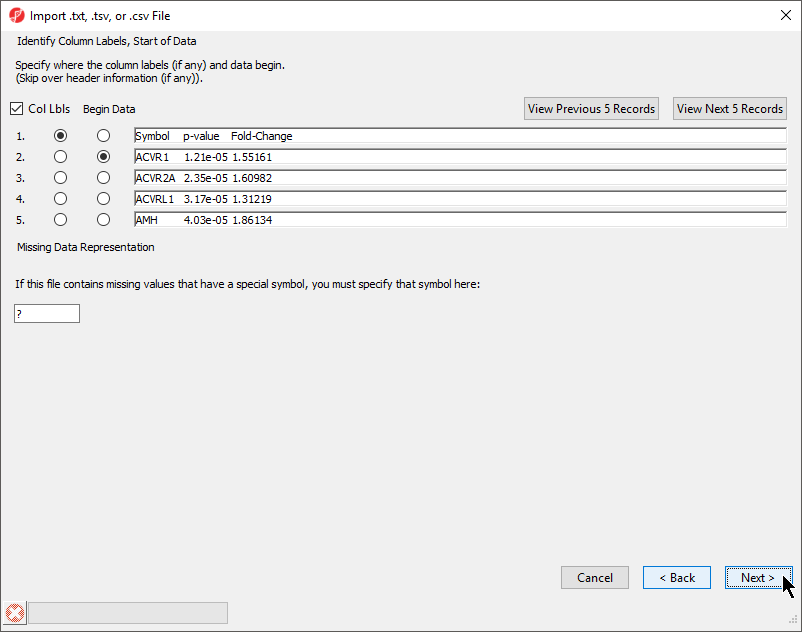
Figure 3. Identifying column labels and start of data
If there are many comment lines at the start of the file, you may need to select View Next 5 Records to get to the row that contains the column header. If you accidentally move past the screen that contains the header or data rows, select View Previous 5 Records.
If there are missing numerical values or empty cells in your input list, insert a special character or symbol (?, N/A, NA, etc.) in the missing cells; you will specify the character in the Missing Data Representation section of the dialog, only one symbol can be used to represent missing values, the default missing value indicator is ?.
- If a header row is present, select Col Lbls to allow you to select a column header row
- Select the row where the data beings using the Begin Data selector
- If any cells have a missing value, you can signify this with a special symbol selected using the Missing Data Representation panel
- Select Next >
The Preview text encoding section (Figure 4) previews the first five lines of the file, allowing you to check if the text encoding is correct.
- If the text does not appear properly, use the Specify the text encoding: drop-down menu to choose the correct encoding
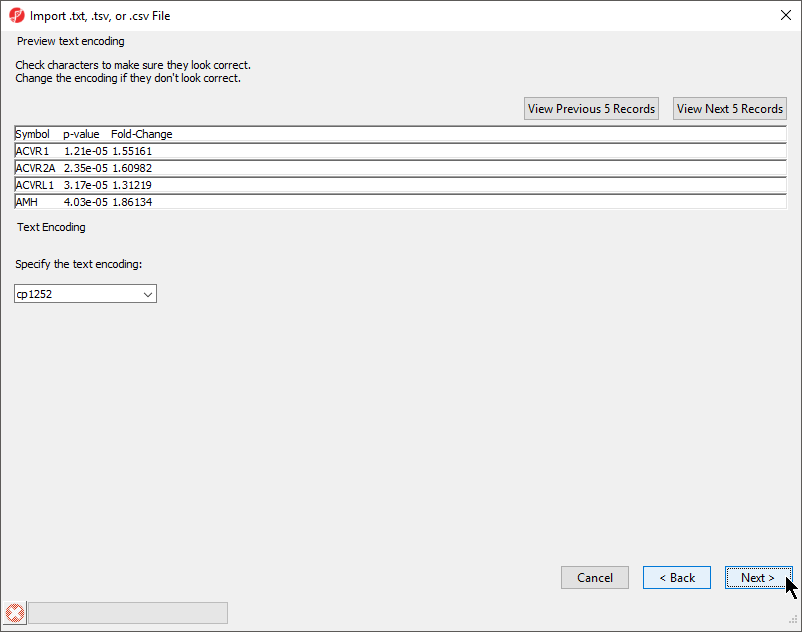
Figure 4. Previewing text encoding
- Select Next >
The final section of the Import .txt, .tsv, or .csv File dialog is Verify Type & Attribute of Data Columns (Figure 5). While data column type and attribute can be modified after import, it is easier and faster to select the proper options during import as multiple columns may be selected during this dialog.
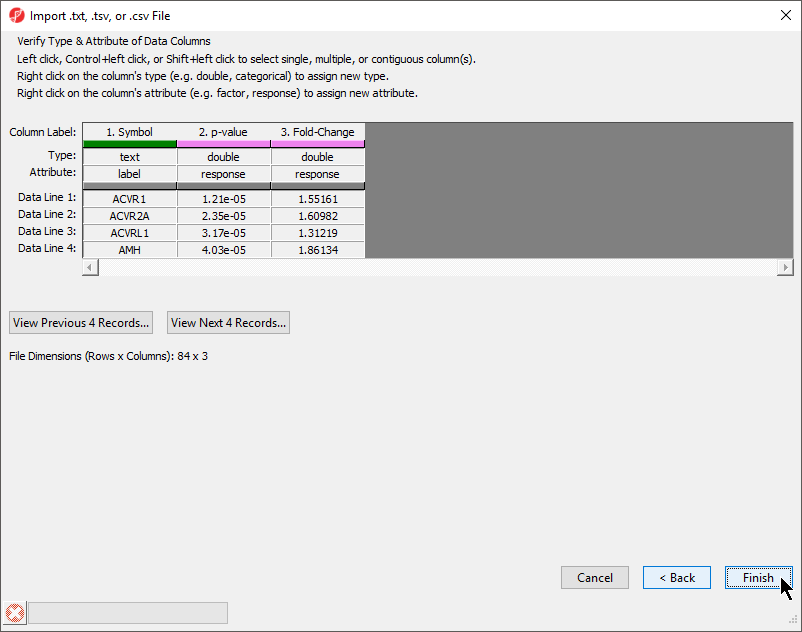
Figure 5. Verifying type and attribute of data columns. While individual column types and attributes can be modified after import, this dialog allows multiple columns to be selected and modified simultaneously.
- Check and modify column types and attributes
If there is an identifier like gene symbol or SNP, the Type field for that column should be set to text and Attribute should be set to label. Numeric values (intensities, p-values, fold-changes, etc.) should have Type set to double and Attribute set to response. The other possible value for Attribute is factor and describes sample data. The user interface is this dialog allows you to select multiple columns at once (Ctrl+left click and Shift+left click). The interface controls are detailed in the dialog (Figure 5).
- Select Finish to import the text file and open it as a spreadsheet
If Genomic data was selected in the Data Type section, the Configure Genomic Properties dialog will open (Figure 6). These options will be discussed in the next section when we add an annotation file.
 Figure 6. Many types of genomic data can be imported into Partek Genomics Suite using the text data file importer. This dialog allows these files to be associated with an annotation file and reference genome.
- Select OK
The imported spreadsheet will open (Figure 7).
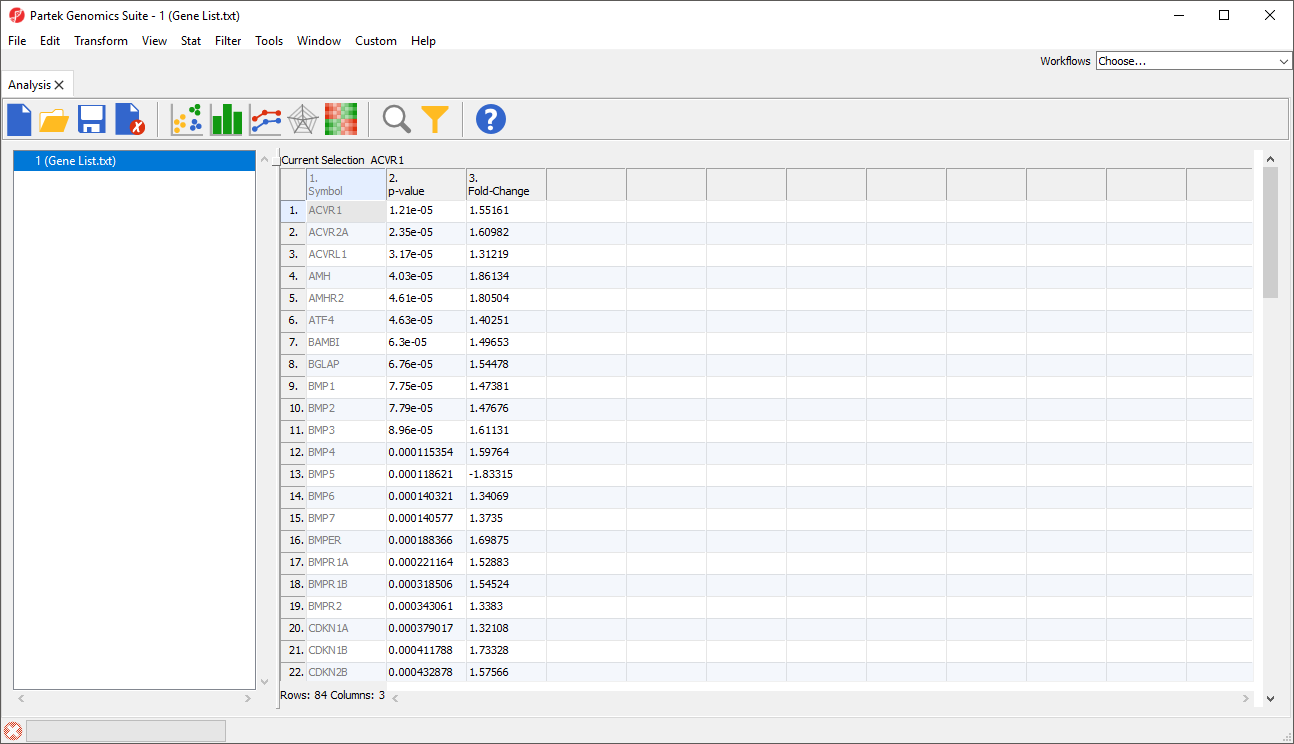
Figure 7. An imported .txt data file spreadsheet
Additional Assistance
If you need additional assistance, please visit our support page to submit a help ticket or find phone numbers for regional support.


| Your Rating: |
|
Results: |

|
35 | rates |
Overview
Content Tools