Page History
...
| Numbered figure captions | ||||
|---|---|---|---|---|
| ||||
|
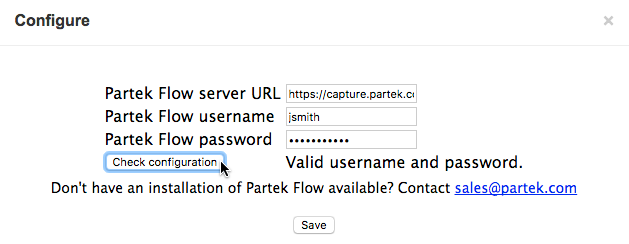
Click the Rescan Plugins for Changes button. Rescanning the plugins will finish the installation and save the configuration.
...
| Numbered figure captions | ||||
|---|---|---|---|---|
| ||||
|
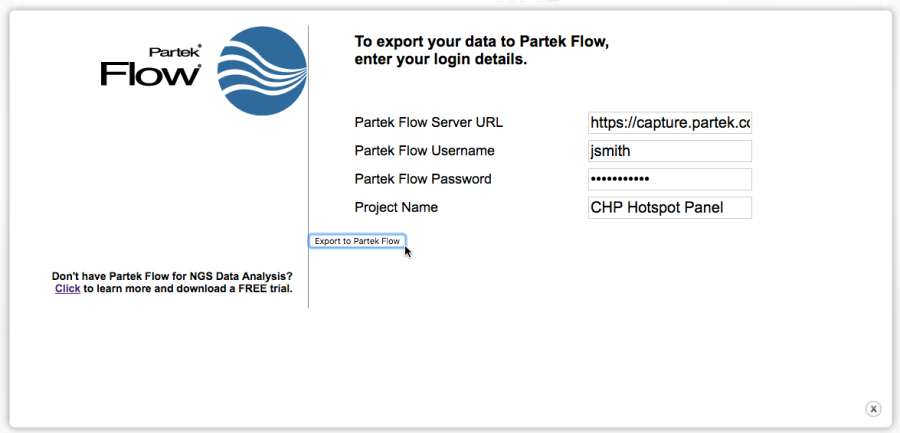
The Project Name field will be used in Partek Flow to create a new project where the run results will be exported. However, if a project with that name already exists, the samples will be added to that existing project. This enables you to combine multiple runs into one project. Project Names are limited to 30 characters. The default project name is the Run Name.
...
Once the plugin starts running, it will indicate that it is Queued on the upper right corner of the Plugins Summary (Figure 16). There will also be a blue Stop button to cancel the operation.
| Numbered figure captions | ||||
|---|---|---|---|---|
| ||||
|
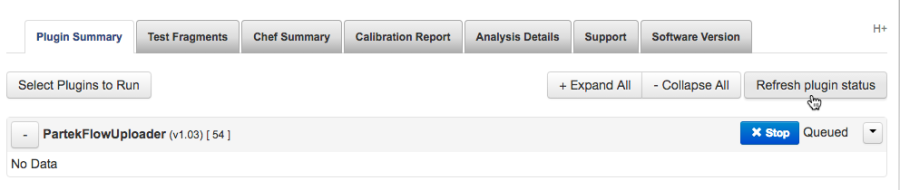
Click the Refresh plugin status button to update. The plugin status will show Completed once the export is done and the data is available in Partek Flow (Figure 11).
...
The Partek Flow Uploader plugin sends the unaligned bam files to the Partek Flow server. Each filename generated by the run will create a sample For each file, a Sample of the same name will be created in the Data tab (Figure 17).Figure 17:
| Numbered figure captions | ||
|---|---|---|
|
...
| ||
|
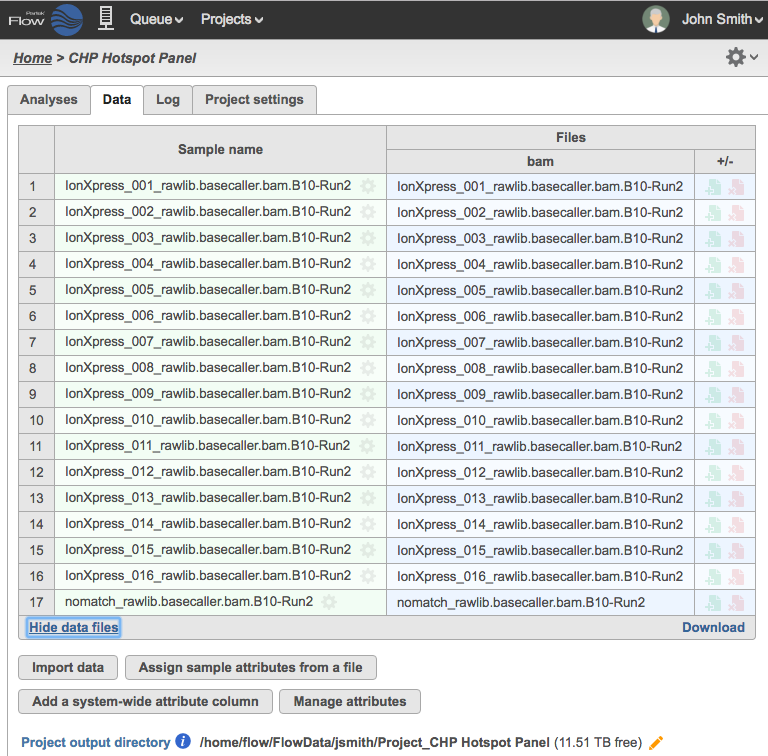
Reads that had no detectable barcodes have been combined in a sample with a prefix: nomatch_rawlib.basecaller.bam (Row 17 in Figure 17). You can removed this sample from your analysis by clicking the gear icon ![]() next to the sample name and choosing Delete sample.
next to the sample name and choosing Delete sample.
...
The data transferred by the Partek Flow Uploader is stored in a directory created for the Project within the user's default project output directory. For example, in Figure 1917, the data for this project is stored in:
/home/flow/FlowData/jsmith/Project_CHP Hotspot Project
...
Panel.
Conversion of UBAM to FASTQ files
The plugin transfers the Unaligned BAM data from the Torrent Browser. The UBAM file format retains all the information of the Ion Torrent Sequencer. In the Partek Flow Project, the Analyses tab would show a circular data node named Unaligned bam. Click on the data node and the context-sensitive task menu will appear on the right (Figure 2318).
Unaligned BAM files are only compatible with the TMAP aligner, which can be selected in the Aligners section of the Task Menu. If you wish to use other aligners, you can convert the unaligned BAM files to FASTQ using the Convert to FASTQ task under Pre-alignment tools.
Some information specific to Ion Torrent Data (such as Flow Order) are not retained in the FASTQ format. However, those are only relevant to Ion Torrent developed tools (such as the Torrent Variant Caller) and are not relevant to any other analysis tools. 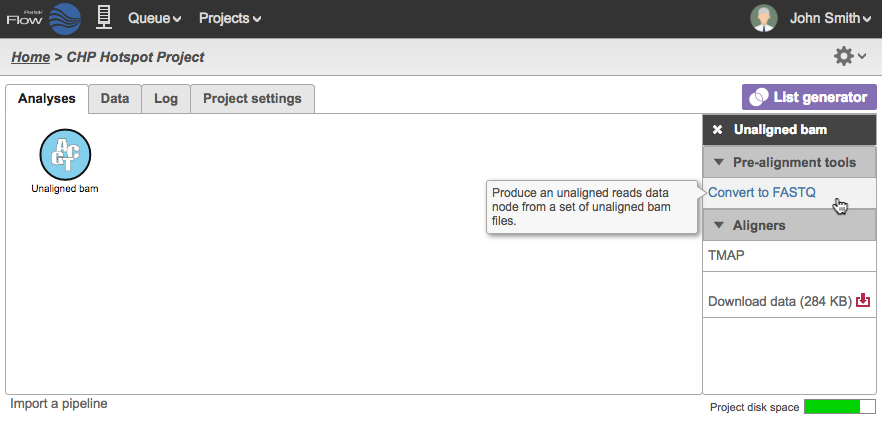
Figure 23:
| Numbered figure captions | ||||
|---|---|---|---|---|
| ||||
|
Once converted, the reads can then be aligned using a variety of aligners compatible with fastq FASTQ input (Figure 2419) . You can also perform other tasks such as Pre-alignment QAQC or run an existing pipeline.
Another option is to include the Convert to FASTQ task in your pipeline and you can invoke the pipeline directly from an Unaligned bam data node.
Figure 24: Unaligned reads in the FASTQ format are compatible with more tasks
...
Deleting the Data in Partek Flow
Deleting data in Partek Flow can be done by deleting the project. During project deletion, you will be given an opportunity to delete data. These include the data transferred by the Partek Flow plugin (Input Files) and the data generated by any Task within Partek Flow (Output Files). Deleting data in Partek Flow does not delete any data in the Torrent Browser.
There are a couple of ways to delete a project. From the Partek Flow home page, click the delete icon under the Actions column (Figure 10). You can also have the project open and click the gear icon on the top right of the page and select Delete project (Figure 25).
Figure 25: Deleting an open project in Partek Flow
A page displaying all the files associated with the project appears. Click the triangle to expand the list. Select the files to be deleted from the server by clicking the corresponding checkboxes next to each file (Figure 26). By default, all Output files generated by the project are selected. The Input files list all the data uploaded by the plugin.
Figure 26: Expanded selection of files to be deleted in with one file being shared by another project
...
Overview
Content Tools