Page History
...
| Numbered figure captions | ||||
|---|---|---|---|---|
| ||||
|
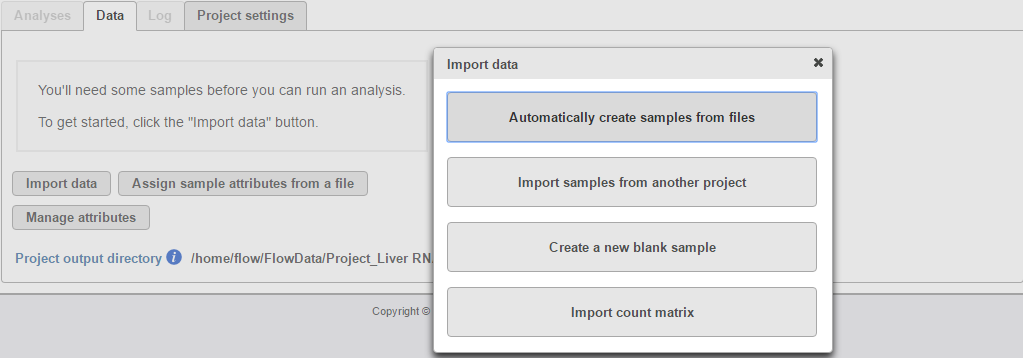
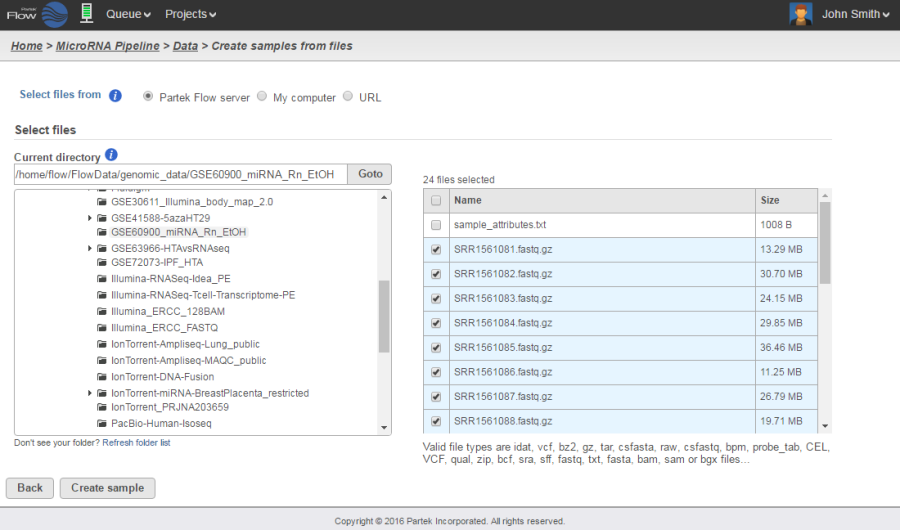
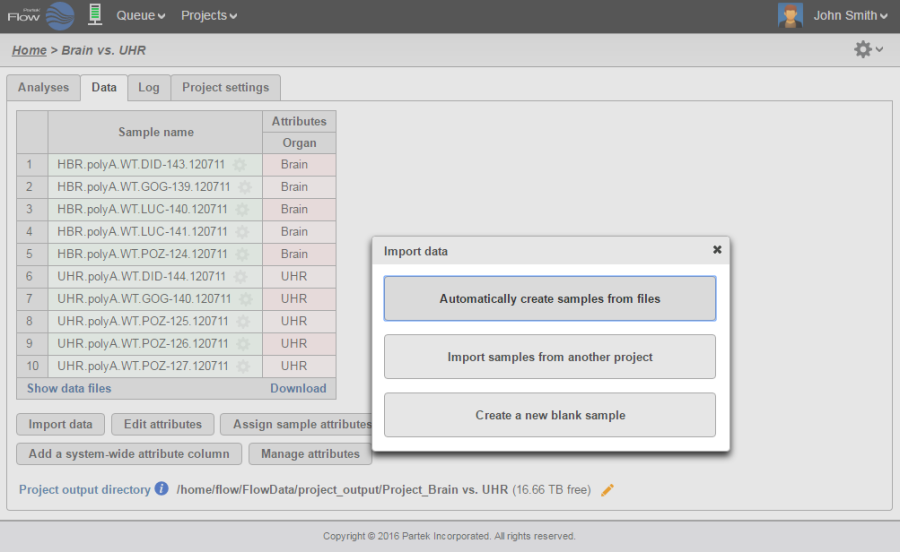
Automatically create samples from files
...
| Numbered figure captions | ||||
|---|---|---|---|---|
| ||||
|
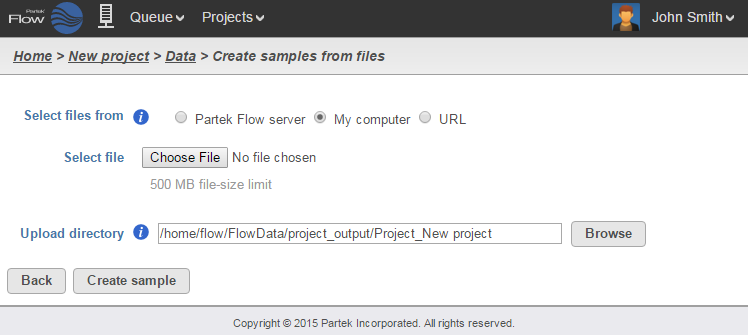
Alternatively, files can also be uploaded and imported into the project from the user's local computer. Select the My computer radio button (Figure 3) and the options of selecting the local file and the upload (destination) directory will appear. Only one file at a time can be imported to a project using this method.
...
| Numbered figure captions | ||||
|---|---|---|---|---|
| ||||
|
Multiple data files can be compressed a single .zip file before uploading. Partek Flow will automatically unzip the files and put them in the upload directory.
...
| Numbered figure captions | ||||
|---|---|---|---|---|
| ||||
|
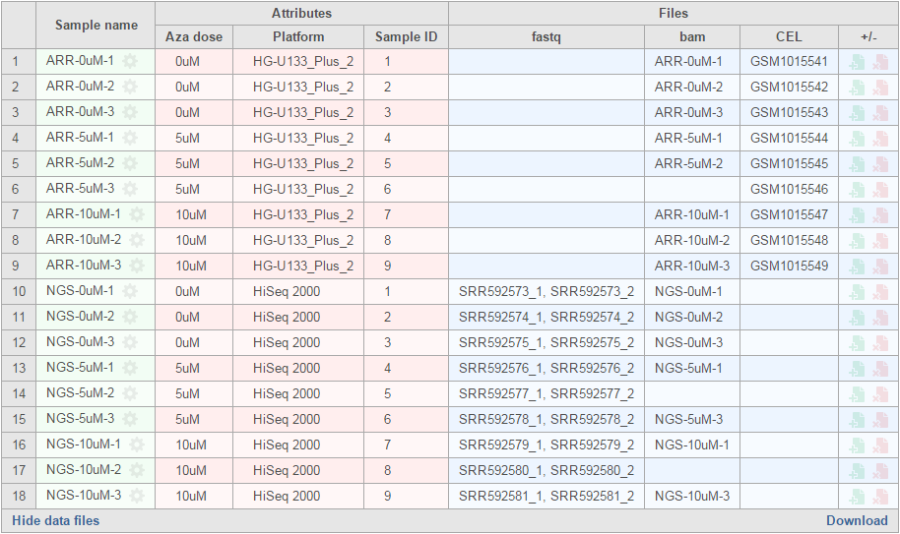
Once a sample is created in a project, the files associated with it can be modified. In the expanded view, mouse over the +/- column of a sample. The highlighted icons will correspond to the options for the sample on that row.
Click the green icon ( ![]()
) to associate additional files or the red icon (
![]()
) to dissociate a file from a sample. You can manually associate multiple files with one sample. Dissociating a file from a sample does not delete the file from the Partek Flow server.
...
| Numbered figure captions | ||||
|---|---|---|---|---|
| ||||
|

Create a new blank sample
...
Mouse over the +/- column and click the green icon ( ![]()
) to associate a file(s) to the sample. Perform the process for every sample in your project.
...
| Numbered figure captions | ||||
|---|---|---|---|---|
| ||||
|
Adding Files to an existing project
...
| Numbered figure captions | ||||
|---|---|---|---|---|
| ||||
|
Importing feature counts
...
| Numbered figure captions | ||||
|---|---|---|---|---|
| ||||
|

Project output directory
...
The user has the option of specifying an existing folder or creating a new one as the project output directory. To do so, click the ![]()
icon next to the directory and specify or create a new folder in the dialog box.
...
| Numbered figure captions | ||||
|---|---|---|---|---|
| ||||
|
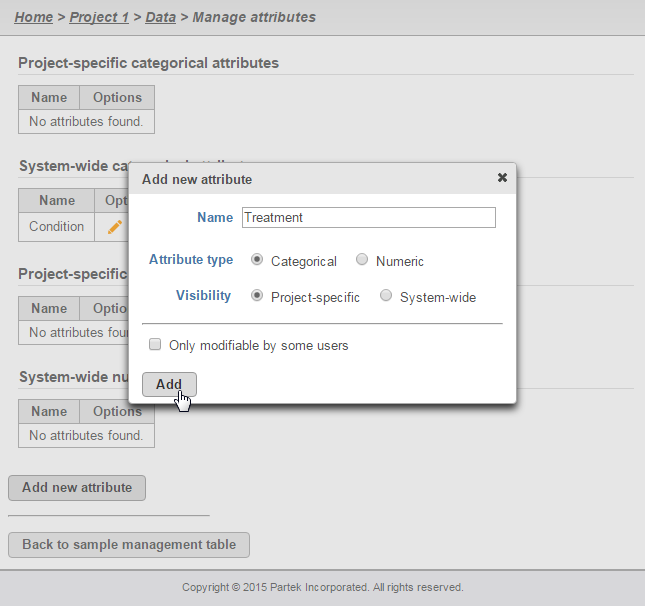
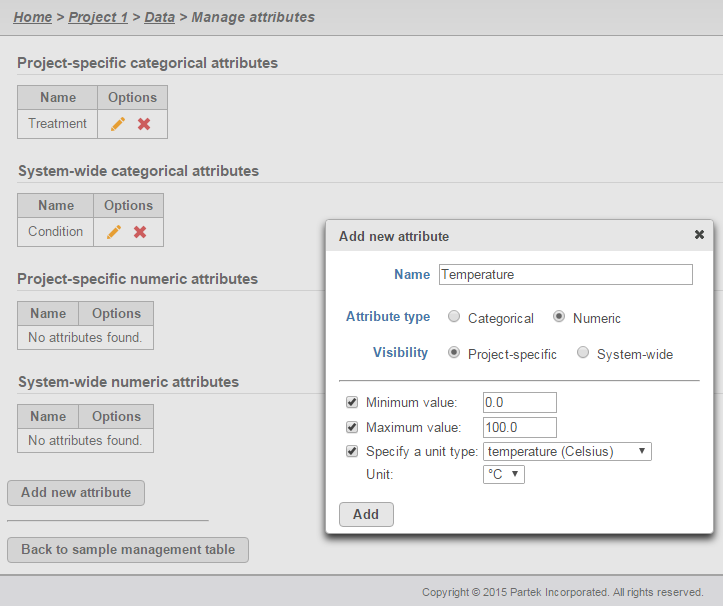
To prepare for later data analysis using statistical tools, attributes can either be categorical or numeric (i.e., continuous).
...
| Numbered figure captions | ||||
|---|---|---|---|---|
| ||||
|
Individual categories for the attribute must then be entered. Enter a name of the New category and click Add. The Name of the new category will show up in the table. The category can also be edited by clicking ![]()
or deleted by clicking
. Additionally, sub-categories can be added by clicking
![]()
in the Options column. After all the categories have been added to this attribute, click Close to proceed.
...
| Numbered figure captions | ||||
|---|---|---|---|---|
| ||||
|
Adding a numeric attribute
...
| Numbered figure captions | ||||
|---|---|---|---|---|
| ||||
|
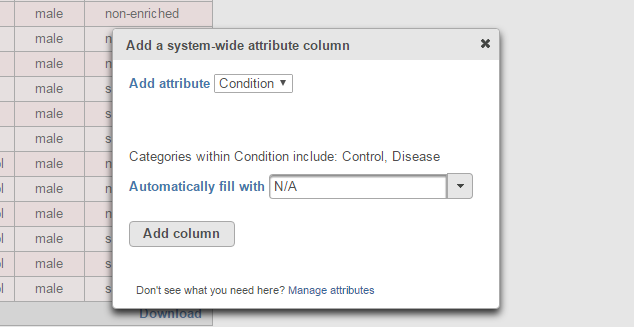
Adding a system-wide attribute
...
| Numbered figure captions | ||||
|---|---|---|---|---|
| ||||
|
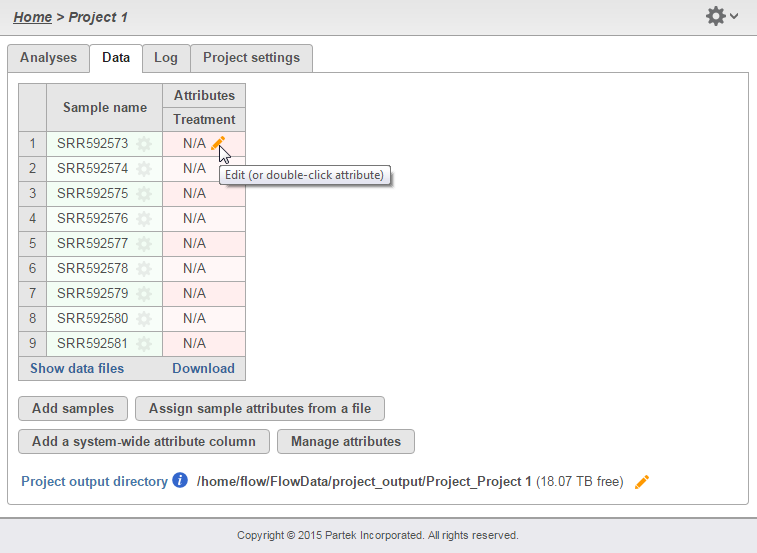
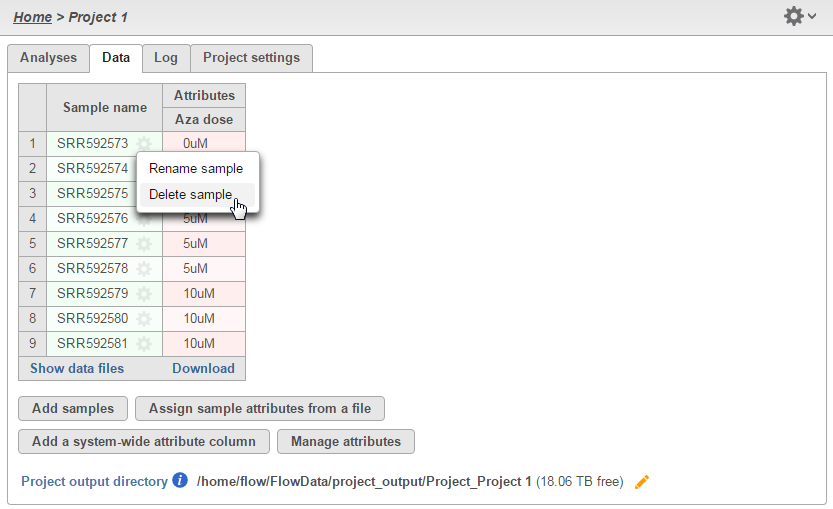
Assigning categories or values to attributes
After adding all the desired attributes to a project, the sample management table will show a new column for each attribute (Figure 15). The columns will initially as "N/A", as the samples have not yet been categorized or assigned a value. To edit the table, click ![]()
. Assign the sample attributes by using a drop down for categorical attributes (controlled vocabulary) or typing with a keyboard for numeric attributes.
...
| Numbered figure captions | ||||
|---|---|---|---|---|
| ||||
|
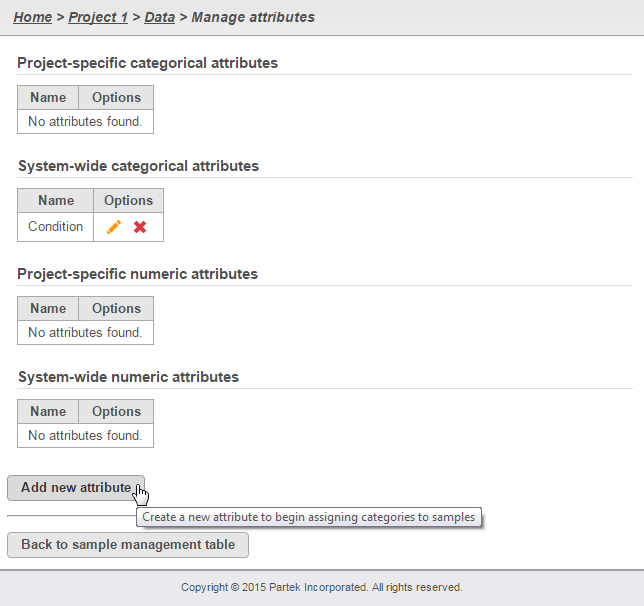
When all the attributes have been entered, click Apply changes and the sample management table will be updated. After editing the sample table, make sure there are no fields with blank or N/A values before proceeding. To rename or delete attributes, click Manage attributes from the Data tab to access the Manage attributes page. Note that you cannot delete an attribute if a sample is assigned to it.
...
| Numbered figure captions | ||||
|---|---|---|---|---|
| ||||
|
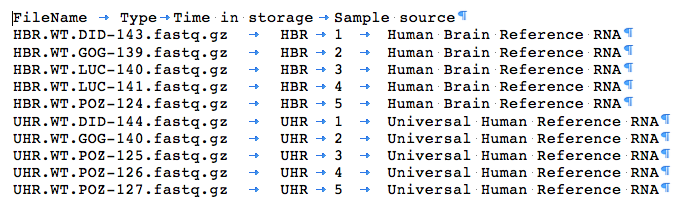
The first row of the table in the text file contains the attributes (as headers). The first column of the table in the text file, regardless of the header of the first column, should contain either the sample names or the file names of the samples already added in Partek Flow. The first column is the unique identifier that will match the samples to the correct values or categories.
...
| Numbered figure captions | ||||
|---|---|---|---|---|
| ||||
|

You can change the name of a specific attribute by editing the Attribute name text box. Columns containing letter characters are automatically selected as categorical attributes. Columns containing numbers are suggested to be numeric attributes and can be changed to categorical using the drop down menu under Attribute type.
...
| Numbered figure captions | ||||
|---|---|---|---|---|
| ||||
|
You can download your completed Sample management table by clicking the Download link at the lower corner of the table. This will export a tab-delimited text file with contents of the table.
...
Overview
Content Tools