Page History
The Partek® Flow® Data Tab is where users can add samples, import data, and assign manage sample/cell attributes. This is also where users can modify the location of the project output folder.
| Table of Contents | ||||||
|---|---|---|---|---|---|---|
|
Adding samples
...
Import data
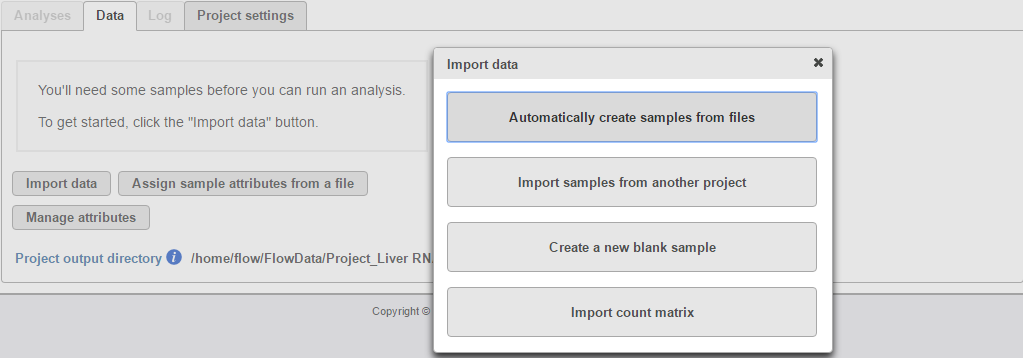
When create a new project, where no samples have yet been added, the Data tab will automatically prompt you to add samples the first step is to import data on Data tab (Figure 1). To add samples to the project, click Import data. Four Import from the Data section, different import options will be displayed (Figure 1).
| Numbered figure captions | ||||
|---|---|---|---|---|
| ||||
|
Automatically create samples from files
...
Before proceeding, it is ideal that you have already copied transfer the data you wish to analyze in a folder (with appropriate permissions) within the Partek Flow server. Please seek assistance from your system administrator in uploading your data directly.
...
Alternatively, files can also be uploaded and imported into the project from the user's local computer -only use this option if your file size is less than 500MB. Select the My computer radio button (Figure 3) and the options of selecting the local file and the upload (destination) directory will appear. Only one file at a time can be imported to a project using this method.
...
Click the green icon ( ![]() ) to associate additional files or the red icon (
) to associate additional files or the red icon ( ![]() ) to dissociate a file from a sample. You can manually associate multiple files with one sample. Dissociating a file from a sample does not delete the file from the Partek Flow server.
) to dissociate a file from a sample. You can manually associate multiple files with one sample. Dissociating a file from a sample does not delete the file from the Partek Flow server.
Import samples from another project
This method adds samples from previously created projects (within the same Partek Flow server) to a new project. This option is useful for re-analyzing a dataset in a new project, analyzing a subset of a data from a previous project, or combining data from different projects
Select the Import samples from another project button. A dialog box will allow selection of the samples (Figure 5). The drop down menu Project lists the existing projects that the current user has access to. They may be previous projects from the same user, previous projects from collaborators, or (if the user has an administrative account) all the projects in the Partek Flow server.
Click the Project dropdown menu to select an existing project. Choose the samples you wish to add to your new project by clicking the check box next to the Sample name. Files that will be imported to the new project are shown in the right column. You also have the option to select some of the Attributes that were associated with the samples from the original project. Once you make your selection, click the Import button. These samples will now appear in the Sample management table in the Data tab.
Note that if you are importing samples from a project that has some data imported as count matrix (see next section), you must import all the samples from that original project. Clicking on one box selects all other samples, as well.
| Numbered figure captions | ||||
|---|---|---|---|---|
| ||||
|

Create a new blank sample
...
| Numbered figure captions | ||||
|---|---|---|---|---|
| ||||
|
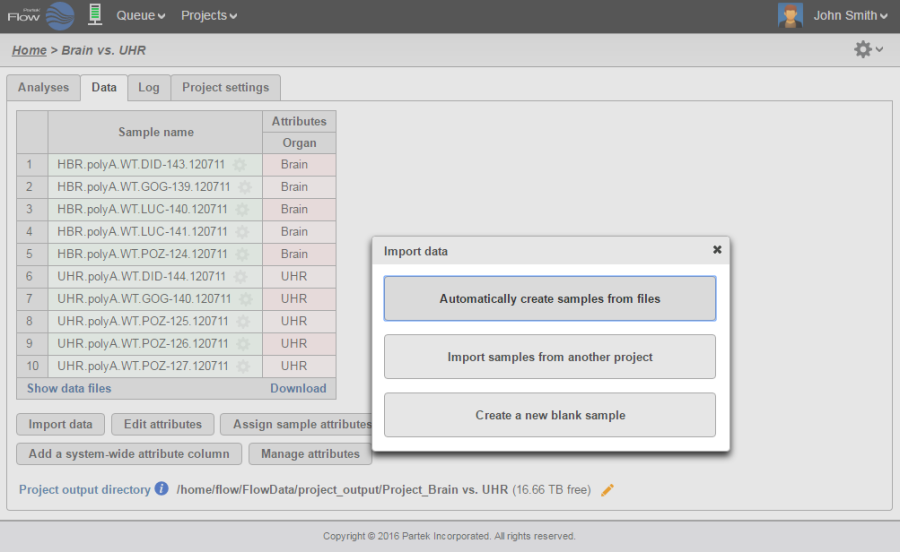
Adding Files to an existing project
Additional samples can be added to any existing project simply by opening the project, going to the Data tab, and clicking the Import data button (Figure 7). Three options to add samples will be revealed.
| Numbered figure captions | ||||
|---|---|---|---|---|
| ||||
|
Importing count matrix data
...
Overview
Content Tools