Page History
...
Now that the data has been imported, we need to make a few changes to the data annotation before analysis.
Modifying Sample Attributes
Notice that the Sample ID names in column 1 are gray (Figure 1). This indicates that Sample ID is a text factor. Text factors cannot be used as a variable in downstream analysis so we need to change Sample ID to a categorical factor.
...
The samples names in column 1 are now black, indicating that they have been changed to a categorical variable. Next, we will add attributes for grouping the data.
Adding Sample Attributes
- From the RNA-seq workflow panel, select Add sample attribute to bring up the Add Sample Attributes dialog (Figure 4)
...
The attribute will now appear as a new column in the RNA-seq spreadsheet with the heading Tissue and the groups muscle and not muscle.
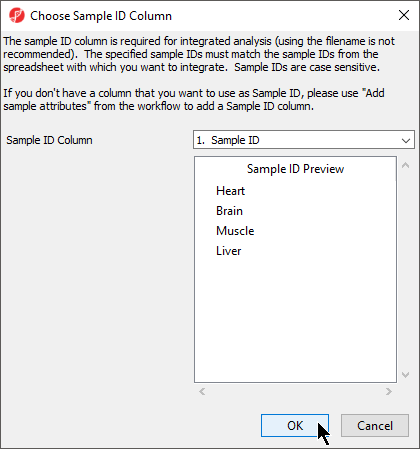
Choosing Sample ID Column
The next available step in the Import panel of the RNA-seq workflow is Choose Sample ID Column. Verifying the correct column is designated the Sample ID becomes particularly important when data from multiple experiments is being combined.
...
| Numbered figure captions | ||||
|---|---|---|---|---|
| ||||
Performing QA/QC
The next step is to assess the quality of the data by checking the alignments per read.
- Select Alignments per Read from the QA/QC section of the RNA-Seq workflow
A new child spreadsheet will be created named Allignment_Counts (Figure 7).
| Numbered figure captions | ||||
|---|---|---|---|---|
| ||||
| Page Turner | ||
|---|---|---|
|
...

