Page History
...
- For this tutorial, unzip the files to C:\Partek Training Data\Down_Syndrome-GE or to a directory of your choosing. Be sure to create a directory or folder to hold the contents of the zip file
- Copy or move the annotation files (HG-U133A.cdf, HG-U133A.na36.annot, HG-U133A.na36.annot.idx) to C:\Microarray Libraries. (Copying the annotation files to the default library location is done because newer annotation files that are released after the publication of this tutorial may cause the results to be different than what is shown in the published tutorial. If, however, you prefer to download the latest version, you may omit copying the HG-U133A files to C:\Microarray Libraries)
- Start PGS Partek Genomics Suite and select Gene Expression from the Workflows panel on the right side of the tool bar in the PGS main window (Figure 1)
| Numbered figure captions | ||||
|---|---|---|---|---|
| ||||
|

...
| Numbered figure captions | ||||
|---|---|---|---|---|
| ||||
|
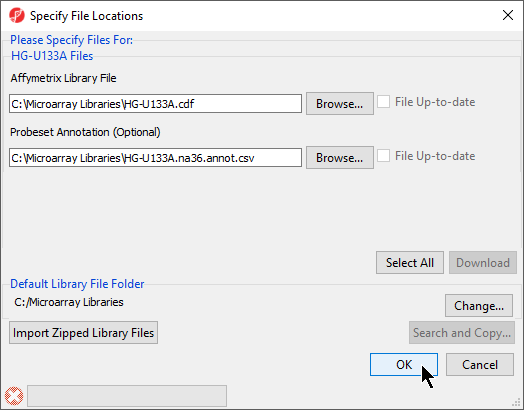
- The default library location can be modified at by selecting Change... in the Default Library File Folder panel. By default, the library directory is at C:\Microarray Libraries. This directory is used to store all the external libraries and annotation files needed for analysis and visualization. The library directory can also be modified from Tools > File Manager in the main PGS Partek Genomics Suite menu
- Select OK (Figure 5) to close the Specify File Locations dialog
- Select the Outputs tab from the Advanced Import Options dialog (Figure 6)
...
After importing the .CEL files has finished, the result file will open in PGS Partek Genomics Suite as a spreadsheet named 1 (Down_Syndrome-GE). The spreadsheet should contain 25 rows representing the micoarray chips (samples) and over 22,000 columns representing the probe sets (genes) (Figure 7).
| Numbered figure captions | ||||
|---|---|---|---|---|
| ||||
|

...
Overview
Content Tools