Page History
...
Download the data from the Partek ® site to your local disk. The zip file contains both data and annotation files.
- For this tutorial, unzip Unzip the files to C:\Partek Training Data\Down_Syndrome-GE or to a directory of your choosing. Be sure to create a directory or folder to hold the contents of the zip file
- Copy or move the annotation files (HG-U133A.cdf, HG-U133A.na36.annot, HG-U133A.na36.annot.idx) to C:\Microarray Libraries. (
Copying the annotation files to the default library location is done because newer annotation files that are released after the publication of this tutorial may cause the results to be different than what is shown in the published tutorial. If, however, you prefer to download the latest version, you may omit copying the HG-U133A files to C:\Microarray Libraries
...
.
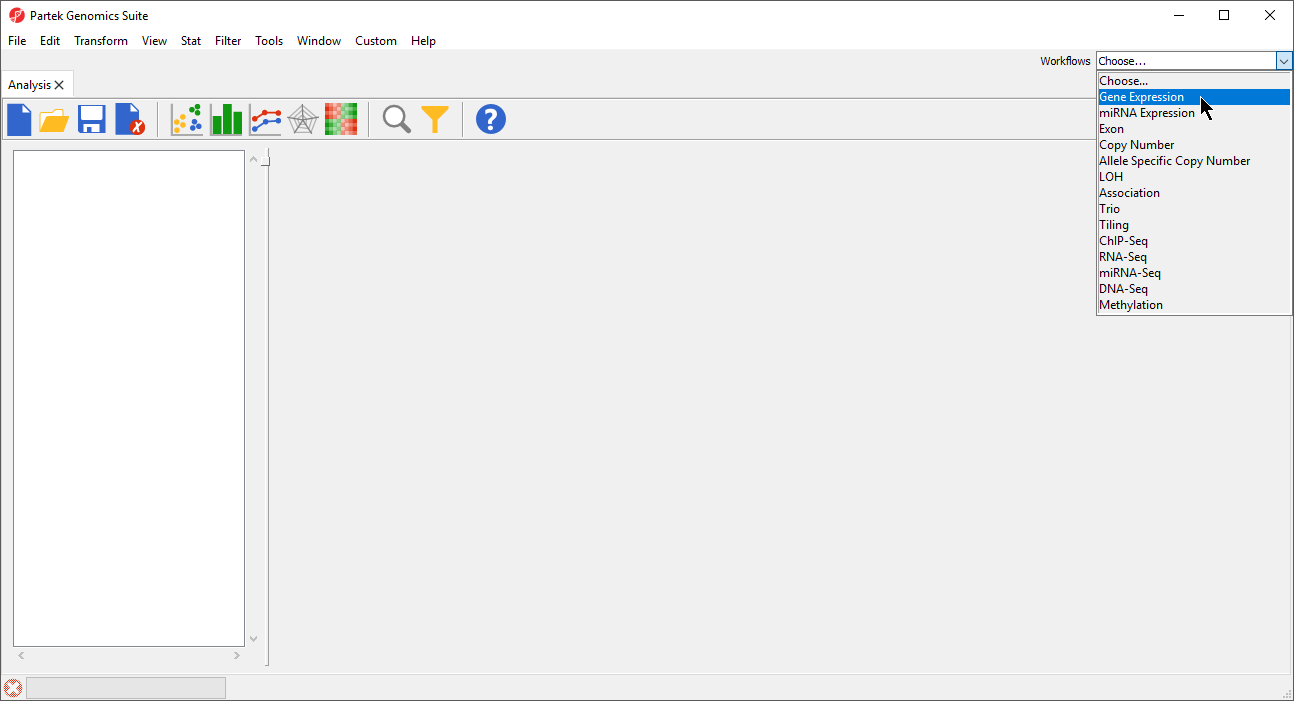
- Start PGS Partek® Genomics Suite® and select Gene Expression from the Workflows panel on the right side of the tool bar in the PGS main window (Figure 1)
| Numbered figure captions | ||||
|---|---|---|---|---|
|
...
|
Select Import Samples under the Import section of the workflow
- Select Import from Affymetrix CEL Files and then click OKselect OK
- Select the Browse button to and select the C:\Partek Training Data\Down_Syndrome-GE folder. By default, all the files with a .CEL extension are selected (Figure 2)
| Numbered figure captions | ||||
|---|---|---|---|---|
| ||||
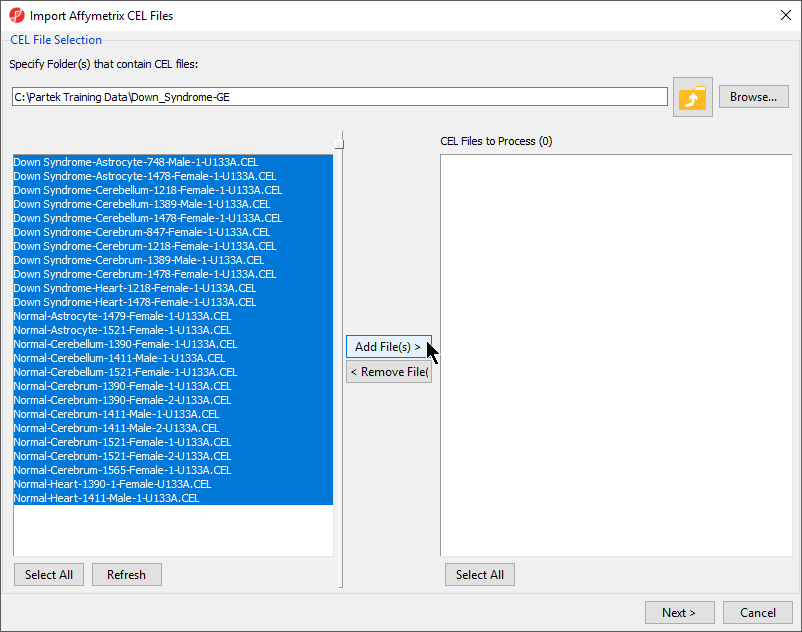 |
- Select the Add File(s) > button to move all the .CEL files to the right panel. Twenty-five CEL files will be processed
- Select the Next > button to open the Import Affymetrix CEL Files dialog (Figure 3)
| Numbered figure captions | ||||
|---|---|---|---|---|
| ||||
|
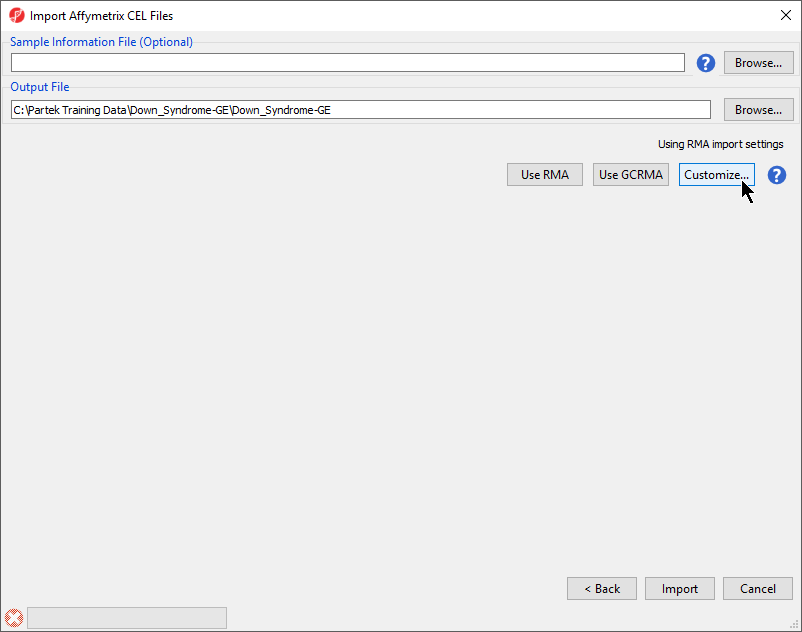
Select Customize… to open the Advanced Import Options dialog (Figure 4)
| Numbered figure captions | ||||
|---|---|---|---|---|
| ||||
|
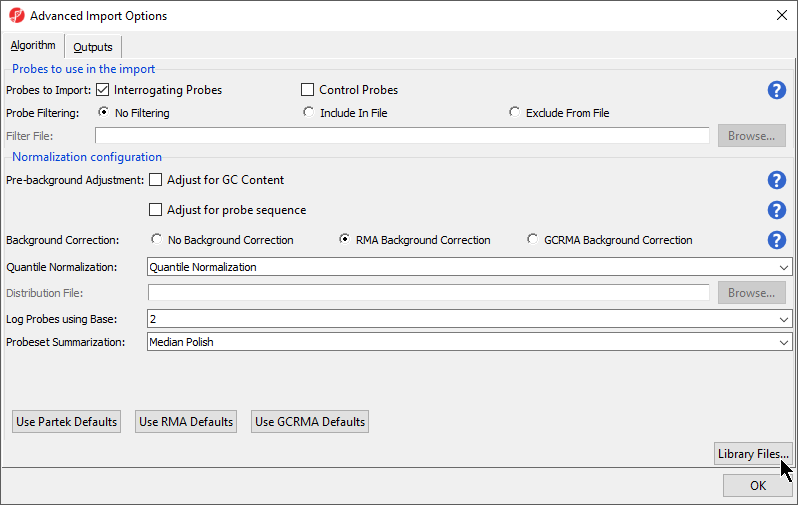
- Select Library Files… to open the Specify File Locations dialog (Figure 5). This dialog is used to specify the location of the library folder and the annotation files
| Numbered figure captions | ||||
|---|---|---|---|---|
| ||||
|
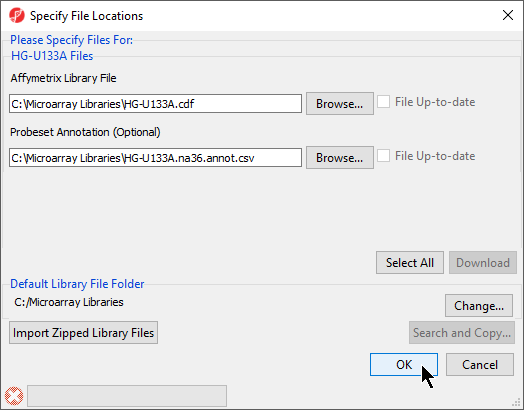
PGS Partek Genomics Suite will automatically assign the annotation files according to the chip type stored in the .CEL files. If the annotation files are not available in the library directory, PGS Partek Genomics Suite will automatically download them and store them in the Default Library File Folder.
- The default library location can be modified at by selecting Change... in the Default Library File Folder panel. By default, the library directory is at C:\Microarray Libraries. This directory is used to store all the external libraries and annotation files needed for analysis and visualization. The library directory can also be modified from Tools > File Manager in the main PGS Partek Genomics Suite menu
- Select OK (Figure 5) to close the Specify File Locations dialog
- Select the Outputs tab from the Advanced Import Options dialog (Figure 6)
| Numbered figure captions | ||||
|---|---|---|---|---|
| ||||
|
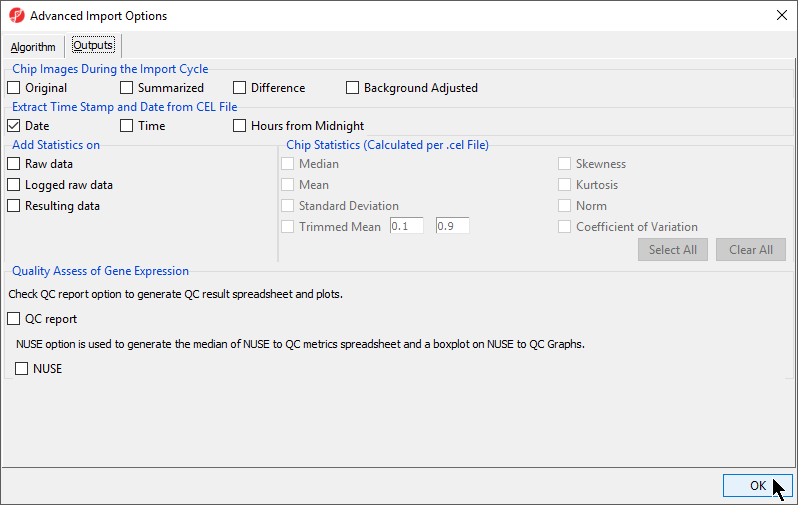
- In the Extract Time Stamp and Date from CEL File panel, make sure the Date button is selected to extract the chip scan date. This information can help you detect if there are batch effects caused by the process time
- In the Quality Assess of Gene Expression panel, leave the QC report button unselected. A user guide for the microarray data quality assessment and quality control features is available in the user manual.the User’s Manual
- Select OK to exit the Advanced Import Options dialog
- Select Import. The progress bar on the lower left of the Import Affymetrix CEL files dialog will update as .CEL files are imported. Once all files have been imported, the Import Affymetrix CEL Files dialog will close
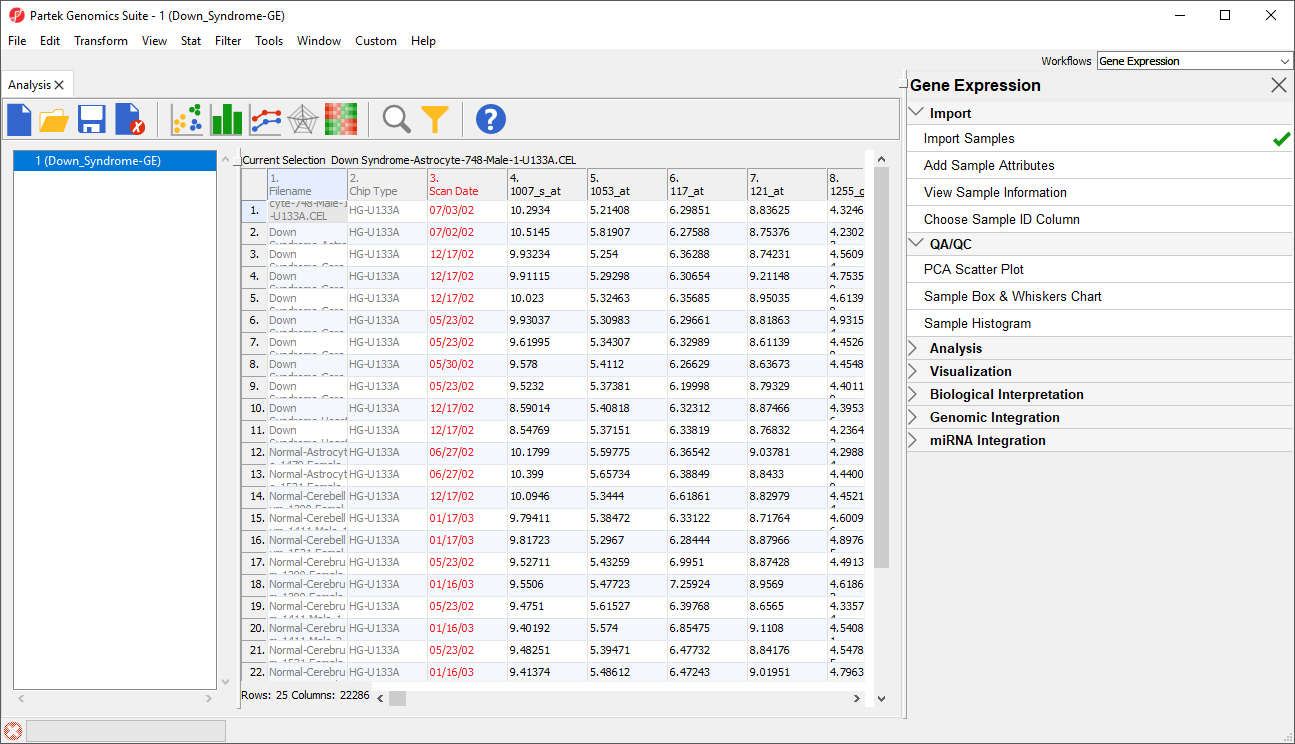
After importing the .CEL files has finished, the result file will open in PGS Partek Genomics Suite as a spreadsheet named 1 (Down_Syndrome-GE). The spreadsheet should contain 25 rows representing the micoarray chips (samples) and over 22,000 columns representing the probe sets (genes) (Figure 7).
| Numbered figure captions | ||||
|---|---|---|---|---|
|
...
|
For additional information on importing data into PGSPartek Genomics Suite, see Chapter 4 Importing and Exporting Data in the Partek User’s Manual. The User’s Manual is available from the Partek Genomic Suite menu from Help> software main menu Help > User’s Manual. The FAQ (Help > On-line Tutorials > FAQ) may also be helpful. As this tutorial only addresses some topics, you may need to consult the User’s Manual for additional information about other useful features.
It is recommended that you are familiar with Chapter 6 The Pattern Visualization System of the user manual User’s Manual before going through the next section of the tutorial.
| Page Turner | ||
|---|---|---|
|
| Additional assistance |
|---|
| Rate Macro | ||
|---|---|---|
|
...
Overview
Content Tools