Page History
The Partek® Flow® Uploader Partek Flow Uploader is a Torrent Browser plugin that lets users easily upload run results into their to Partek Flow server for further analysis.
For quick video on how to run the plugin, you can go directly here.
This guide is for Partek® Flow® Uploader v.1.02 and covers the following:
| Table of Contents | ||||||
|---|---|---|---|---|---|---|
|
Quick Video Tutorial on running the Plugin
| Multimedia | ||||||
|---|---|---|---|---|---|---|
|
The clip below above (video only, no audio) shows the Partek Flow Uploader plugin in action.
|
|---|
Downloading the Plugin
Download the Partek® Flow® Uploader from the link links below:
https://customer.partek.com/plugins/PFU/PartekFlowUploader-1.0203.zip
This is a compressed zipped file. Do not unzip.
...
| Numbered figure captions | ||||
|---|---|---|---|---|
| ||||
|
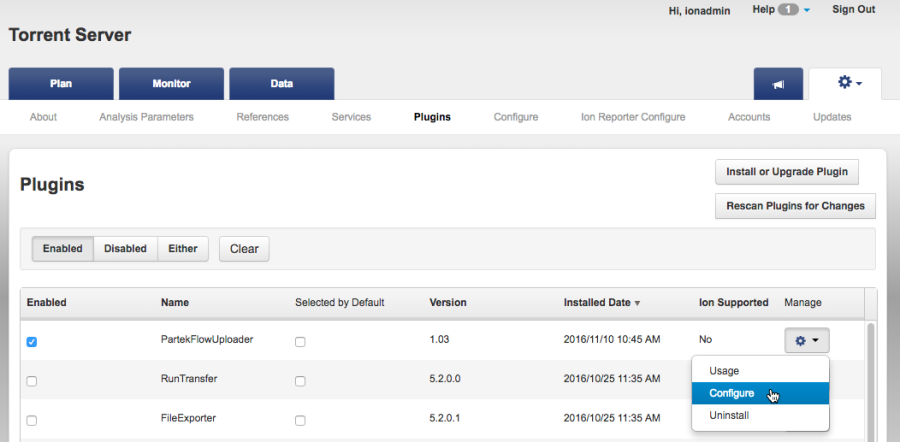
From the plugins table, click the (Manage) gear icon for the Partek Flow Uploader and select Configure in the drop-down menu (Figure 6).
| Numbered figure captions | ||||
|---|---|---|---|---|
| ||||
|
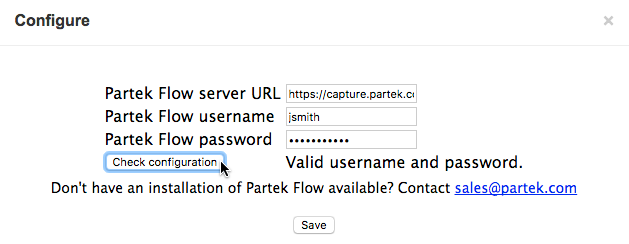
Global Partek Flow configuration settings can be entered into the plugin. When set, it will serve as the default for all users of the Torrent Browser. If multiple Partek Flow users are expected to run the plugin, it is recommended to leave the username and password fields blank so that individual users can enter them as needed.
...
| Numbered figure captions | ||||
|---|---|---|---|---|
| ||||
|
Click the Rescan Plugins for Changes button. Rescanning the plugins will finish the installation and save the configuration.
...
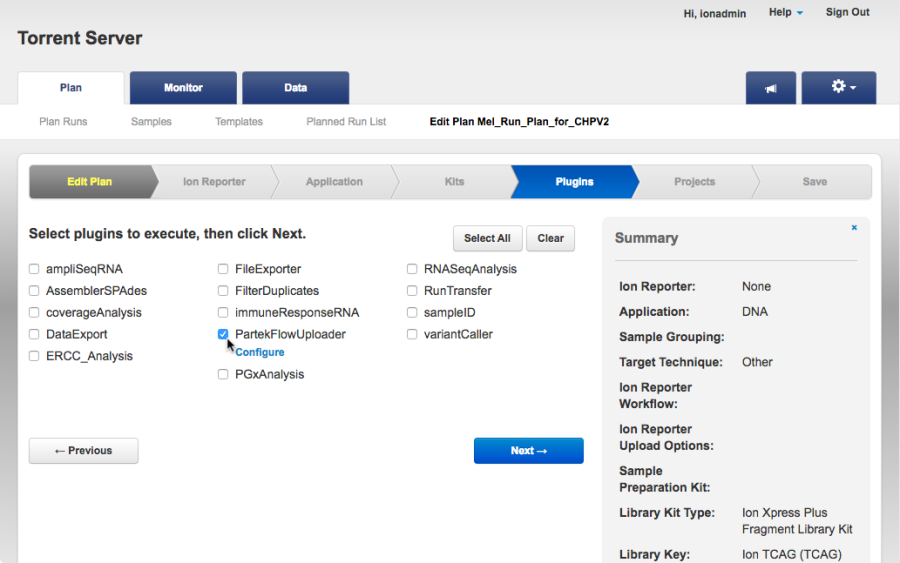
In the Edit Plan page, go to the Plugins tab (Figure 9) and select the checkbox next to the PartekFlowUploader.
| Numbered figure captions | ||||
|---|---|---|---|---|
| ||||
|
Click the Configure hyperlink next to the PartekFlowUploader (Figure 10). If necessary, enter the Partek Flow URL, your username and your password. These are the same credentials you use to access Partek Flow directly on a web browser. Note that some fields may already be pre-populated depending on the global plugin configuration, you can edit the entries as needed. All fields are required to successfully run the plugin.
...
| Numbered figure captions | ||||
|---|---|---|---|---|
| ||||
|
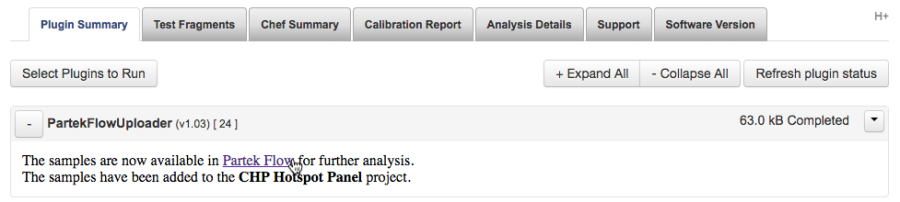
To access the project, click on the Partek Flow hyperlink in the plugin results (Figure 11). You can also go directly to Partek Flow in a new browser window and access your account. In your Partek Flow homepage (Figure 12), you will now see the project created by the Partek Flow Uploader.
...
| Numbered figure captions | ||||
|---|---|---|---|---|
| ||||
|
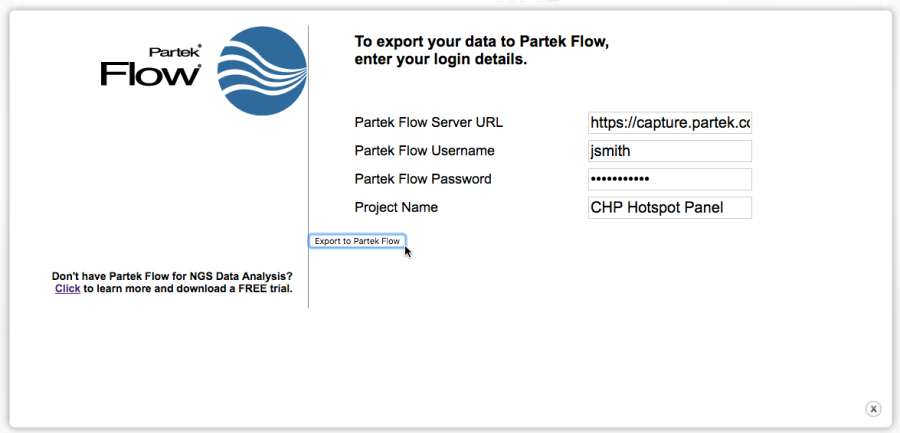
The Project Name field will be used in Partek Flow to create a new project where the run results will be exported. However, if a project with that name already exists, the samples will be added to that existing project. This enables you to combine multiple runs into one project. Project Names are limited to 30 characters. The default project name is the Run Name.
...
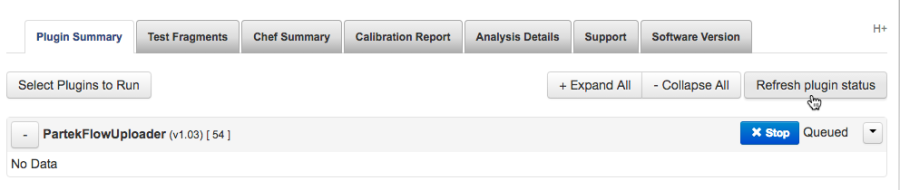
Once the plugin starts running, it will indicate that it is Queued on the upper right corner of the Plugins Summary (Figure 16). There will also be a blue Stop button to cancel the operation.
| Numbered figure captions | ||||
|---|---|---|---|---|
| ||||
|
Click the Refresh plugin status button to update. The plugin status will show Completed once the export is done and the data is available in Partek Flow (Figure 11).
...
Sample table created by the
...
Plugin
The Partek Flow Uploader plugin sends the unaligned bam files to the Partek Flow server. For each file, a Sample of the same name will be created in the Data tab (Figure 17).
| Numbered figure captions | ||||
|---|---|---|---|---|
| ||||
|
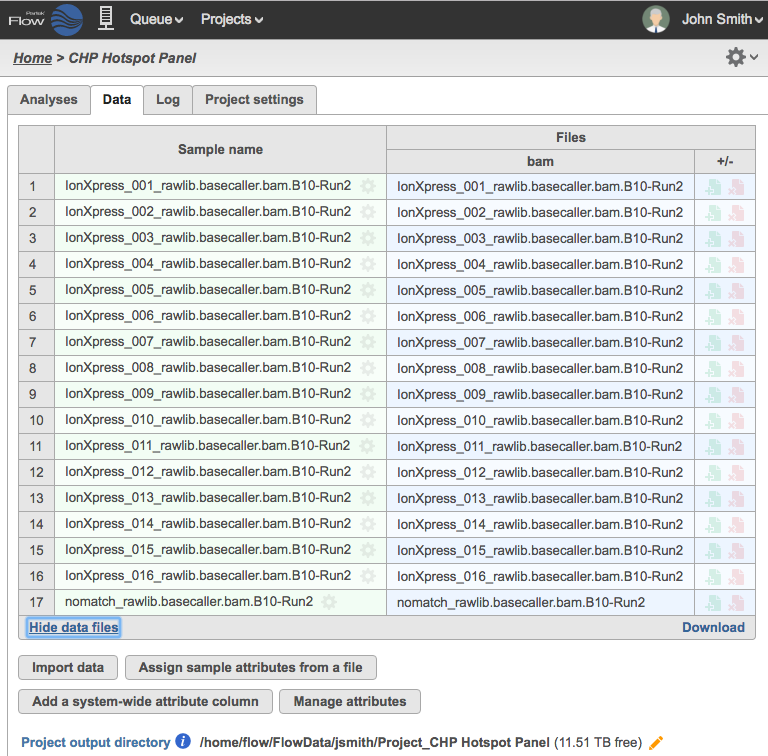
Reads that had no detectable barcodes have been combined in a sample with a prefix: nomatch_rawlib.basecaller.bam (Row 17 in Figure 17). You can removed this sample from your analysis by clicking the gear icon ![]() next to the sample name and choosing Delete sample.
next to the sample name and choosing Delete sample.
...
| Numbered figure captions | ||||
|---|---|---|---|---|
| ||||
|
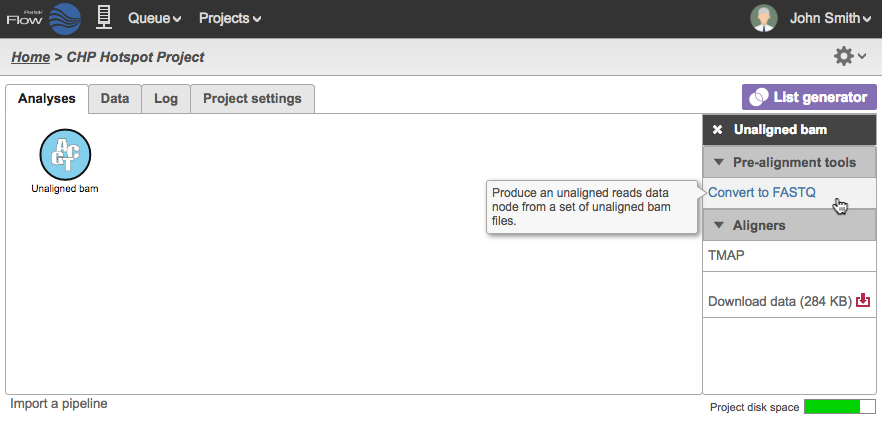
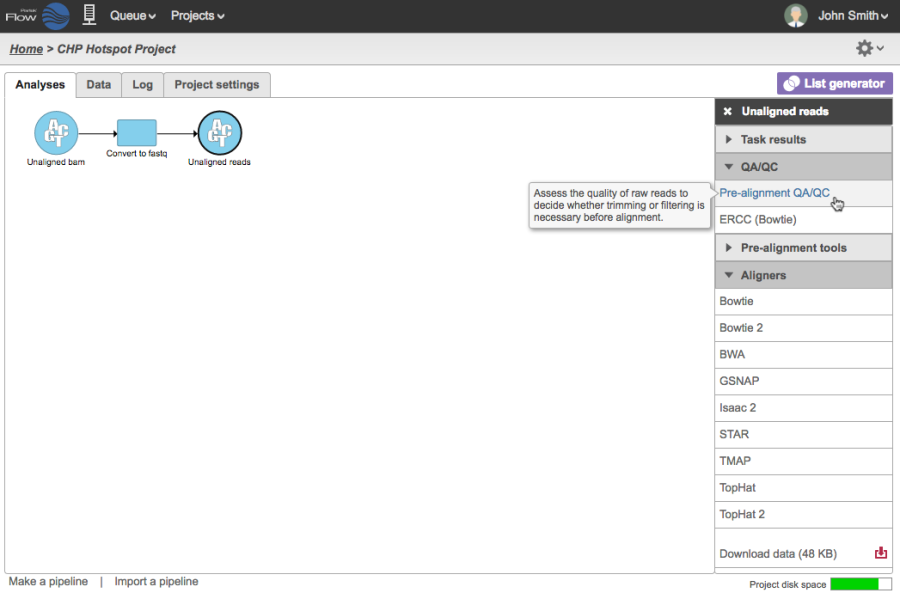
Once converted, the reads can then be aligned using a variety of aligners compatible with FASTQ input (Figure 19) . You can also perform other tasks such as Pre-alignment QAQC or run an existing pipeline. Another option is to include the Convert to FASTQ task in your pipeline and you can invoke the pipeline directly from an Unaligned bam data node.
| Numbered figure captions | ||||
|---|---|---|---|---|
| ||||
|
| Additional assistance |
|---|
| Rate Macro | ||
|---|---|---|
|
...
Overview
Content Tools