Page History
Partek® Flow® Partek Flow users can be organised organized into groups. For example, user accounts can be organized by research group, privilege level (e.g. administrative vs non-administrative) or by pre-defined groups determined by an a Lightweight Directory Access Protocol (LDAP) database. This enables easier data sharing and collaboration among multiple Partek Flow users and makes it easier to define directory permissions for groups of users. For Enterprise editions, administrative users can generate usage report per group and reserve a number of concurrent licenses for groups.
...
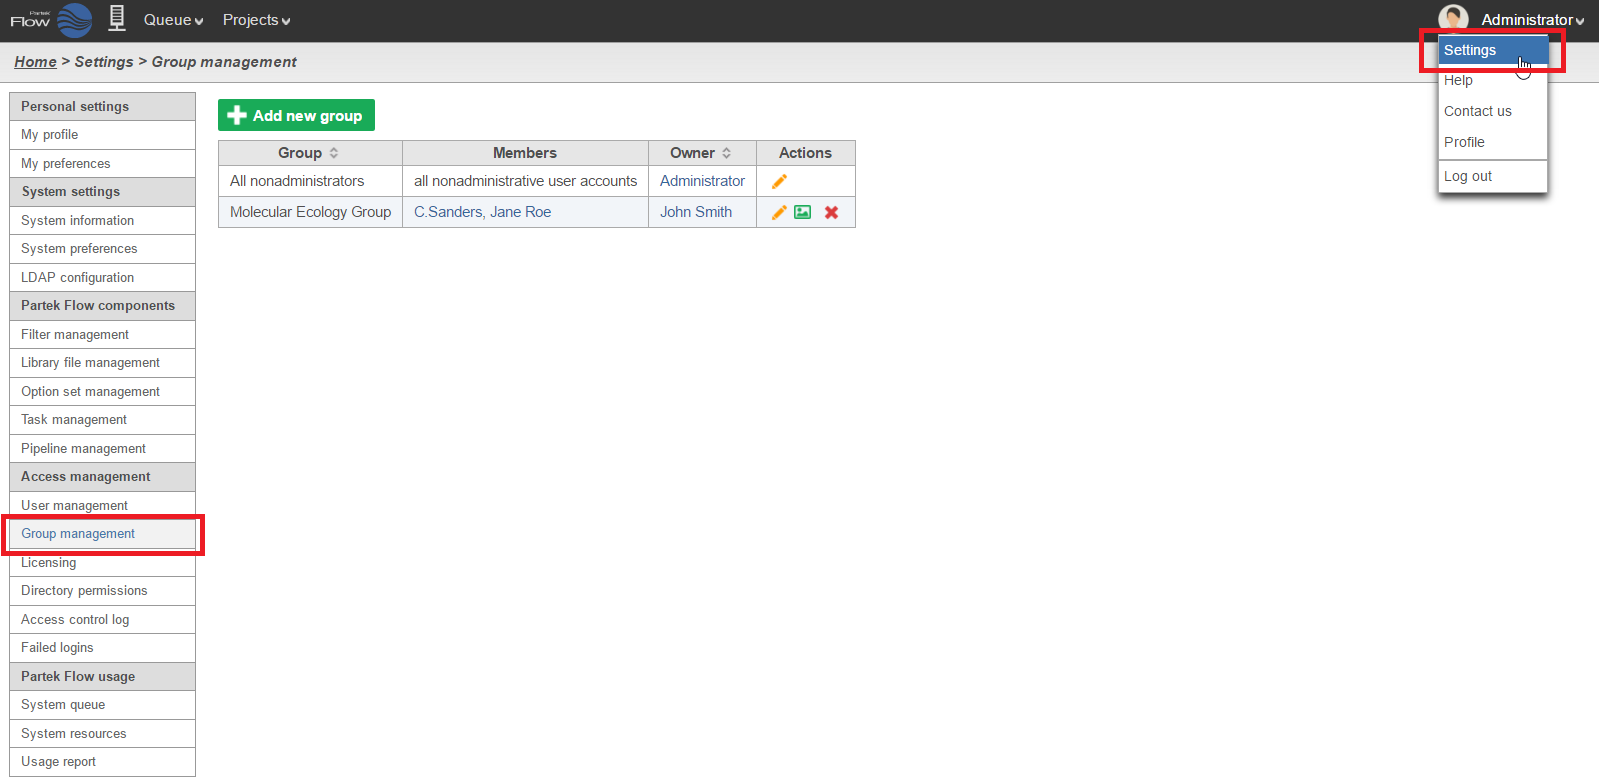
To access the User Management page, click the avatar in the top right corner, choose Settings and click User management on the left (Figure 1). This page can be accessed by administrative and non-administrative Partek Flow users.
| Numbered figure captions | ||||
|---|---|---|---|---|
| ||||
|
Creating a Group
Both administrative and non-administrative users can create groups. Partek Flow user accounts must exist before they can be organised into groups. See User Management for information on how to create user accounts. To create a new group, click on the green Add new group button on the Group Management Page (Figure 1), complete the Add new group dialog (Figure 2) and click Save.
...
...
| Numbered figure captions | ||||
|---|---|---|---|---|
| ||||
|
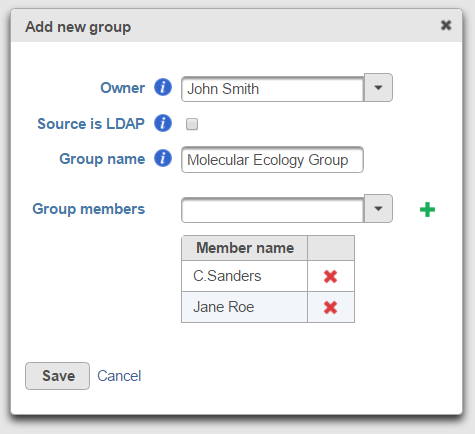
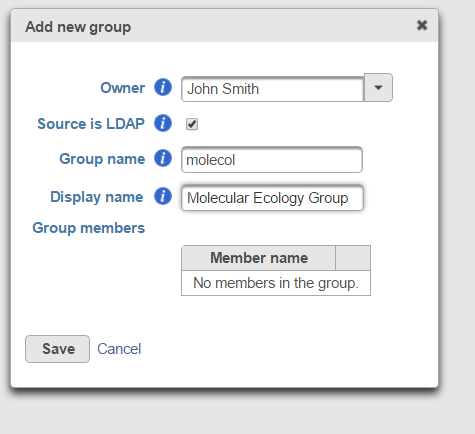
Owner – choose the owner of the group from the drop-down list of Partek Flow users. Alternatively, start typing a few characters of the users’ display name and Partek Flow will suggest users that are available for you to choose.
...
Group members – if the source is an LDAP database, members that are also Partek Flow users will be listed as group members in the dialog. Not all LDAP group members will be listed, just those that have Partek Flow user accounts. If the group is being managed entirely within Partek Flow, choose the group members from the drop-down list of Partek Flow users and select the green plus icon (). Alternatively, start typing a few characters of the users’ display name and Partek Flow will suggest users that are available for you to choose. To remove a group member, select the red cross icon (
).
The new group can be further managed by the group owner or an administrative user. Group membership and other details can be edited by selecting the Edit group icon yellow pencil icon () in the table on the Group Management page (Figure 1). A group picture can be uploaded by selecting the Edit image icon image icon (
![]() ). A group can be deleted by selecting the Delete group red cross icon (
). A group can be deleted by selecting the Delete group red cross icon ().
| Additional assistance |
|---|
| Rate Macro | ||
|---|---|---|
|
...
Overview
Content Tools