Page History
...
Click on a circular data node under the Analyses tab and expand the Pipelines section from the menu on the right (Figure 1). The context-sensitive menu will only display pipelines that can be applied to the data type of the selected data node
Numbered figure captions SubtitleText Loading a pipeline. In this example, the context-sensitive menu is showing all pipelines that can be applied to Aligned reads AnchorName Pipeline loading 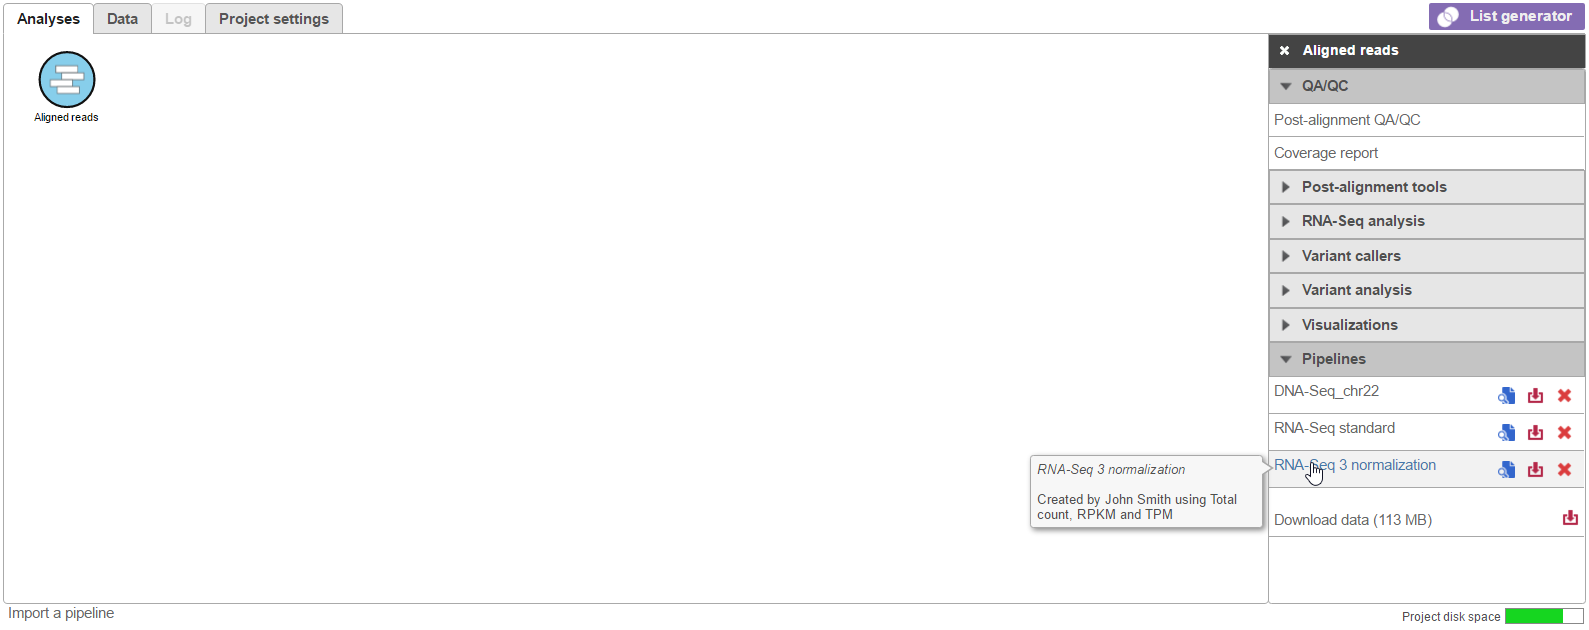
- Click on the pipeline name from the menu. Note that hovering the mouse over the pipeline name will show the description (if one was added) in a pop-out balloon (Figure 1)
If further settings need to be specified for any of the tasks, you will be redirected to a task-specific page. For example, if the chosen pipeline includes a STAR alignment task, you need to specify the species and STAR aligner index (Figure 2). Other tasks that require additional settings include Quantification to annotation model, Differential gene expression, Variant detection and others. For each task, specify the requested settings and click Next. Other task settings that were specified when the pipeline was saved (e.g. alignment parameters) will be applied automatically.
Numbered figure captions SubtitleText Additional settings may be requested for certain tasks when loading a pipeline. In this example, the STAR alignment task is requesting an index to align to AnchorName Additional settings selection 
The additional settings requested for certain tasks allows for flexibility in how the pipelines are used. For example, a pipeline that was initially created from a project on human data can be reused on data from another species by specifying a different Assembly (Figure 2). Other examples include performing quantification using different annotation models and customizing statistical models for different study designs.
Once additional settings have been specified for each task, all tasks will be queued and the jobs will run sequentially (Figure 3). The status of queued tasks can be monitored under the Log tab (Figure 4). If you have set up email notifications (see Personal Settings), you will receive an email when the pipeline finishes.
Numbered figure captions SubtitleText All tasks in the chosen pipeline have been queued AnchorName Queued tasks 
Numbered figure captions SubtitleText The Log tab shows the status of all tasks in the pipeline AnchorName Log tab 
| Additional assistance |
|---|
|
| Page Turner | ||
|---|---|---|
|
| Rate Macro | ||
|---|---|---|
|
Overview
Content Tools