Page History
...
Upon creation of a new project, the Analyses tab will appear, prompting you to add samples to your project. Click the blue Add data button ![]() (Figure 2).
(Figure 2).
Select the type of data (Single cell, Bulk, Other), choose the assay type, and select the data format. Partek Flow accepts various data types. Use the Next button to proceed with import.
...
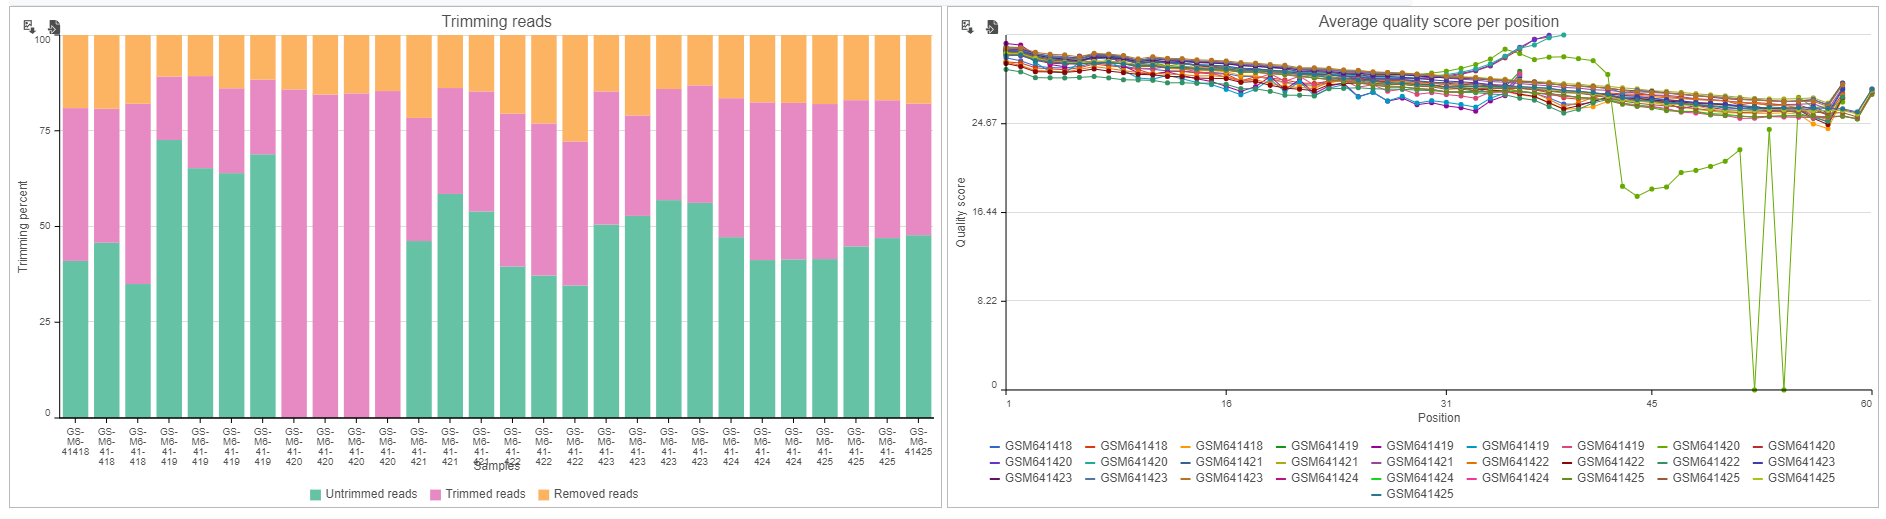
To view the results of a task, click the task node and choose the Task report option on the menu.
Saving visualizations
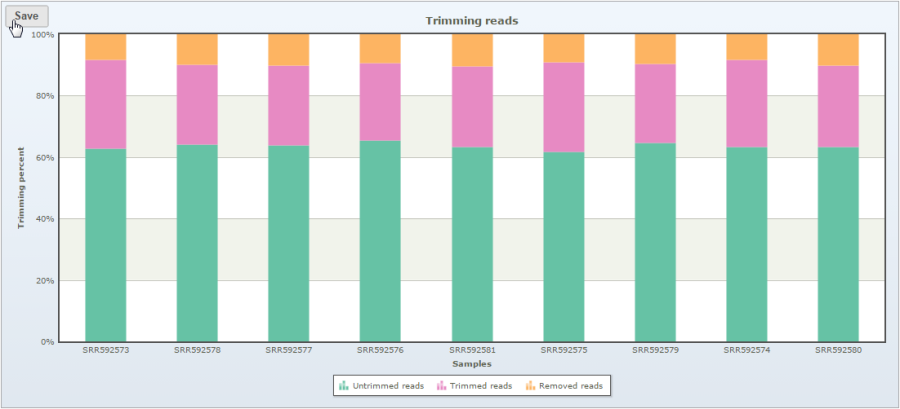
Click the Click Save button ![]() on any visualization to export a publication-quality image (Figure 7).
on any visualization to export a publication-quality image (Figure 7).
...
| Numbered figure captions | ||||
|---|---|---|---|---|
| ||||
|
Downloading your data
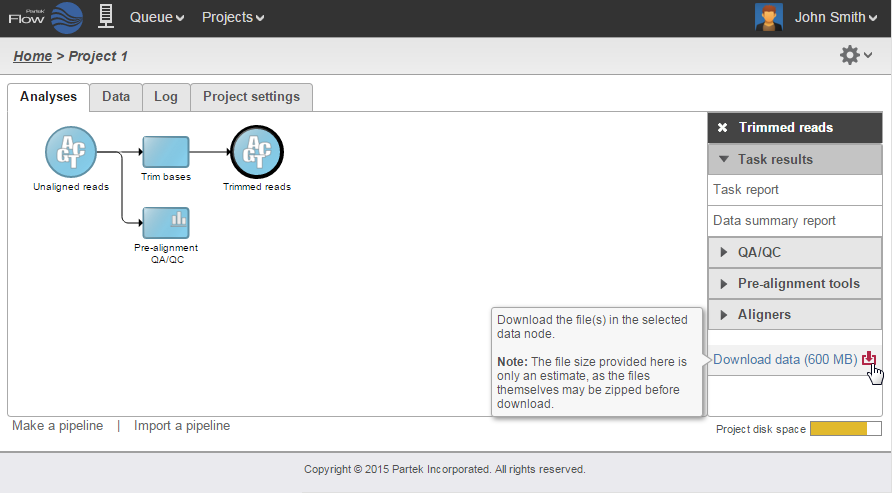
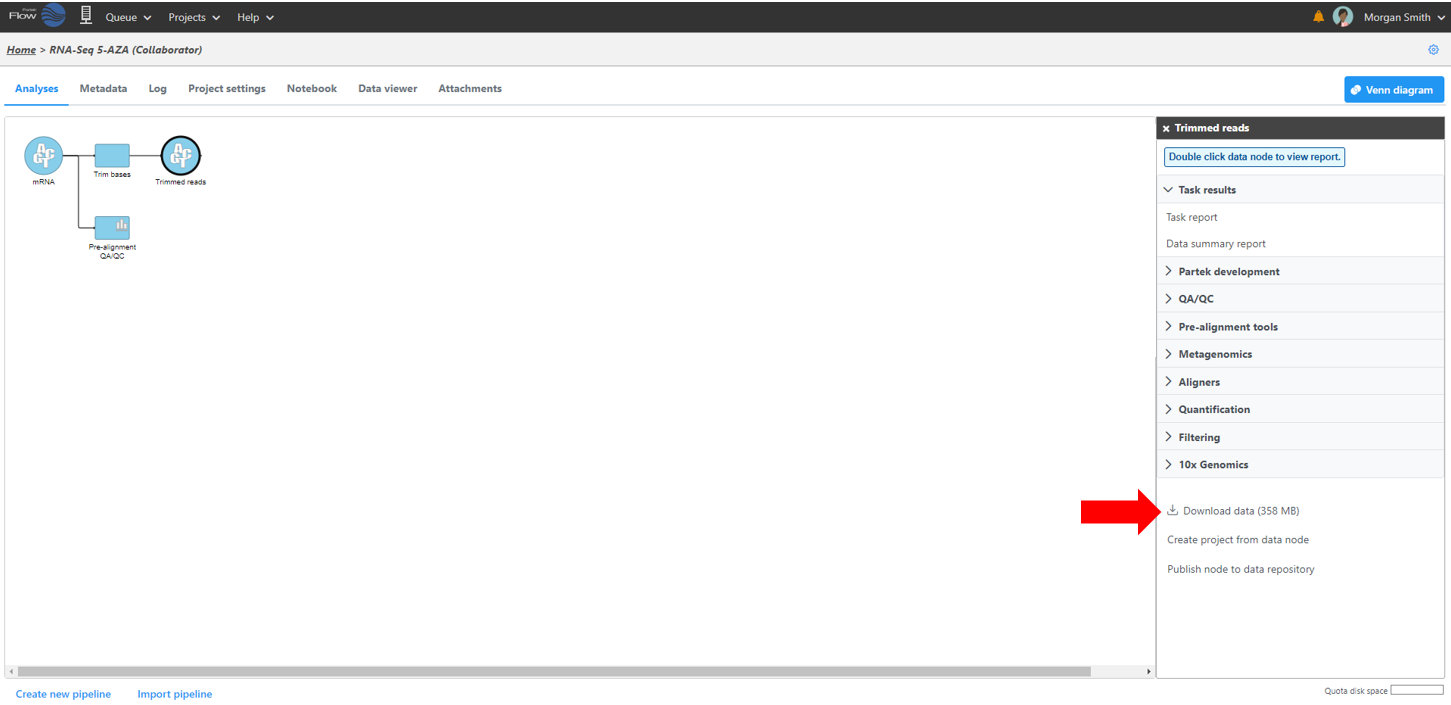
Data associated with any data node can be downloaded by clicking the node and choosing Download data at the bottom of the task menu (Figure 8). Compressed files will be downloaded to the local computer where the user is accessing the Partek Flow server. Note that bigger files (such as unaligned reads) would take longer to download. For guidance, a file size estimate is provided for each data node. Downloaded files can be seamlessly imported in Partek® Genomics Suite®.
...
| Numbered figure captions | ||||
|---|---|---|---|---|
| ||||
|
Partek Flow in action
...
Overview
Content Tools